If your workflow involves Terrain Shader, specifying a DEM schema is an important step, especially when dealing with mulitple DEM files.
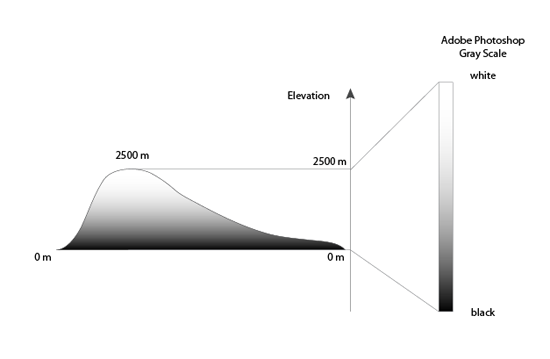
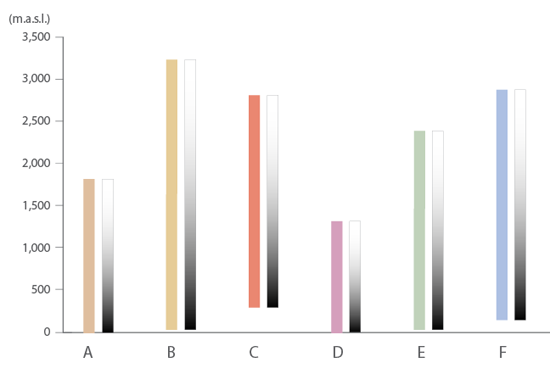
When importing a single DEM file, Geographic Imager converts elevation values to gray scale values. For example, if the elevation range in your DEM file is between 0 and 2500 meters and the “Auto-stretched” option is selected, this range will be converted to the Adobe Photoshop gray scale range between black and white. As shown below, the black color is assigned to the lowest elevation value (0 meter) while the white color is assigned to the highest elevation value (2500 meters). For elevation values between 0 and 2500, Geographic Imager calculates and converts them into gray scale.
In this example, we’ll use six DEM files of one geographic region. Many datasets are distributed as tiled DEM files. Each of them is next to each other and the goal is to create a colorized DEM image from those six files.

When dealing with multiple DEM files, you will need to consider the elevation range of the each DEM file. In other words, the elevation range in each DEM file will be slightly different.
Option 1: Using the “Auto-Stretched” option for multiple DEM files
When importing multiple DEM images and using the “Auto-stretched” option, click “Apply to All”…
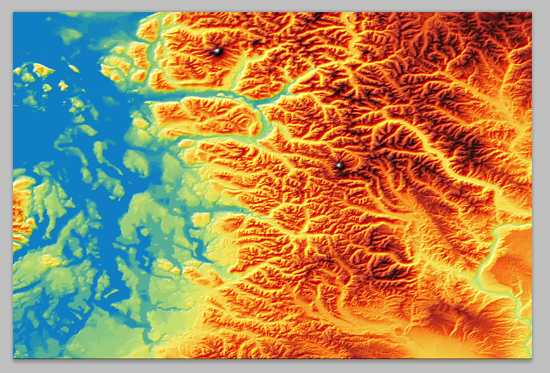
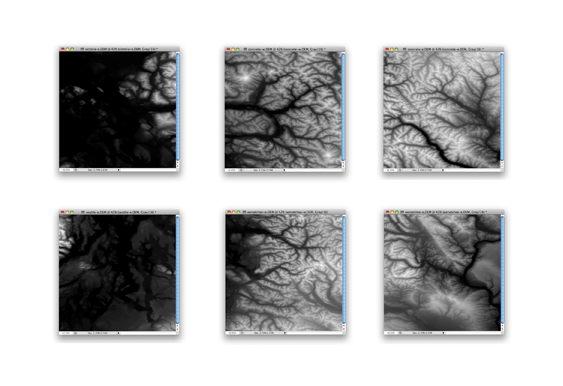
Every one of the DEM images will be converted to the gray scale between black and white.
As a result, you can get the maximum contrast in each image. However, you will not be able to mosaic or apply Terrain Shader to those six images because each DEM has slight differences in elevation and an all encompassing schema like the”Auto-stretched” option will not work.
Option 2: Creating a DEM schema by specifying a range
In order to apply Terrain Shader to multiple DEM files, you will need to assign one DEM schema to each DEM image you would like to share the same schema.
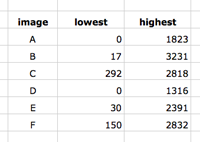
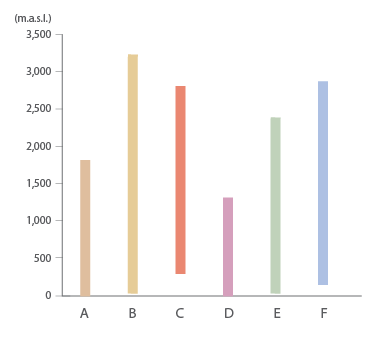
Step 1: Identify the elevation range amongst multiple DEM files
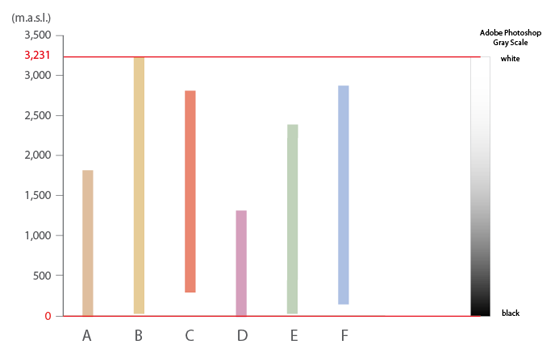
Explore the DEM files and find out what the elevation range is for each one. Then note which are the lowest and highest values among all DEMs. For this example, the lowest elevation is 0 m and the highest is 3,231 meters.
Step 2: Create a new DEM schema for your dataset
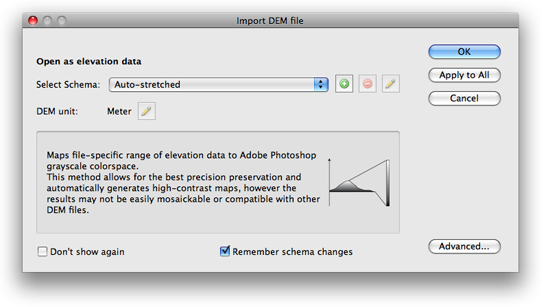
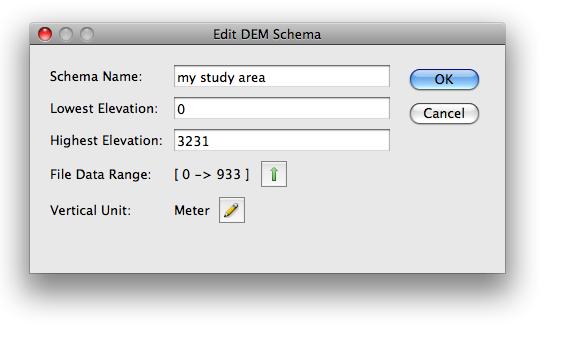
Choose File > Open and select multiple DEM files. Once the Import DEM file dialog box is open, click the Add button to open the “Edit DEM Schema” dialog box.
Create a new Schema name (e.g. “my study area”). Simply enter the lowest and highest elevation value found in Step 1.
Step 3: Apply the DEM schema to your datasets
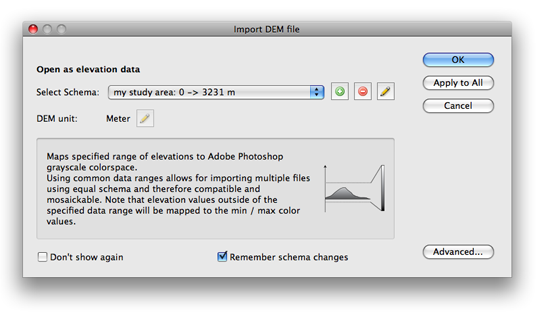
When you’ve created a new DEM schema, it will be available in the “Select Schema” drop-down list. Choose the new schema and click “Apply to All”. This selected schema will be applied to all the DEM files being imported.
After the import process is completed, the images are ready for Terrain Shader.

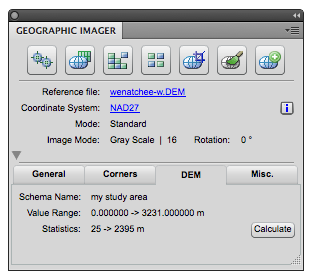
When one of the imported DEM file is the active document, click the “DEM” tab in the Geographic Imager panel. It shows the DEM schema name, the DEM value range, and the actual elevation value available in the currently active document. Click the “Calculate” button if you do not see the statistics (actual elevation value range of the active document).
Step 4: Apply Terrain Shader to your DEM files
Since each DEM has a schema, a mosaic can be perfomed and then Terrain Shader can be applied to the mosaicked iamge.