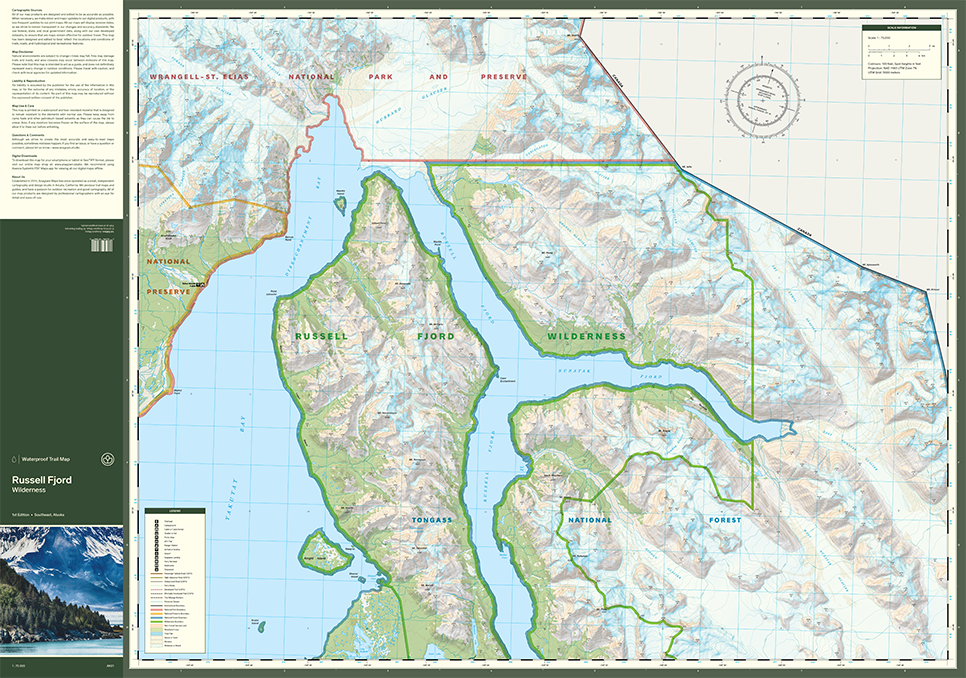
For our monthly Map Spotlight of July, we are displaying another superb honourable mention of the 2021 Avenza Map Contest: Russell Fjord Wilderness by Aaron Taveras of Cartografix. This outdoor recreation map was created to help visitors navigate the Russell Fjord Wilderness area and find the few trails that exist around the Yakutat region of Alaska. The map consists of two pages which illustrate the beautiful glaciers and rocky moraines, both of which make the area a popular destination for backcountry travel. Aaron combined essential topographic detail with recreational points of interest which resulted in a visually stunning yet useful cartographic product.
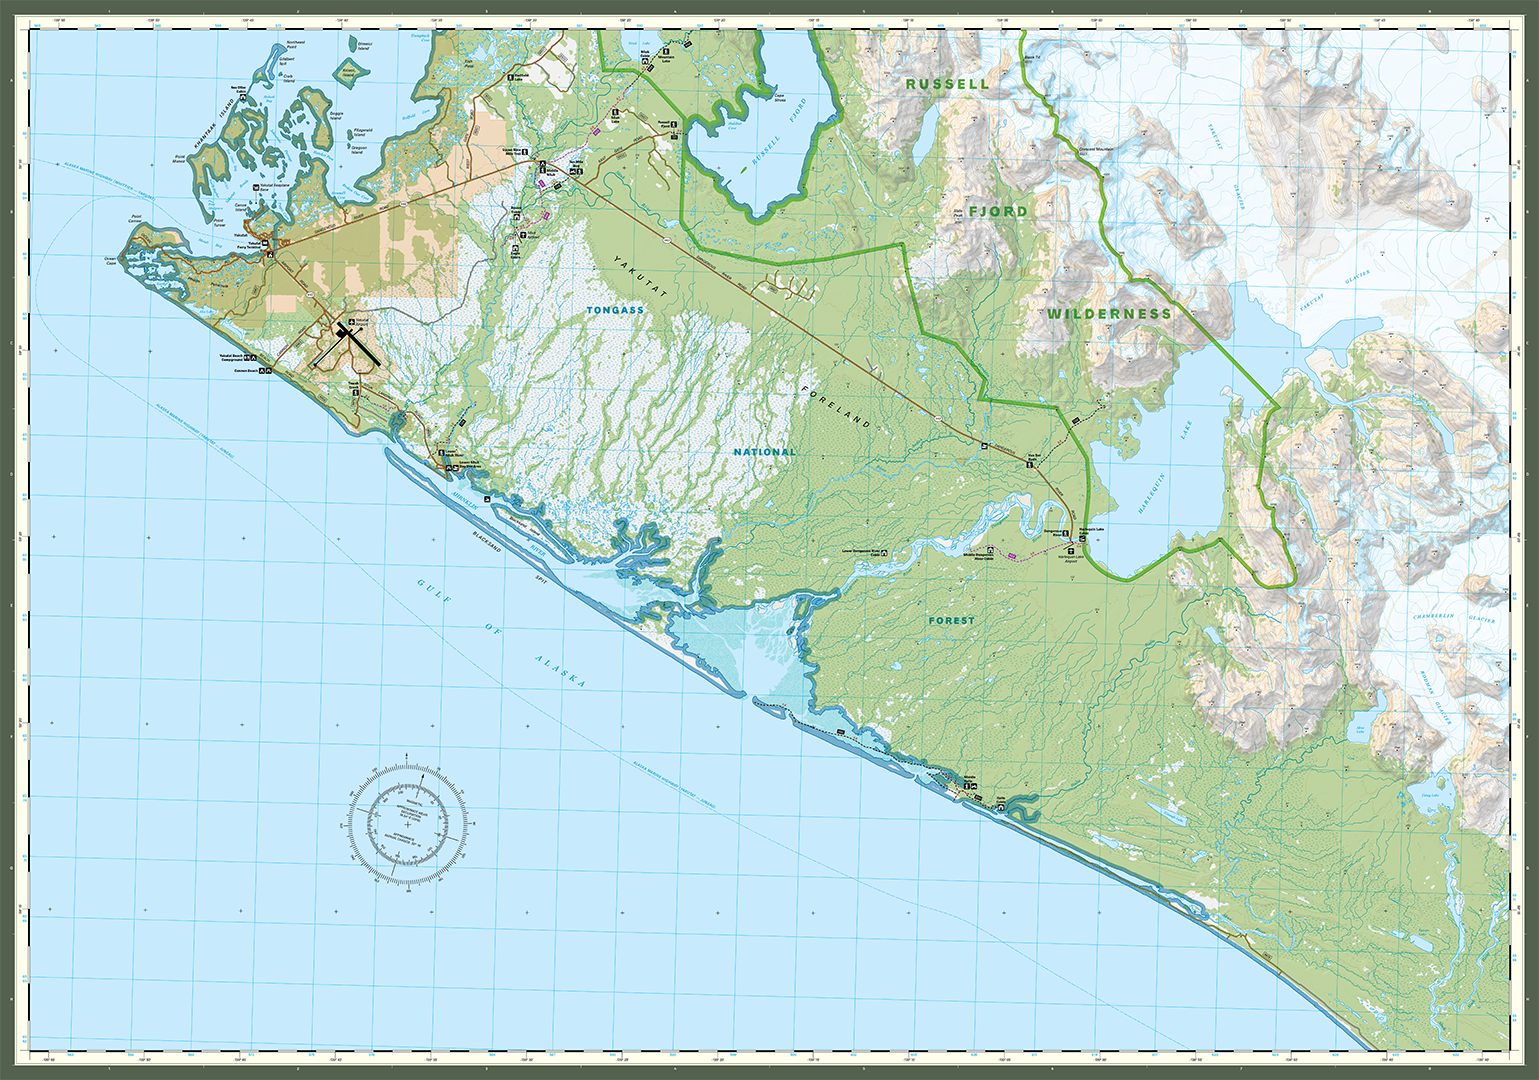
A fun fact: this map was selected to be used in the main software graphics for MAPublisher 11. It is available for purchase as a bundle digitally on the Avenza Maps Store.
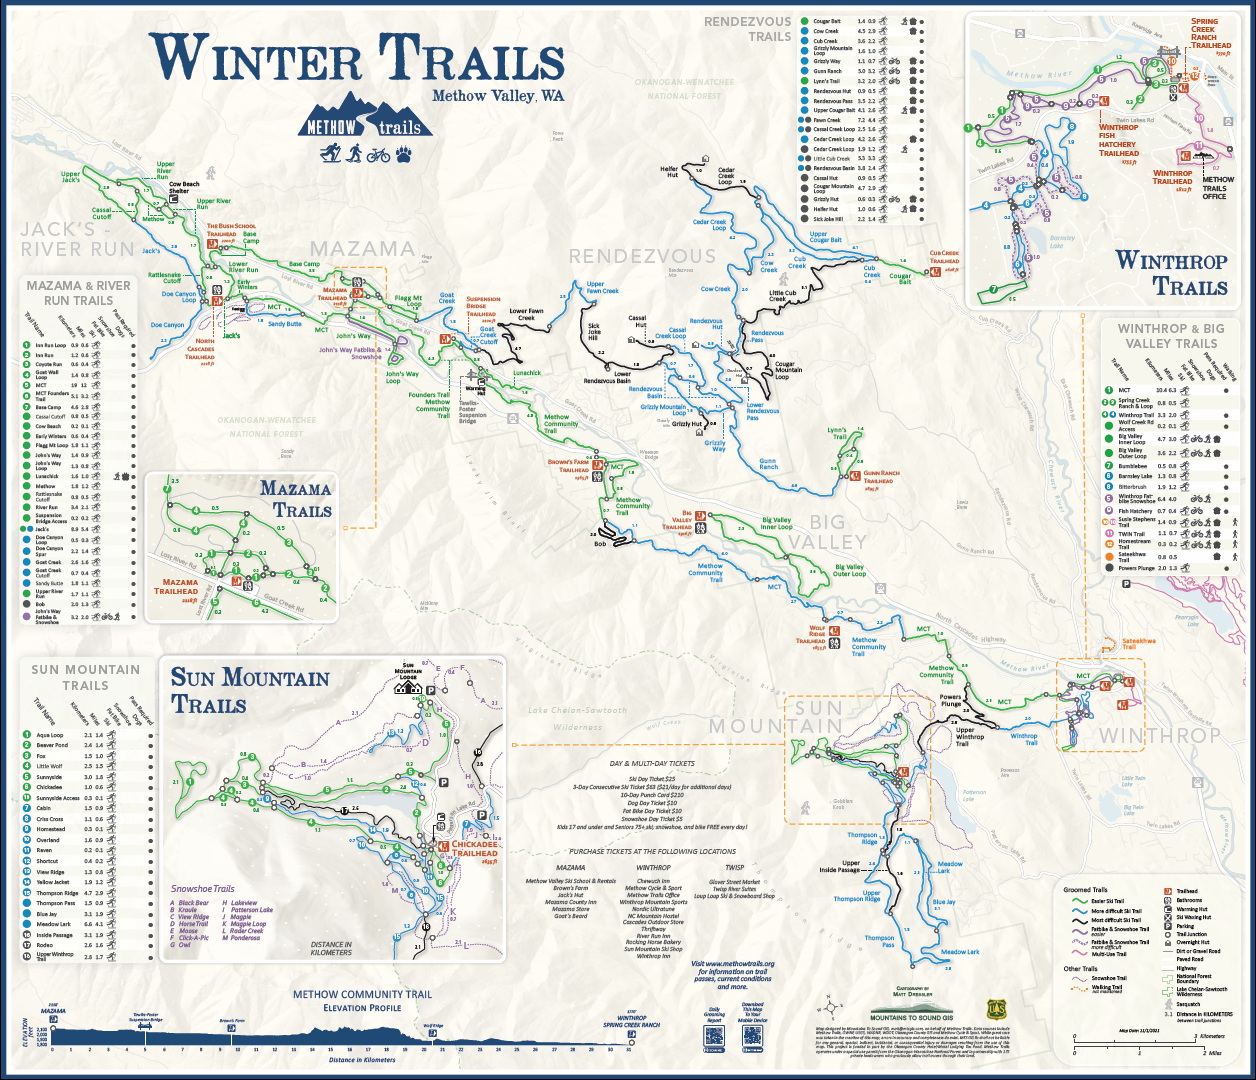
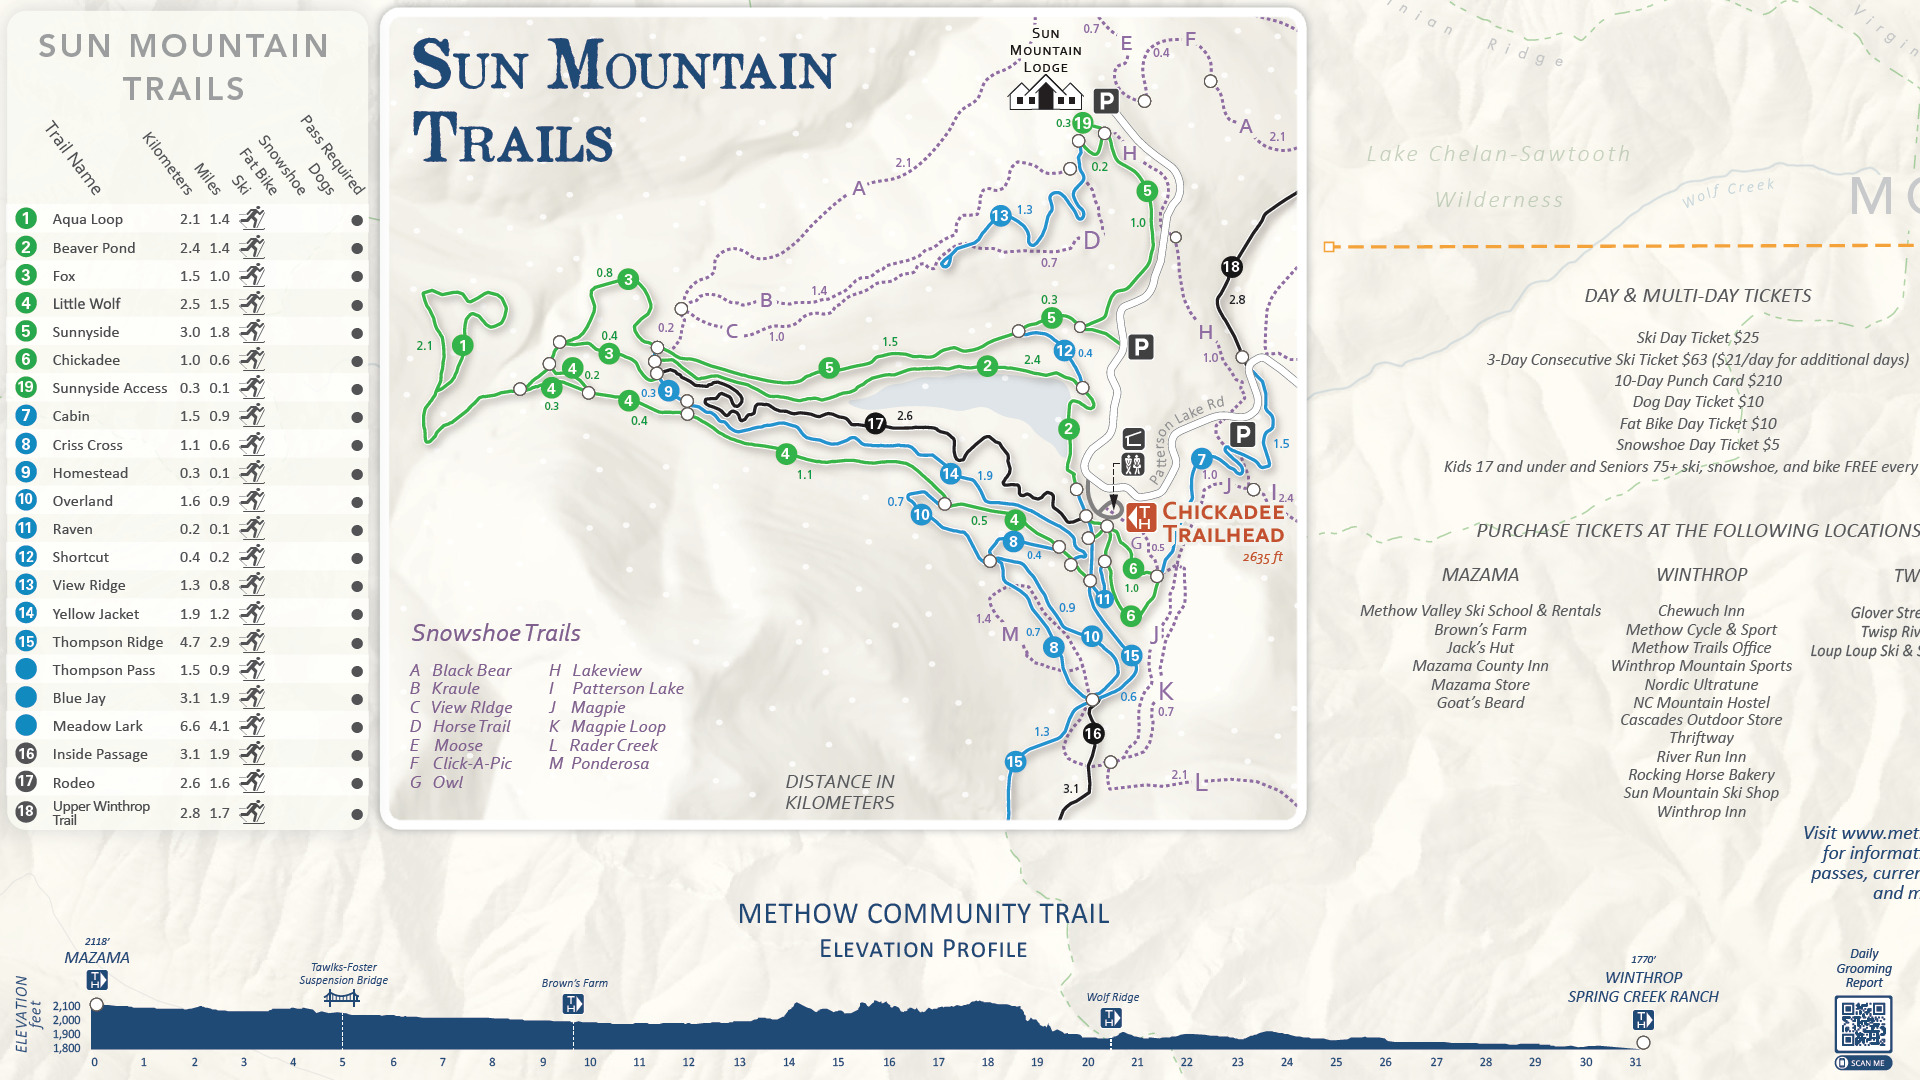
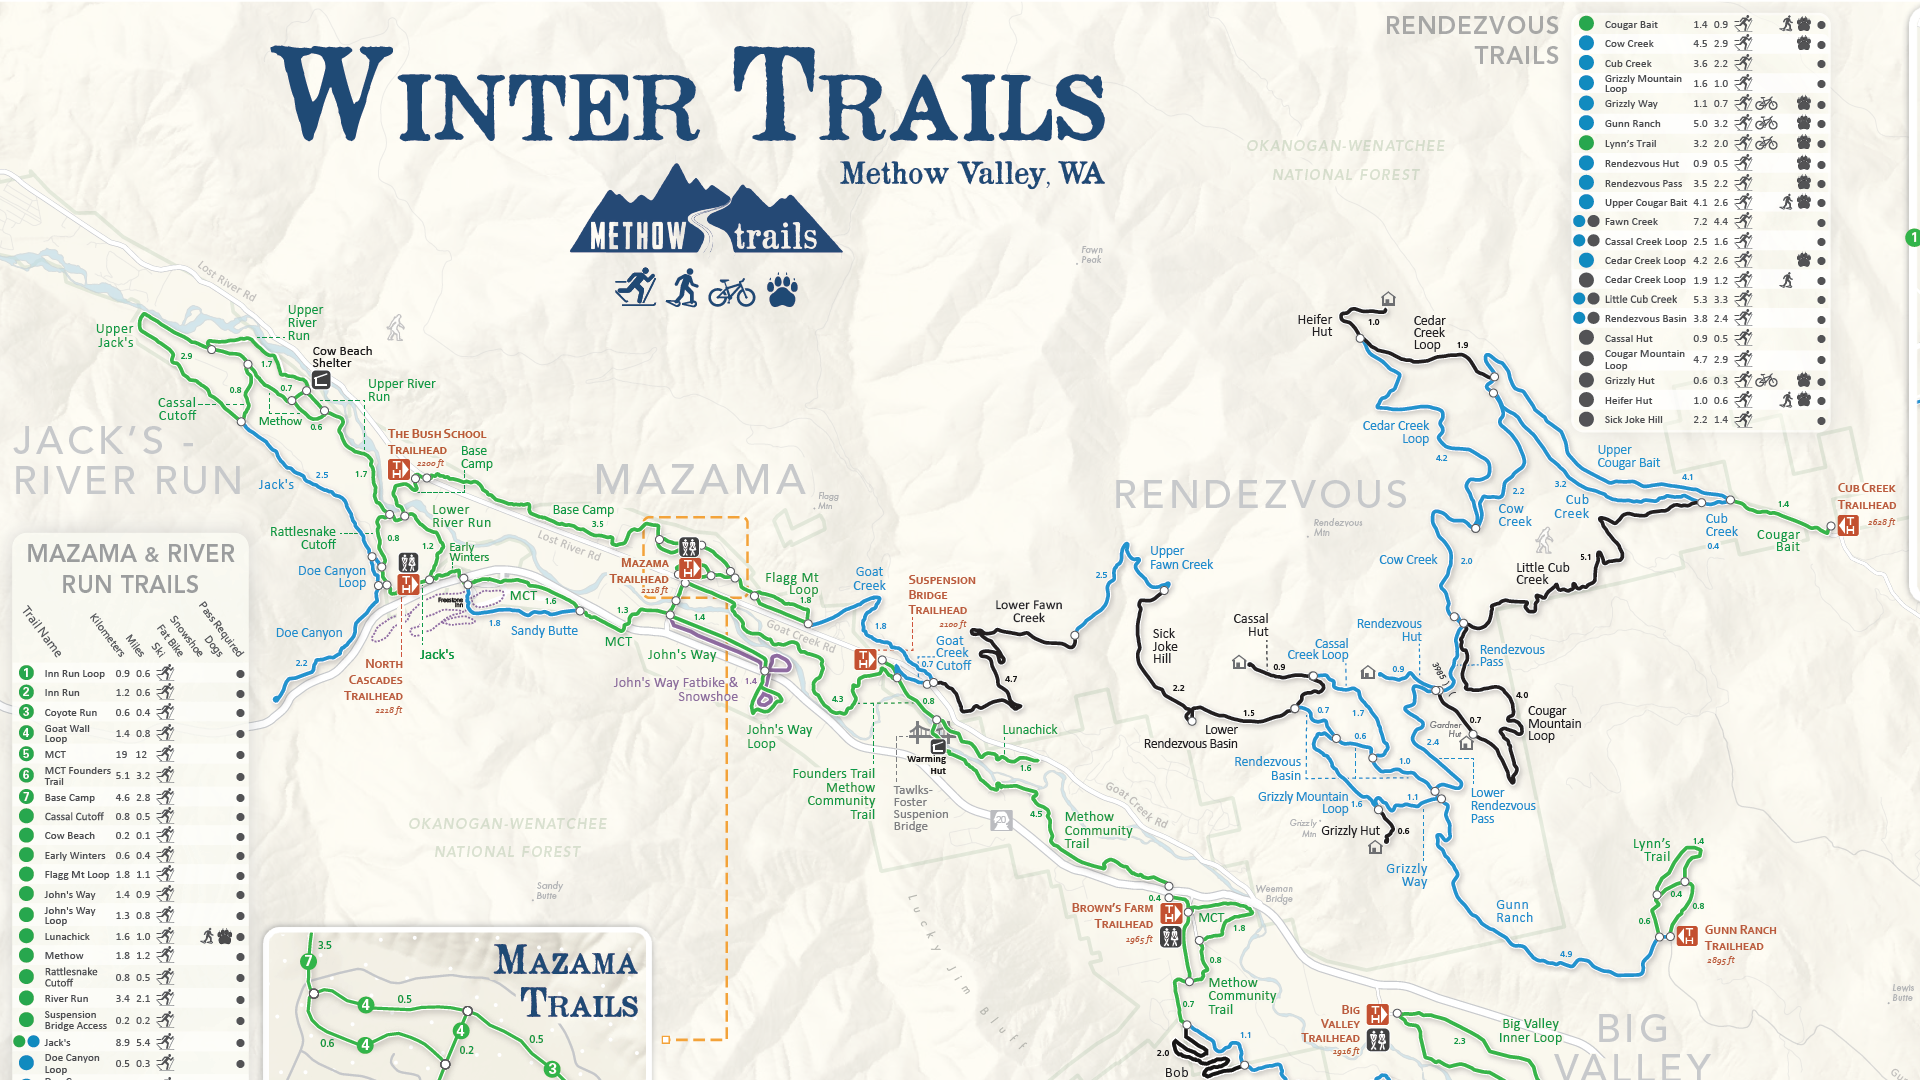
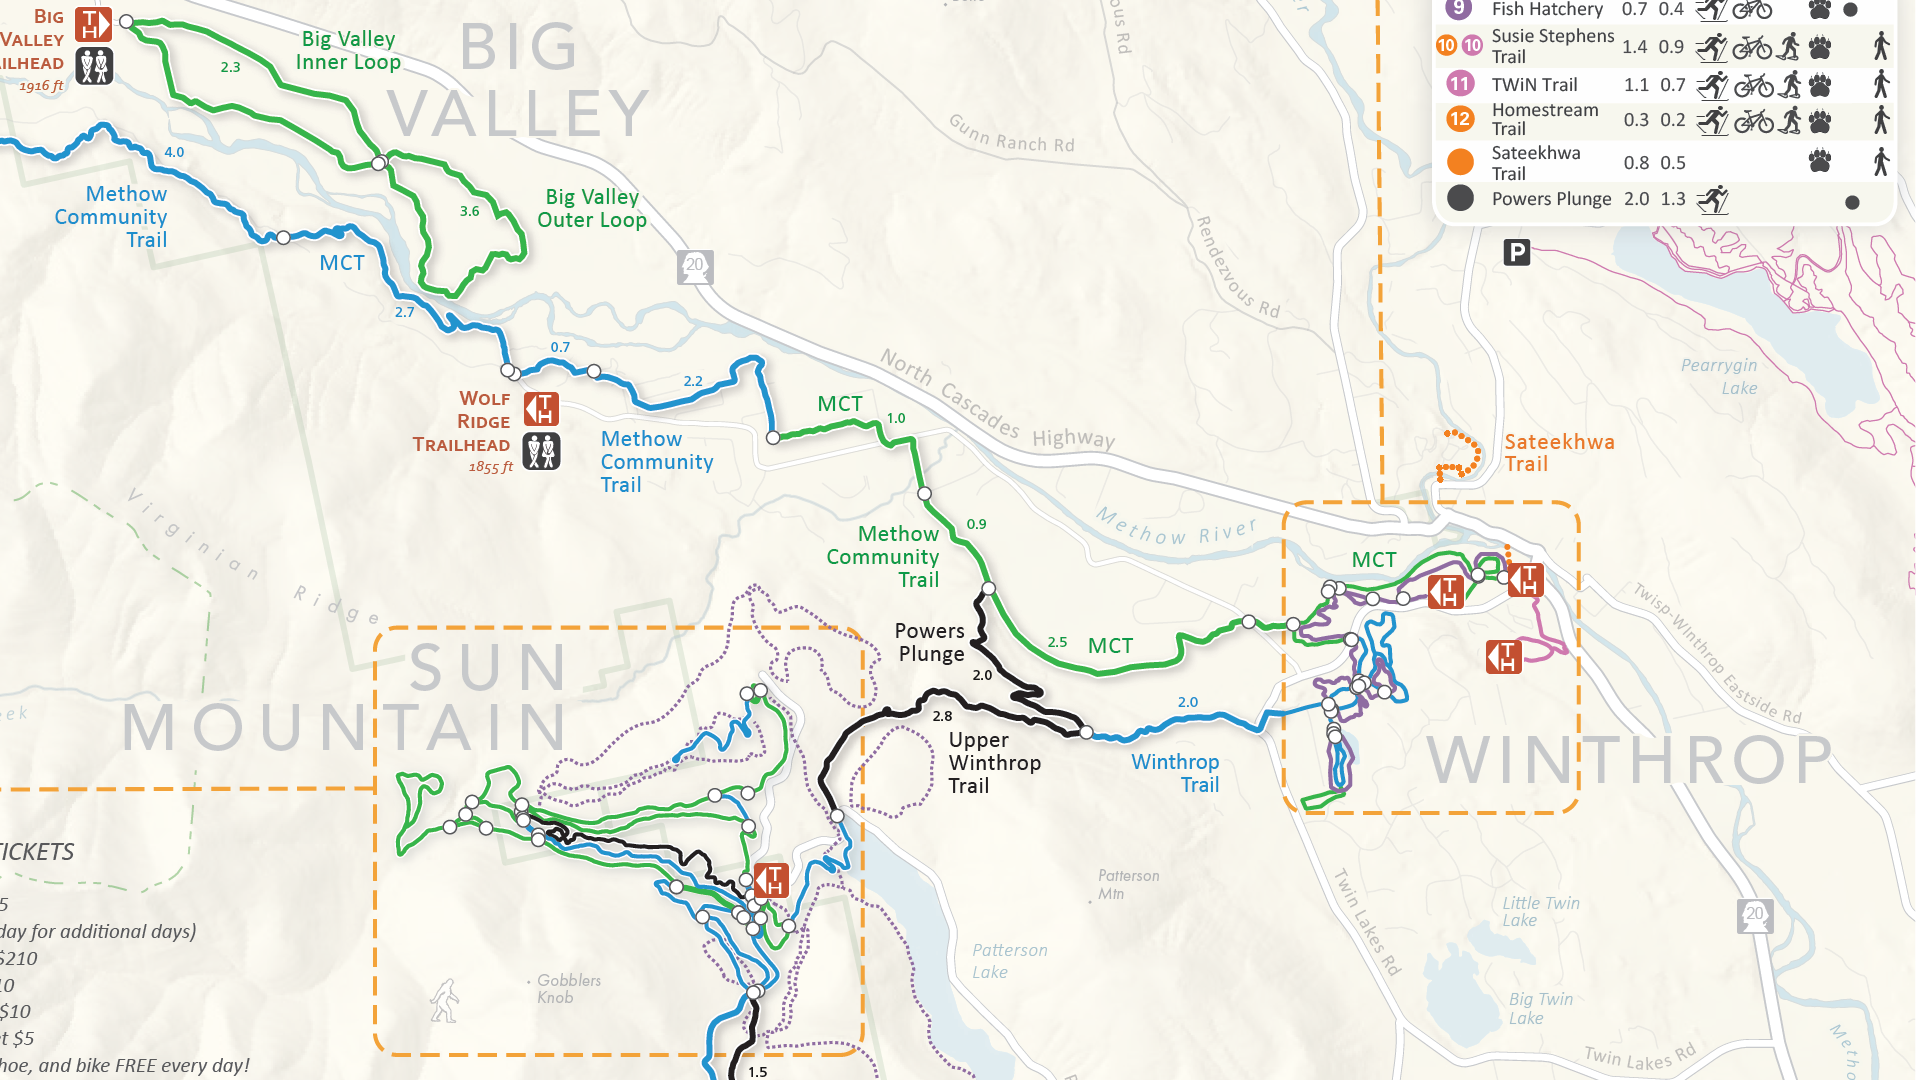
Select the images below to see a detailed look at Aaron’s map

Making the Map
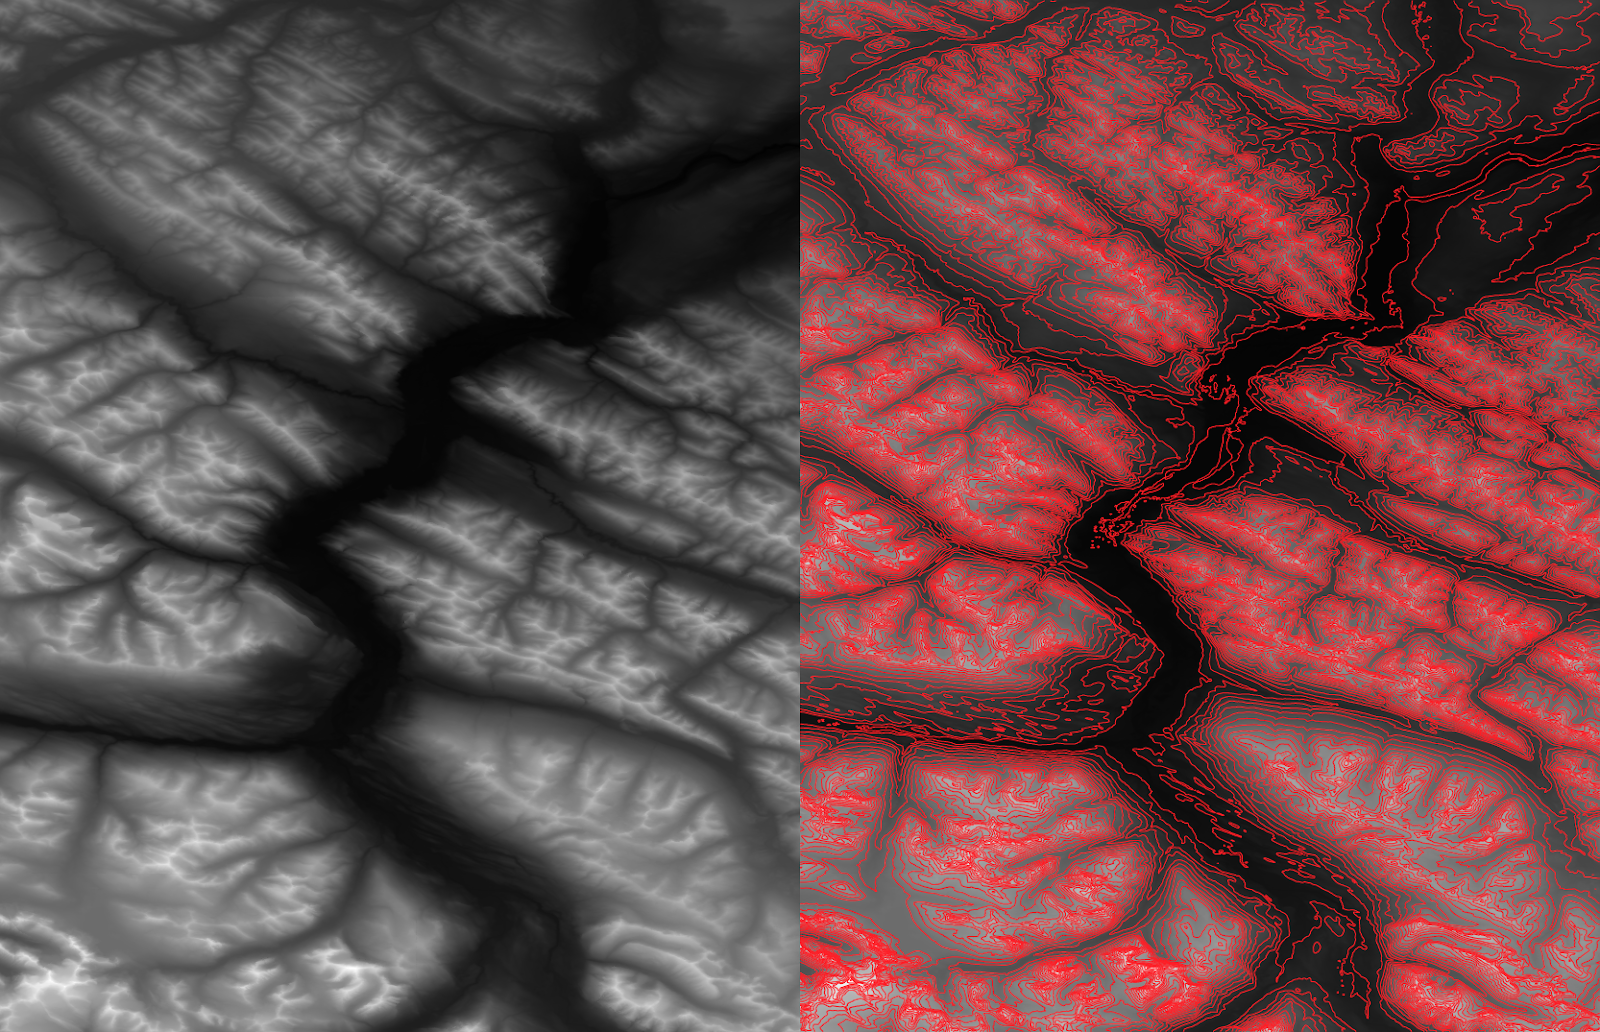
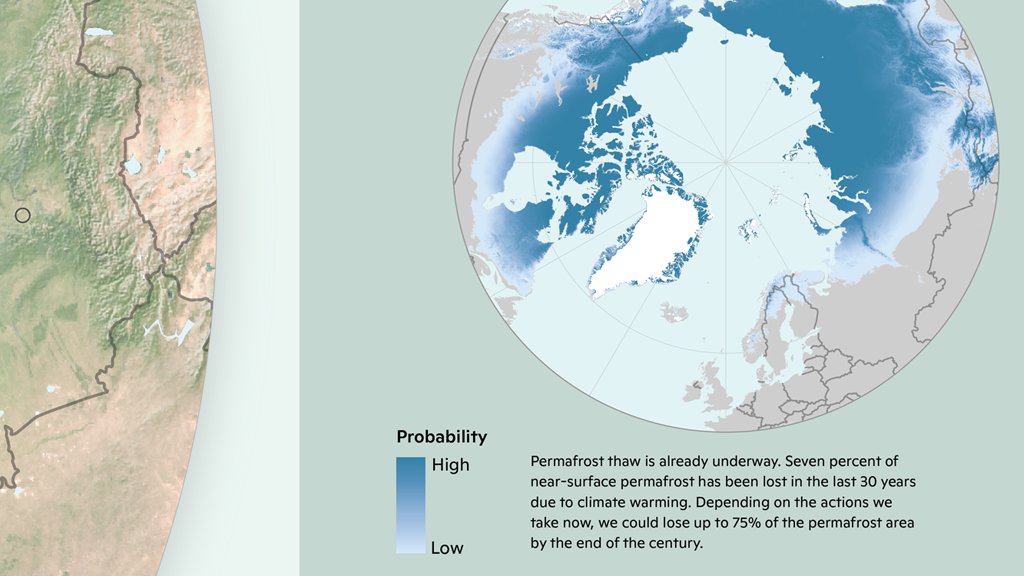
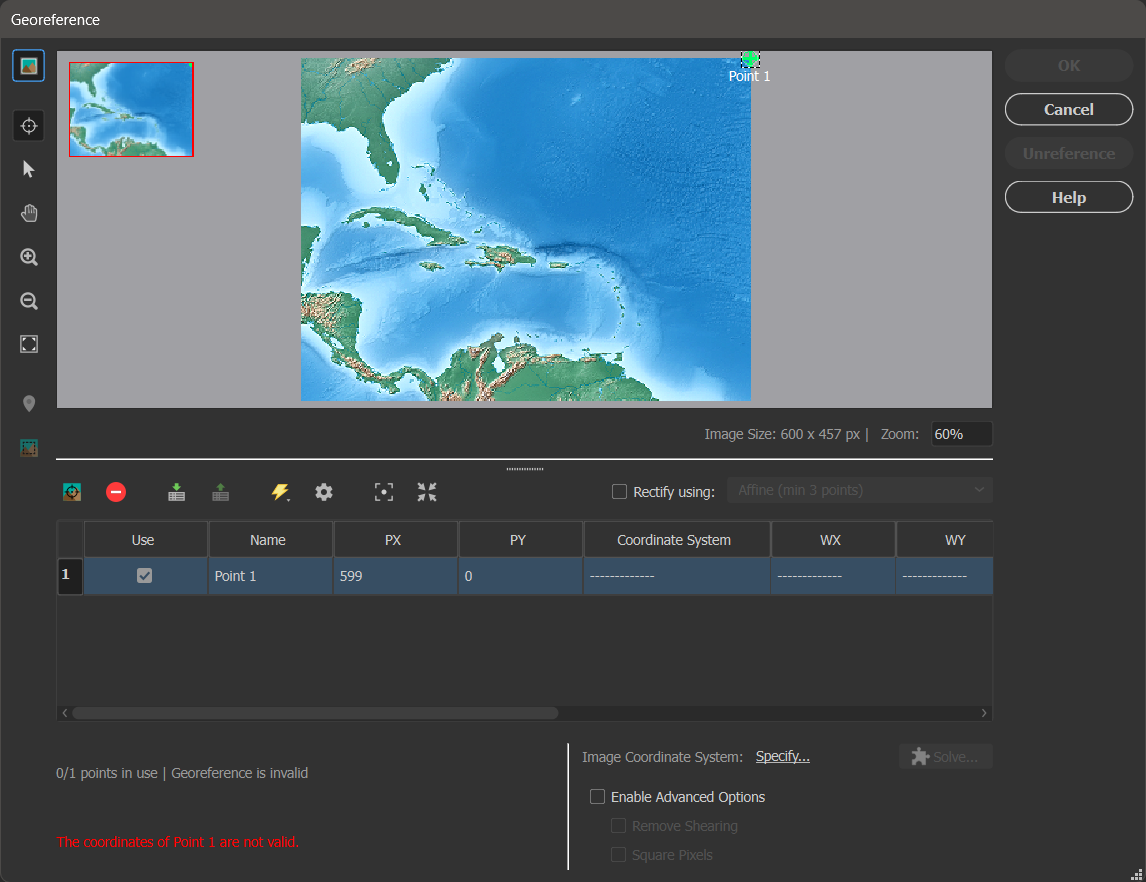
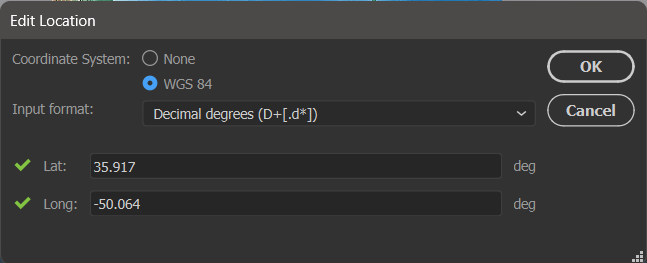
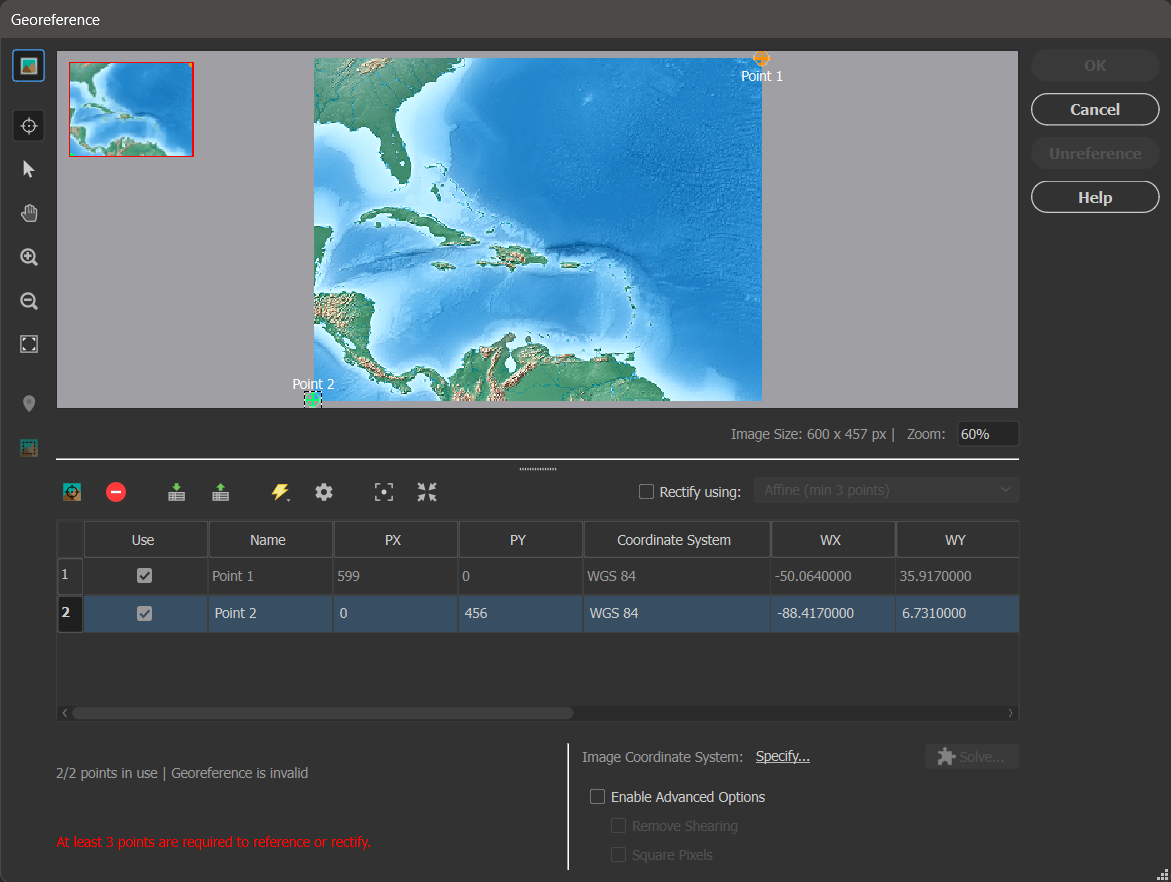
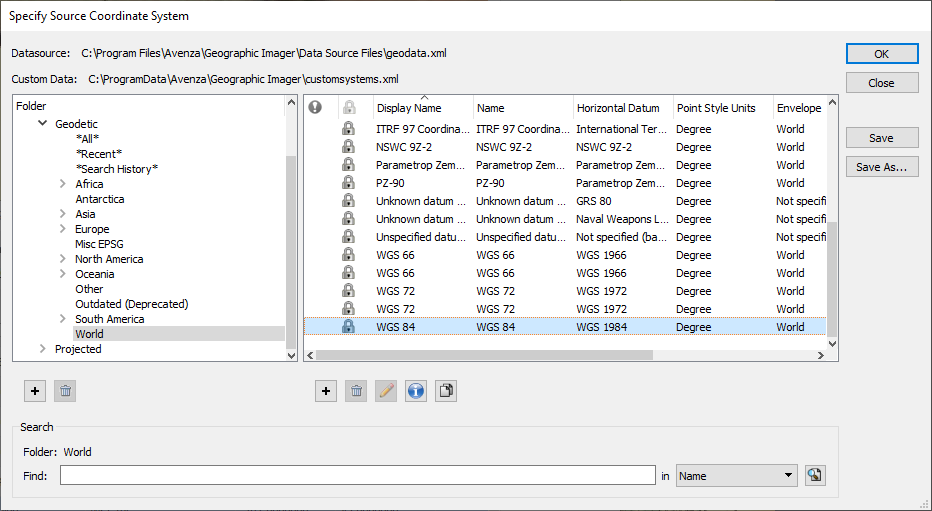
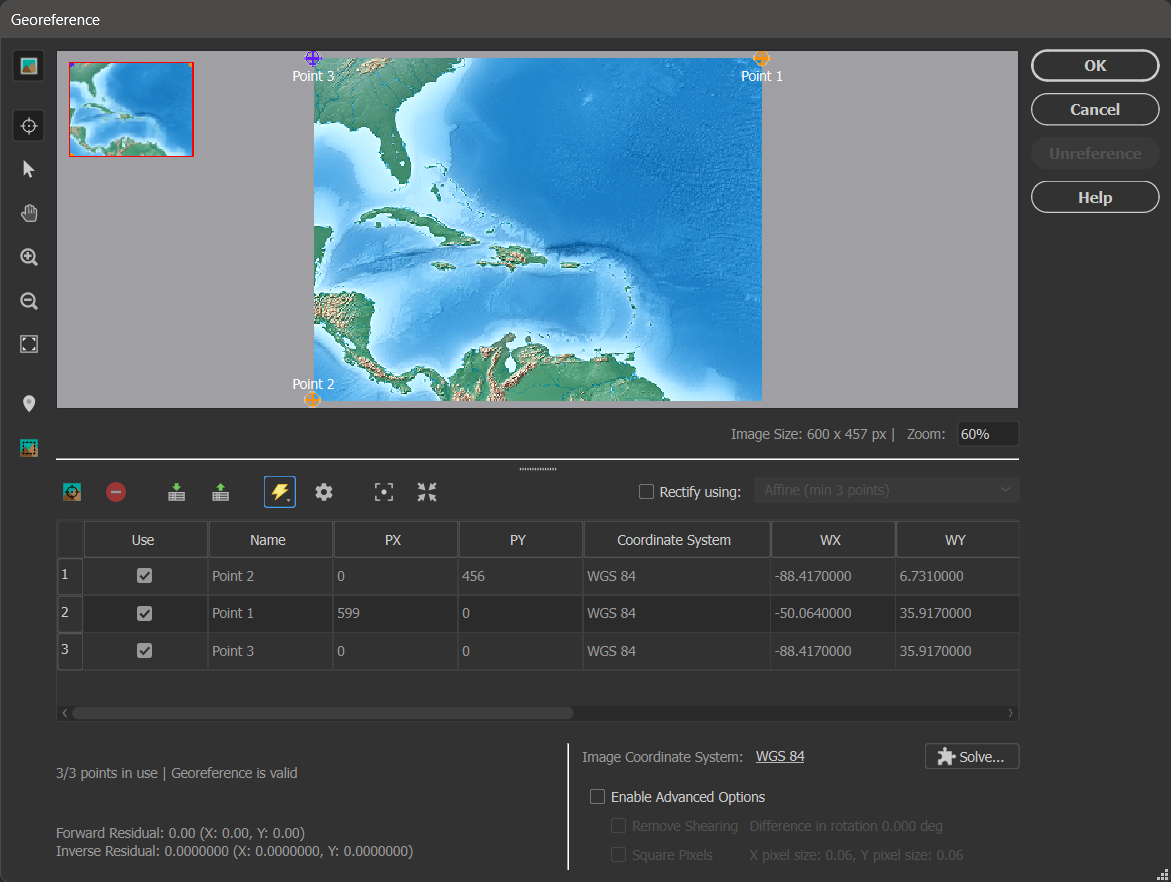
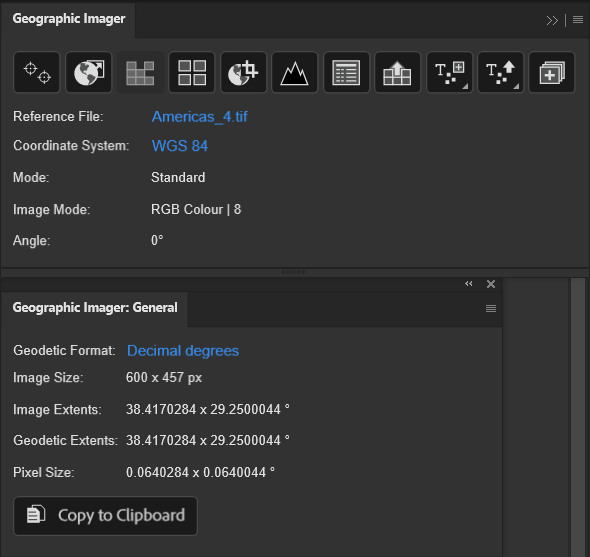
Aaron used both Geographic Imager and MAPublisher in the creation of this map. Geographic Imager was used in Adobe Photoshop to build the shaded relief images for the background of the map. The Terrain Shader makes it quick and easy to create a shaded relief by simply inputting a Digital Elevation Model (DEM). After this, the shaded relief image could be imported into MAPublisher and used as the background for the map.
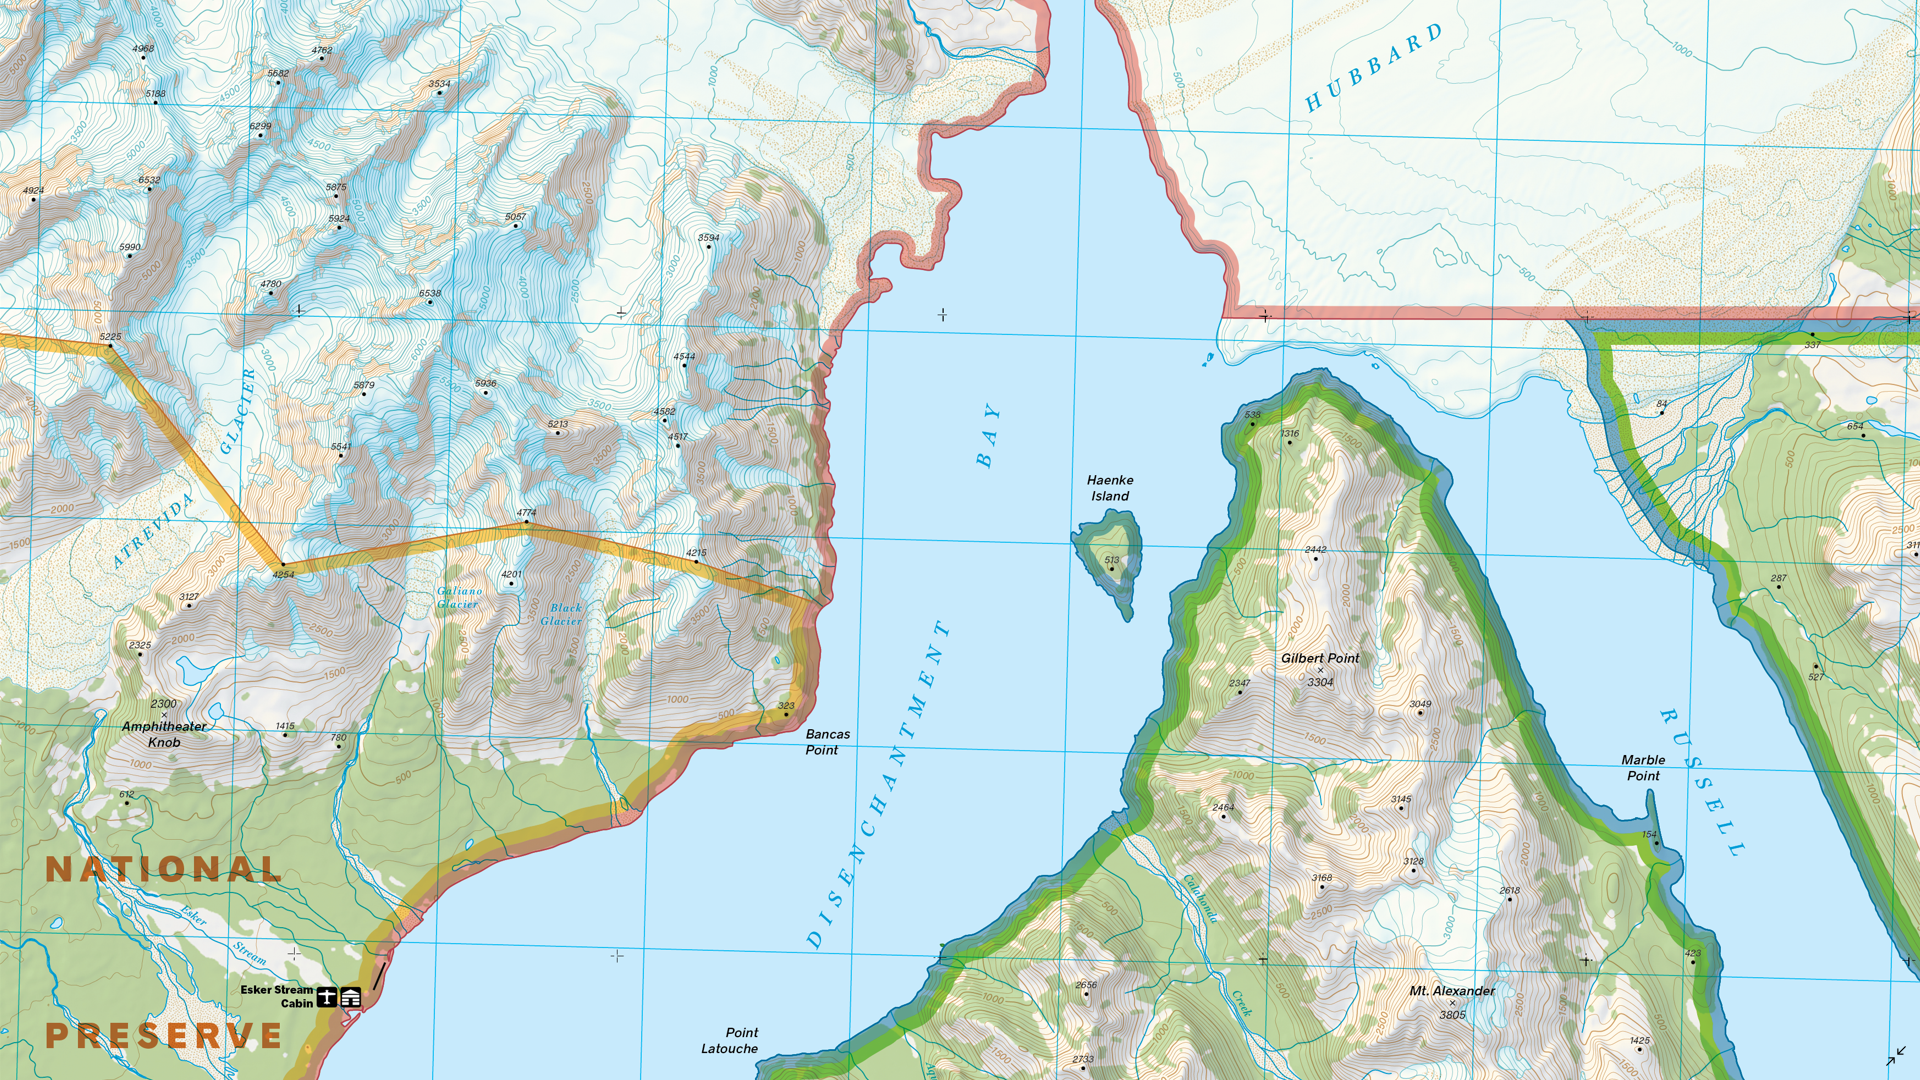
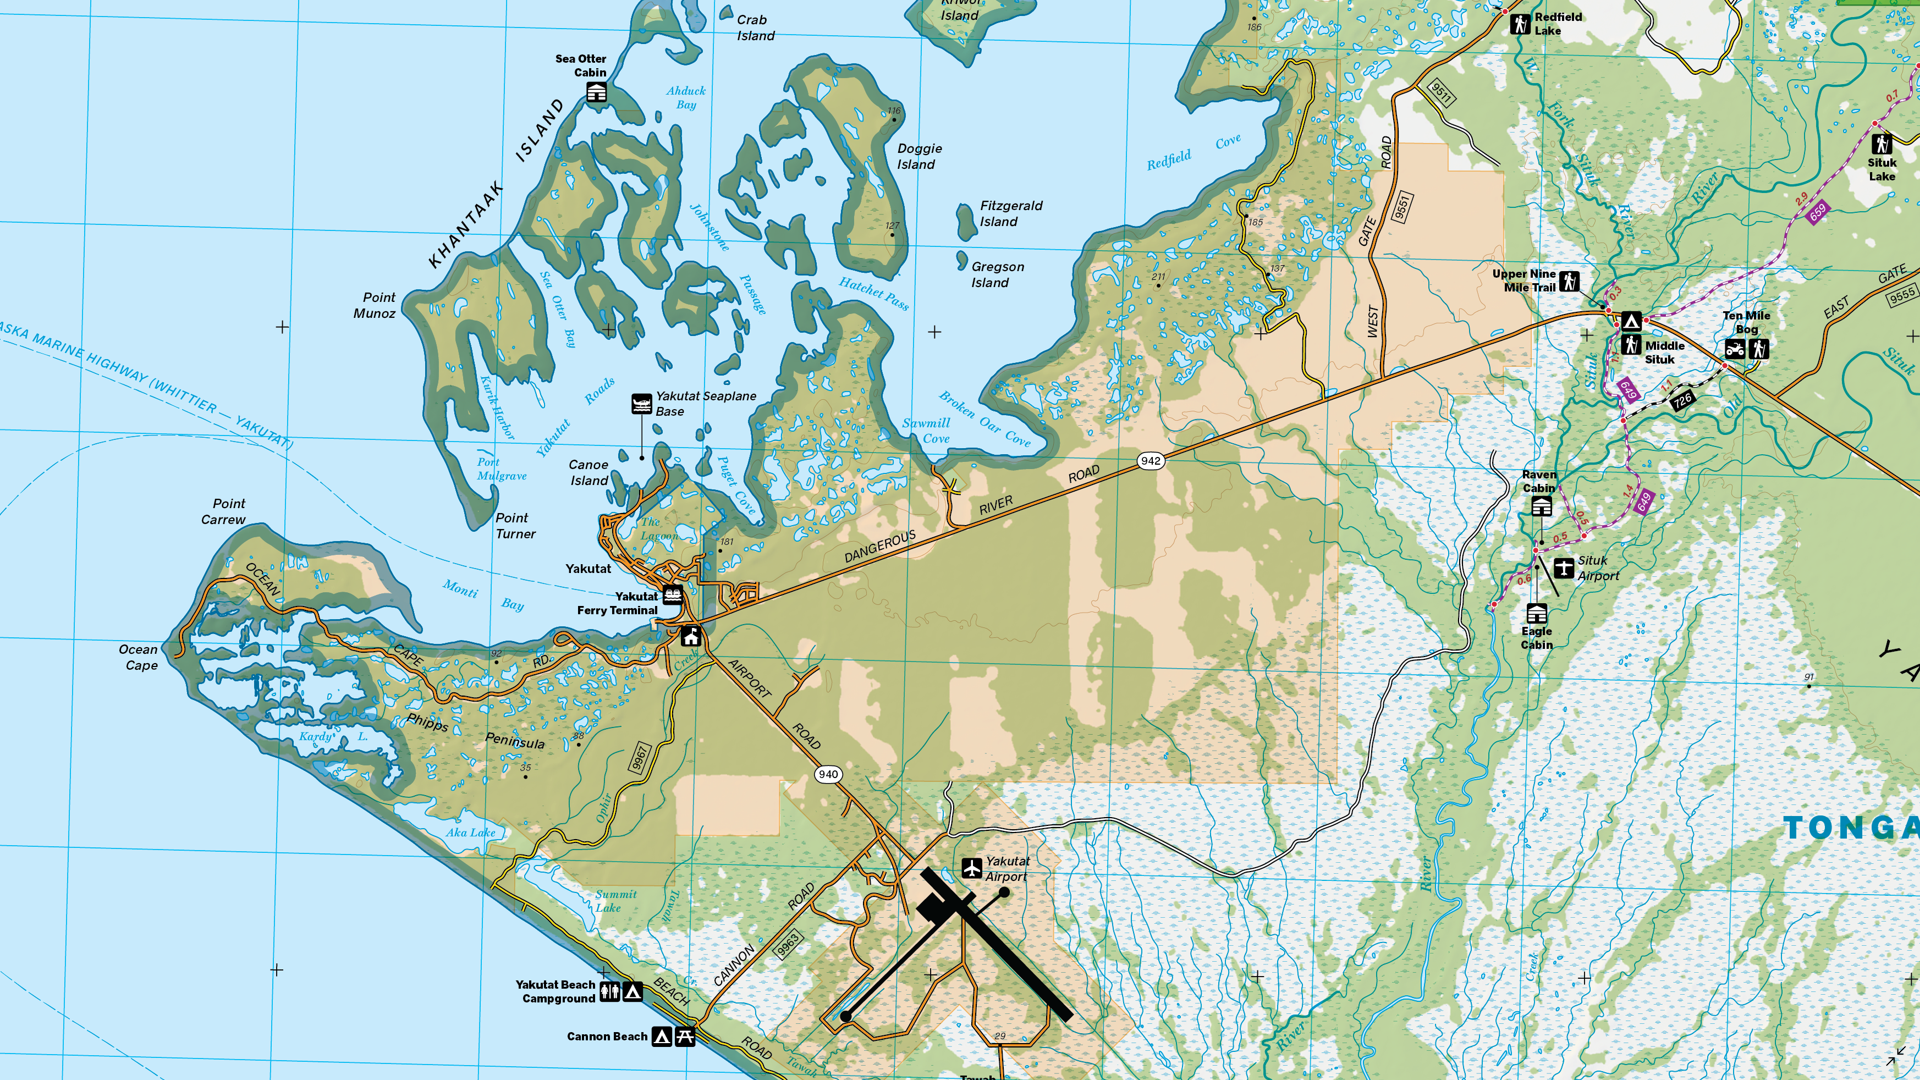
Aaron imported his vector data and his shaded relief image into MAPublisher. MAP Stylesheet Themes were used to stylize the vector data such as the glaciers, land cover and water features. The Create Halo tool was used to create the thick and slightly transparent borders of the various parks and preserves in the region.
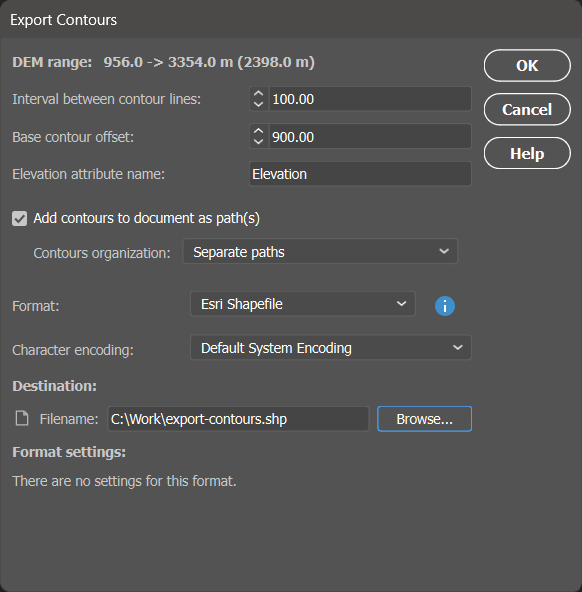
One of the standout features of Aaron’s map is the contour lines illustrating the terrain of the Russell Fjord Wilderness. The lines can be smoothed out using the Simplify Art tool to make them more visually appealing. The MAP Contour Tagger tool could then be used to manually create elevation labels for the contour lines, which allowed Aaron to select their exact placement in a visually appealing and uncrowded manner. Another important aspect of contour lines is that the text labels are readable, since they are usually obscured by the contour line itself. The Create Knockouts tool is perfect for ensuring that any text or features obscured by other features can be visible. Create Knockouts was used to create a gap in the contour lines where the contour labels (and other labels such as glacier names) exist.
The Grids & Graticules tool was essential in Aaron’s addition of such features to the map, with a UTM grid of 3000 meters being visible across the entirety of the map. Finally, Aaron used the Scale Bar and North Arrow features to easily ensure his finishing touches were placed correctly. Check out his north arrow that shows both true north and magnetic north and the difference between the two!
Learn more and enter the 2024 Avenza Map Contest here, and check out our other Map Spotlight blogs here!