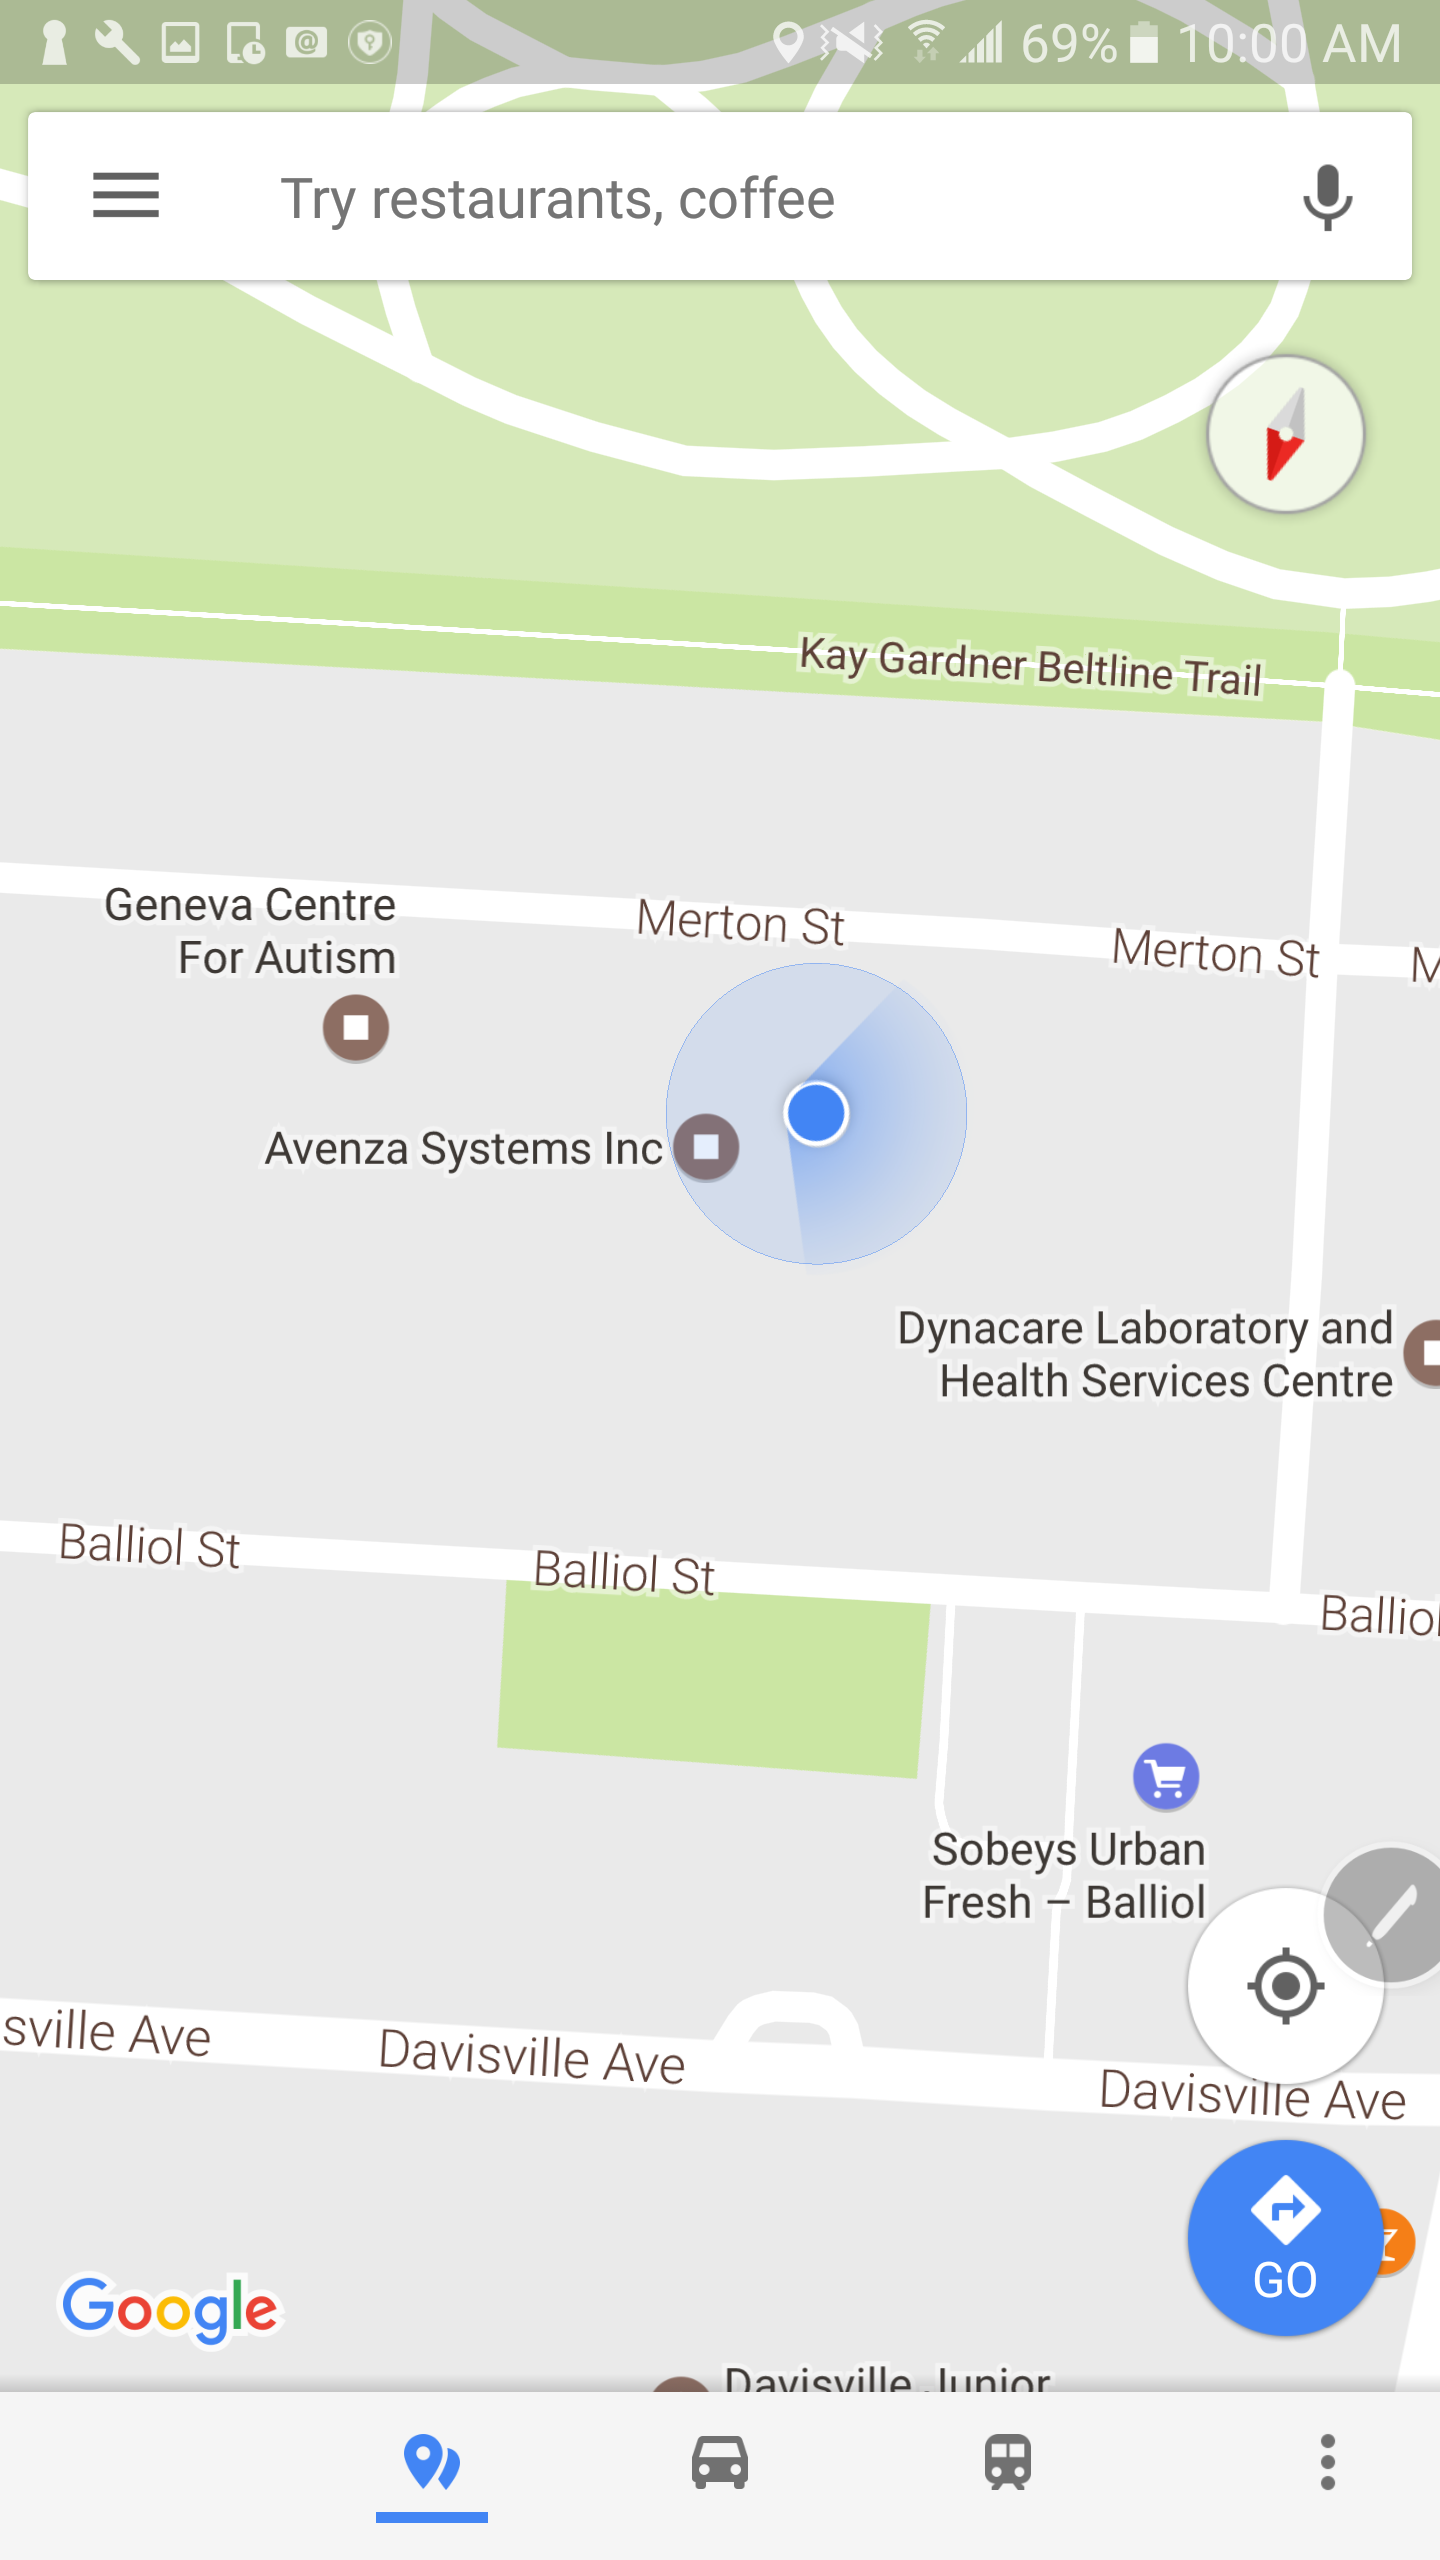
One of the great features of Avenza Maps is being able to navigate offline using your own maps or maps from the Map Store. By tapping the GPS icon twice (once to locate yourself and then again to enable the compass), the map will rotate and align with your compass. Your current location is represented by a blue dot and the little arrow points in the direction you are facing. This feature allows you to navigate easily, however it can be problematic when your devices’ compass isn’t calibrated. If you notice that your blue dot’s arrow is not pointing in the right direction, or isn’t functioning as you’d expect, try these steps to calibrate your device’s compass!
Android
Not calibrated (Android)
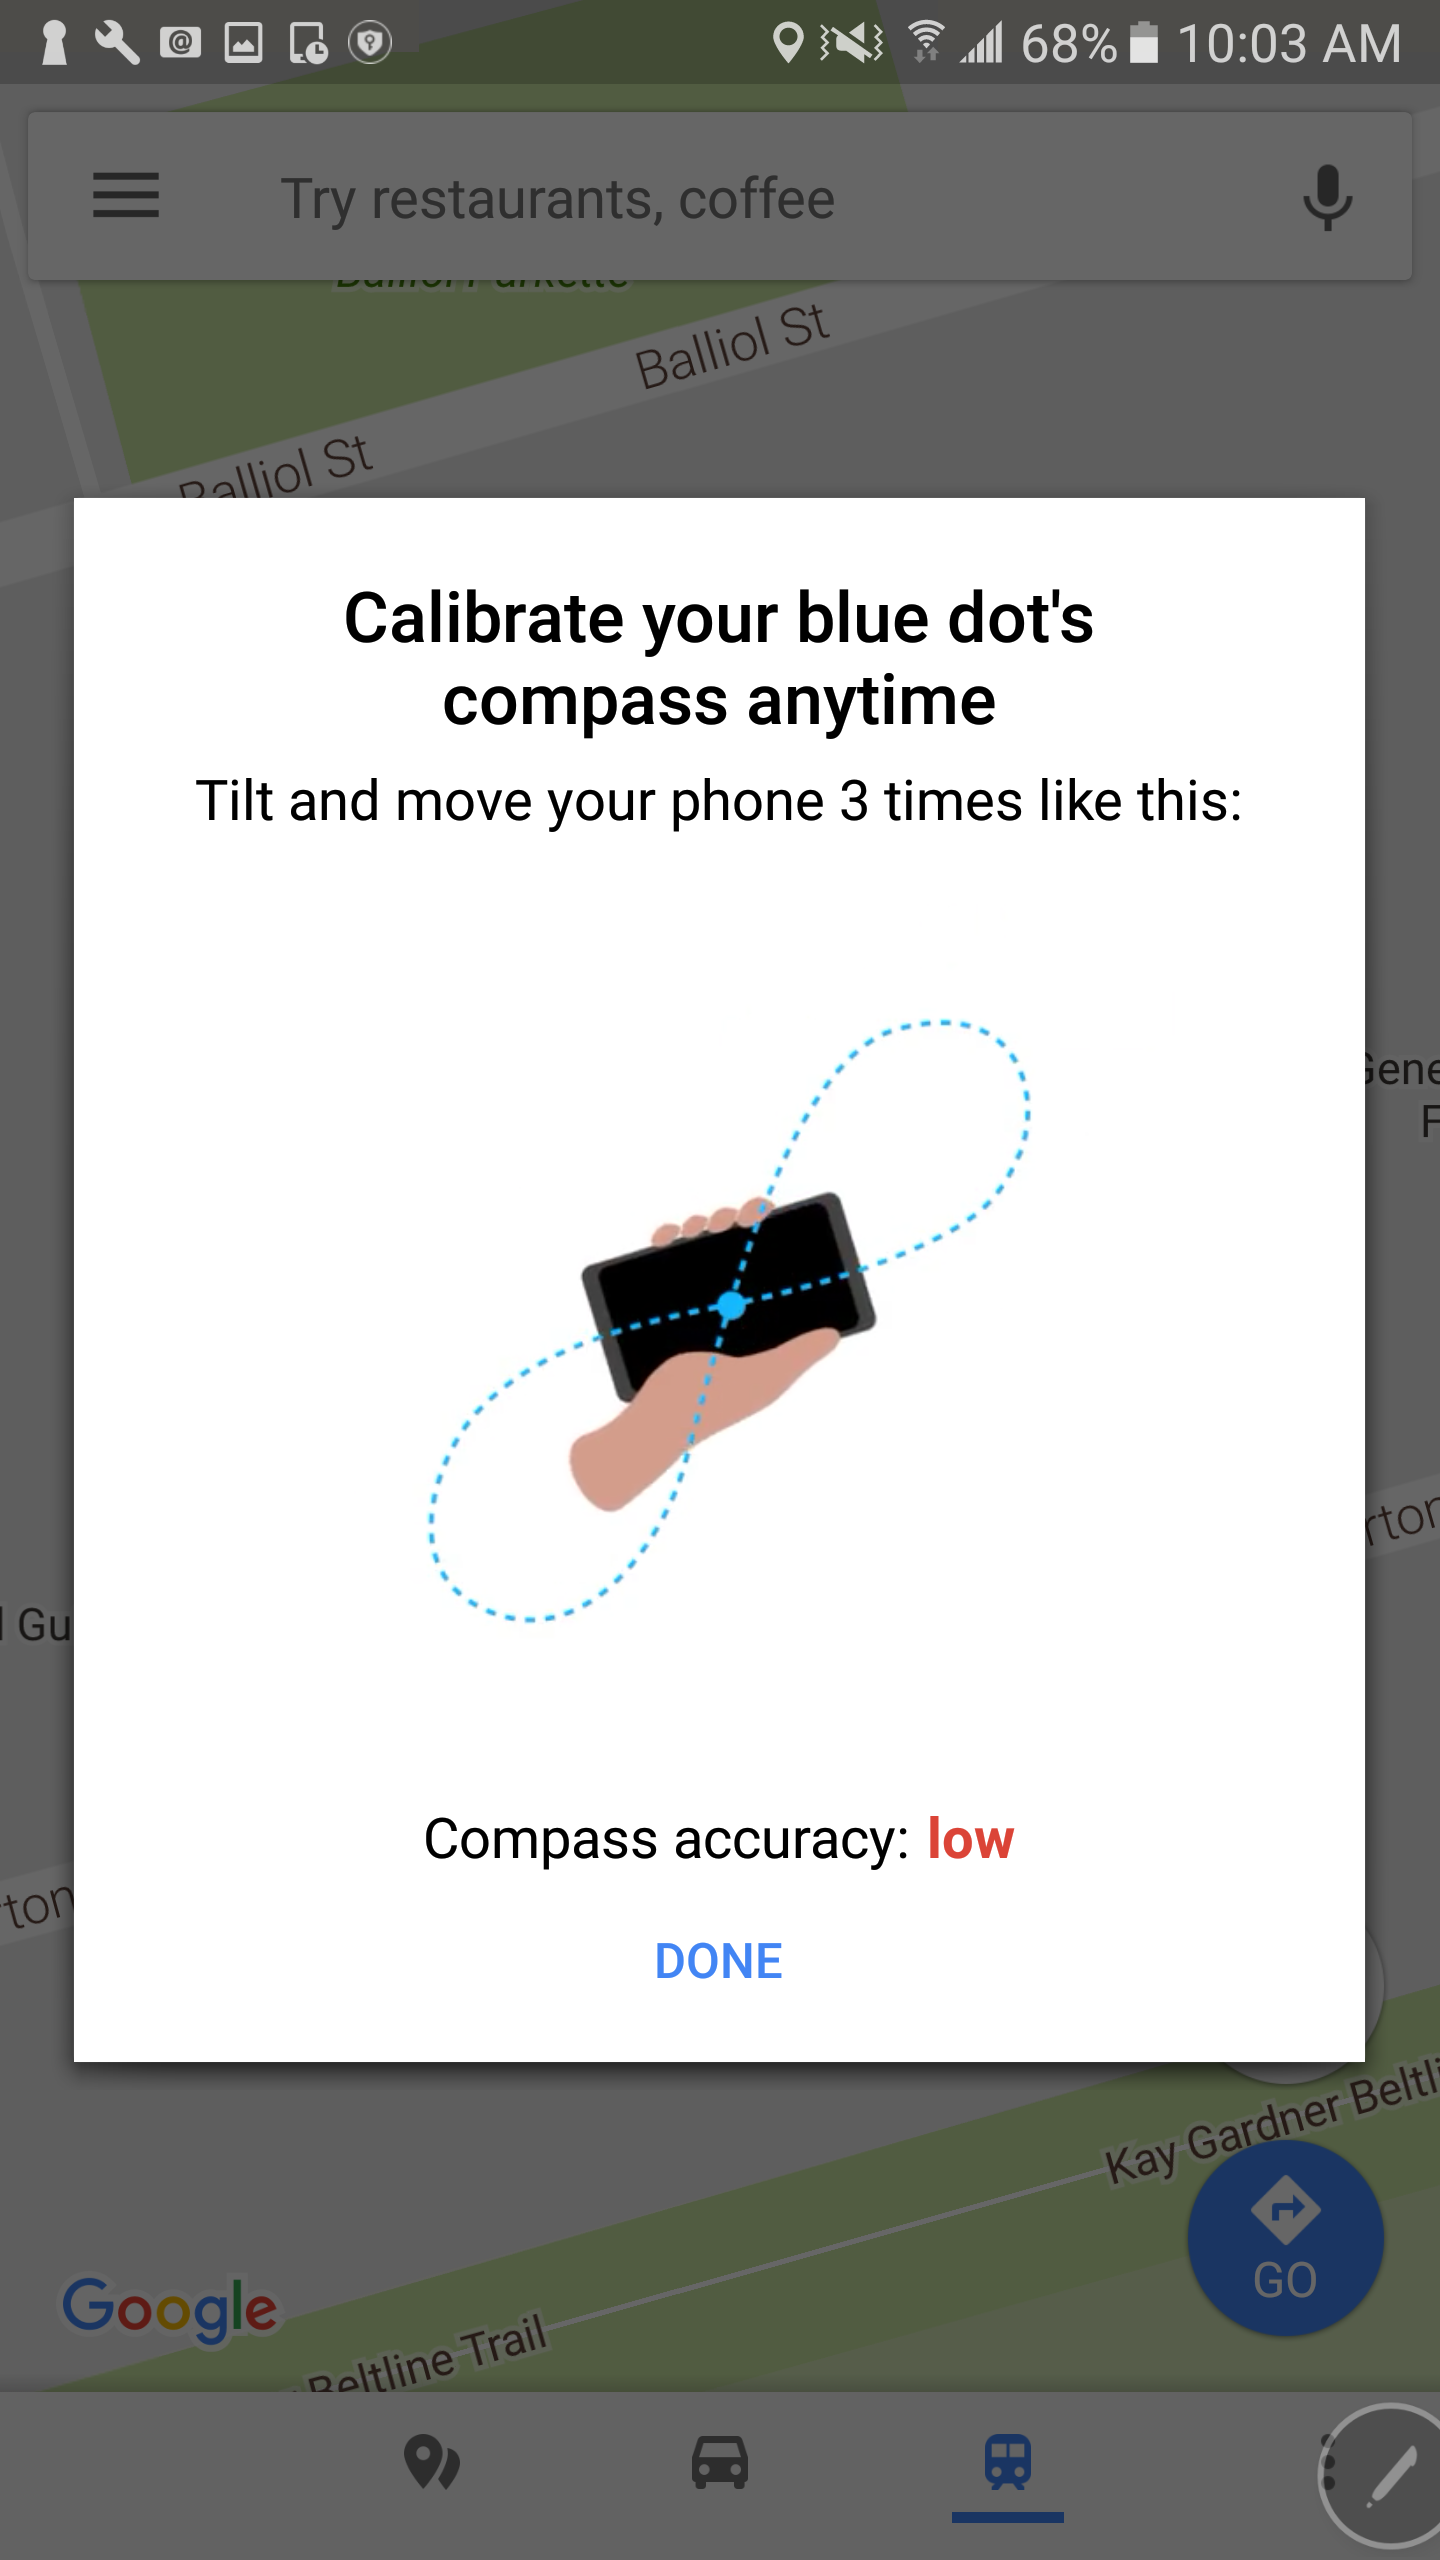
To calibrate your compass on Android, go to your Google Maps app. If your blue dot’s beam (the blue shading coming out of it) is pointing in a different direction to where you are facing or is very wide, your compass will need to be calibrated. To calibrate, tap the blue dot and select “calibrate blue dot compass”. From here, you will be instructed to move and tilt your device in a figure 8 pattern, shown in the following diagram.
Calibrate device (Android)
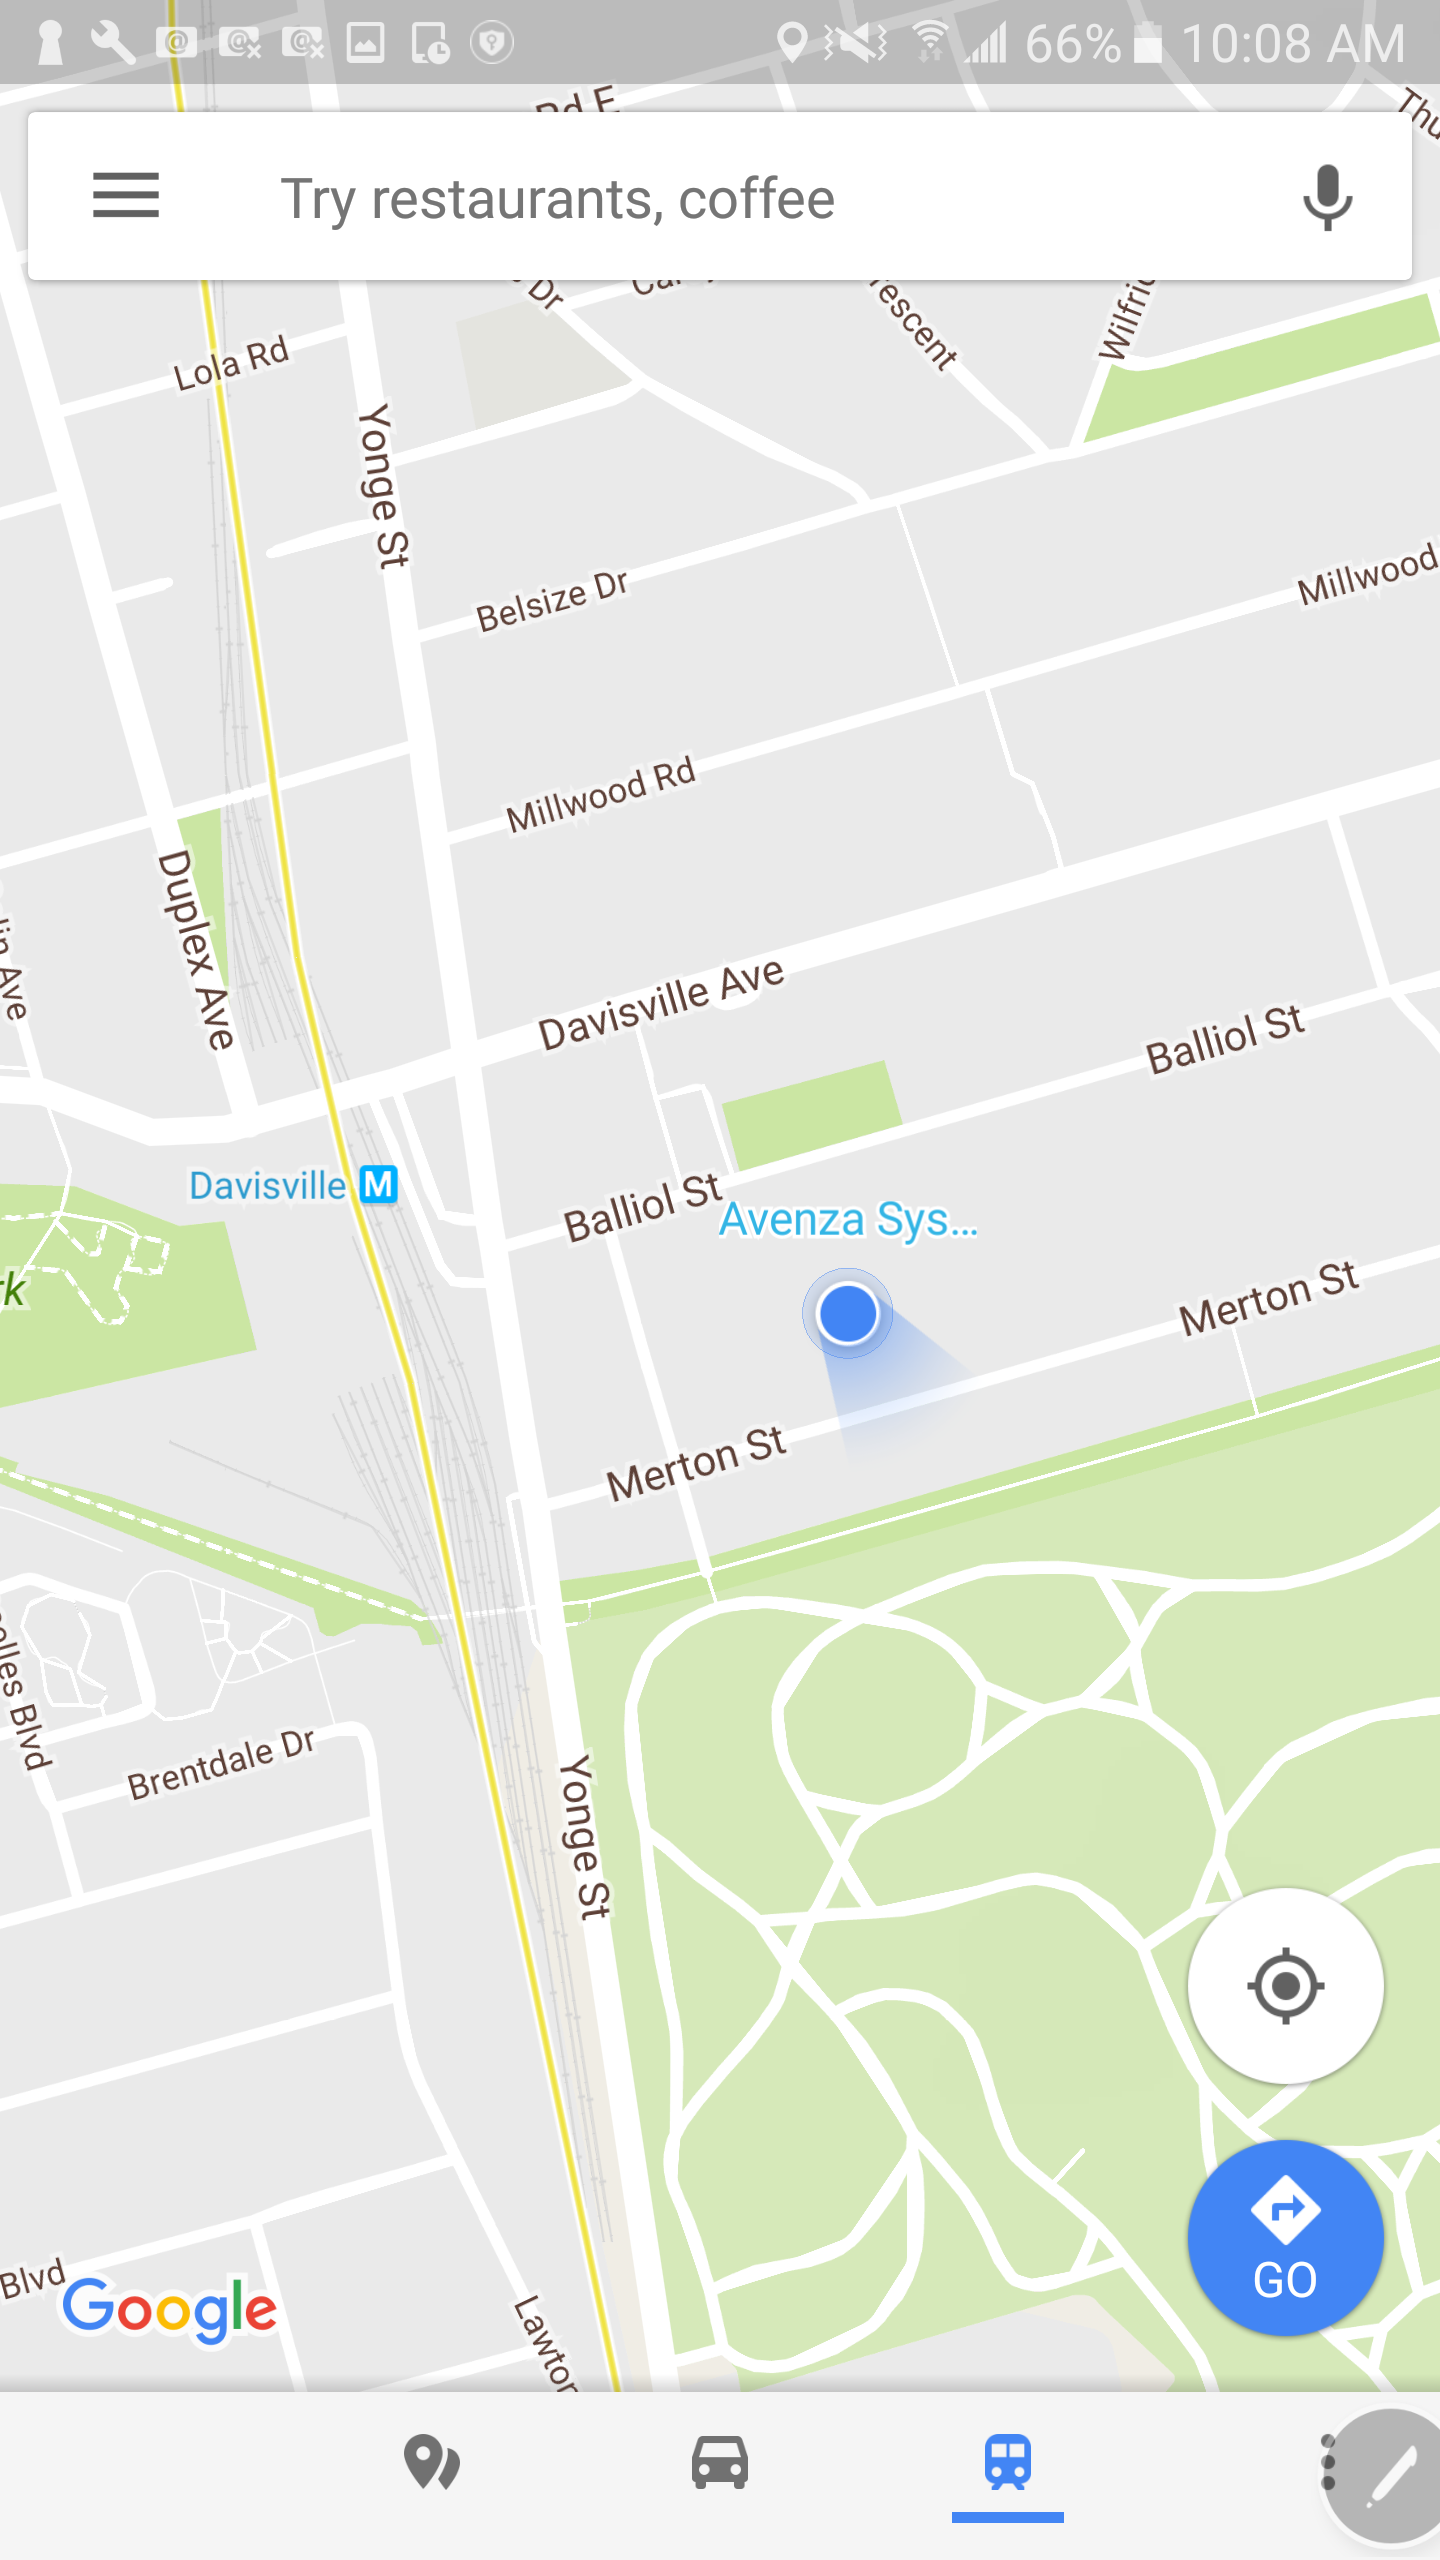
Your compass accuracy will improve as you continue to do this. When you are happy with your compass accuracy, tap Done. The beam from the blue dot on the display will now be narrower and point in the right direction. If at any point the accuracy lowers again, this process can be repeated. If this does not solve your issues, you can select “report blue dot issues” by pressing the blue dot again. For more information, click here.
Calibrated device (Android)
iOS
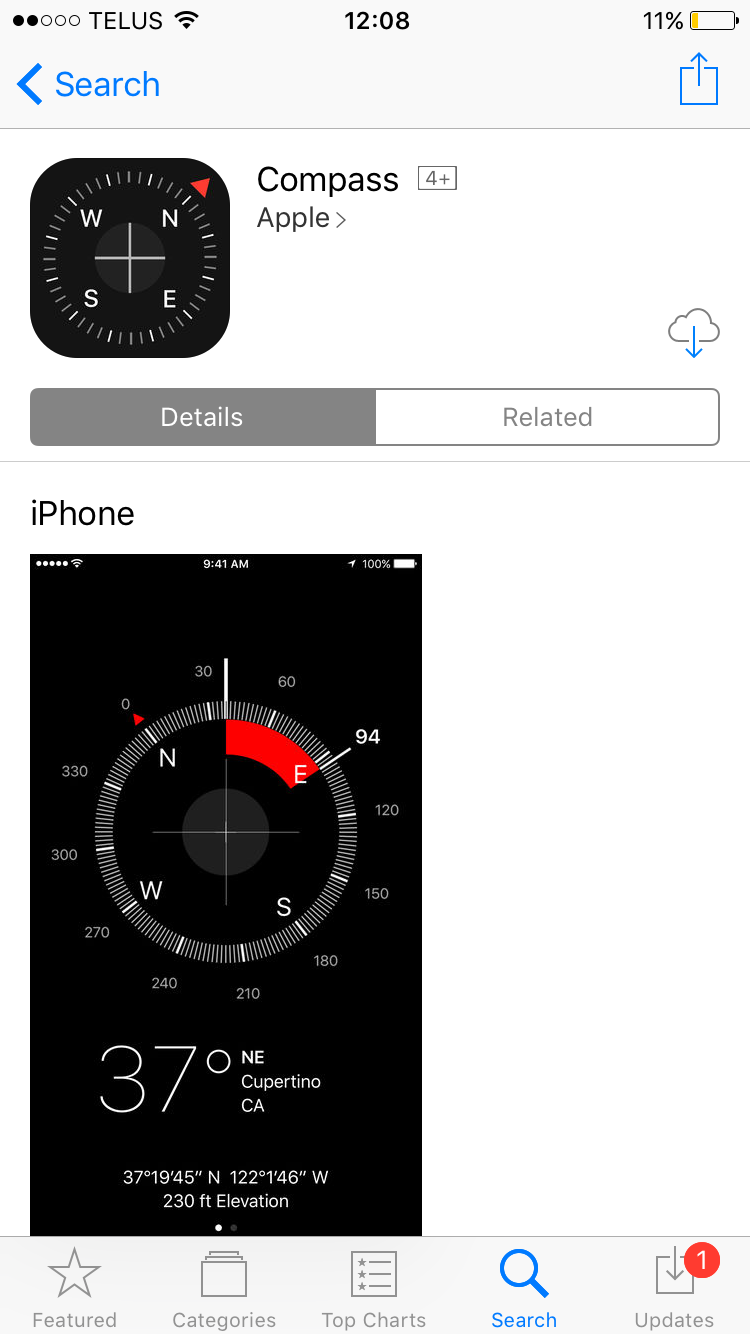
On Apple devices, use the Compass app to calibrate your compass. This app comes pre-installed on iPhone devices. If for any reason it has been deleted, it can be found in the App Store if you search for “Compass”.
Compass app on App Store (iOS)
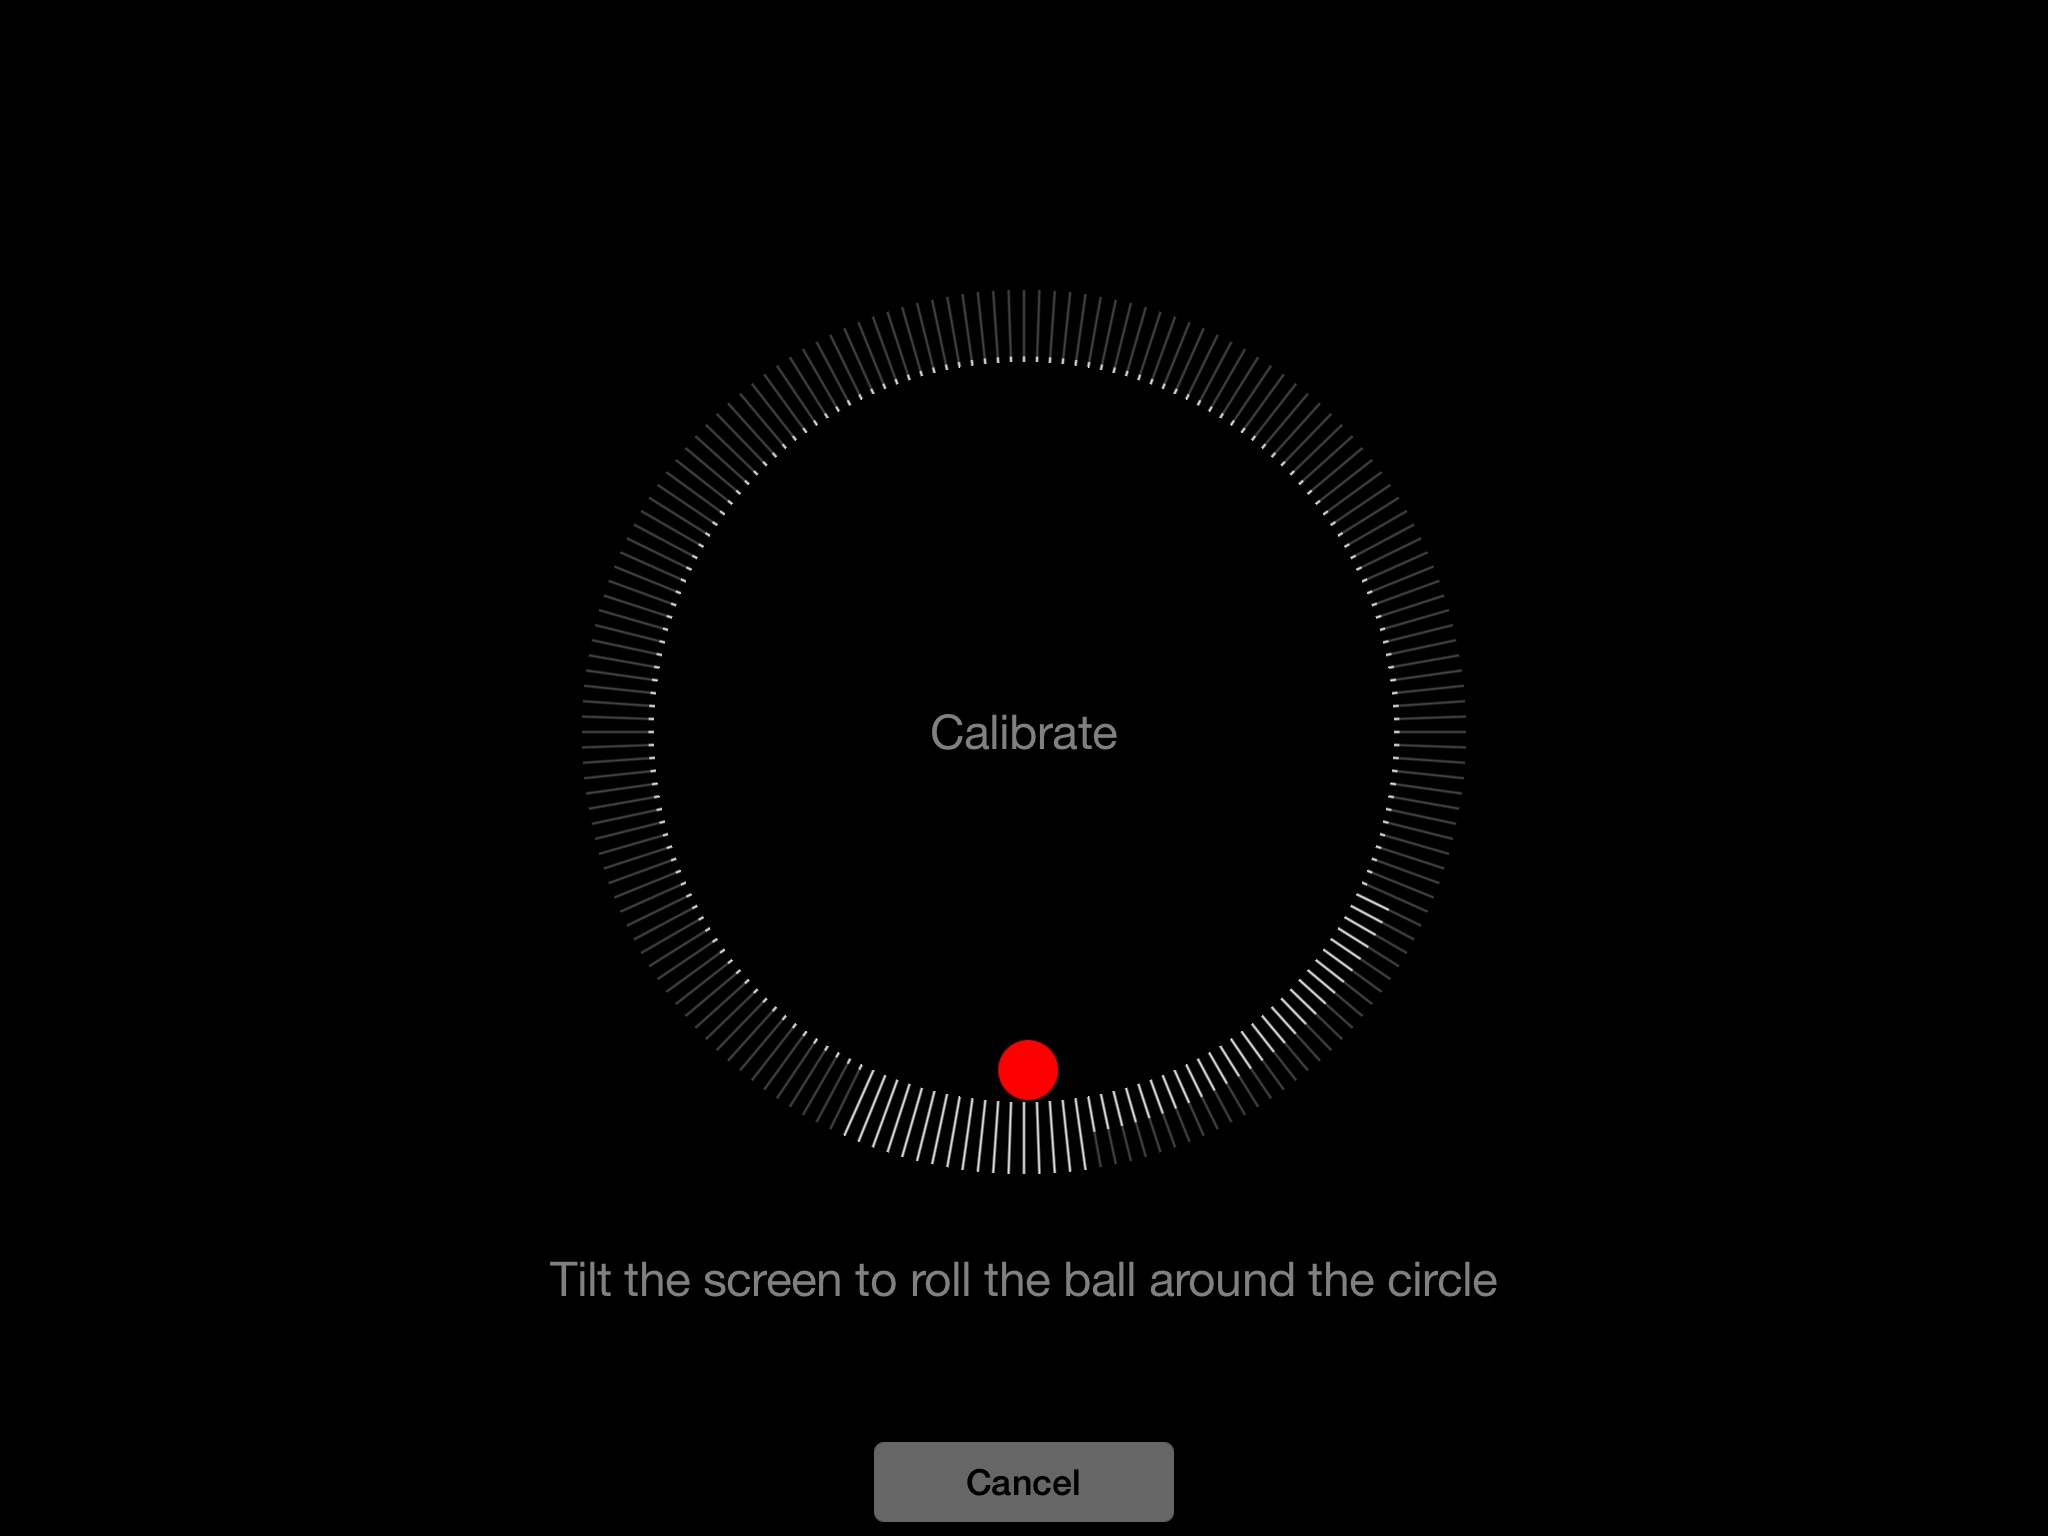
When the calibration screen appears after you open the Compass app, you’ll need to perform a few easy steps to calibrate the compass. Follow the on screen instructions and tilt your phone until the ball moves all the way around the circle. If you are using an earlier iOS, you will be prompted to move your phone in a figure 8 motion.
Calibrate device (iOS)
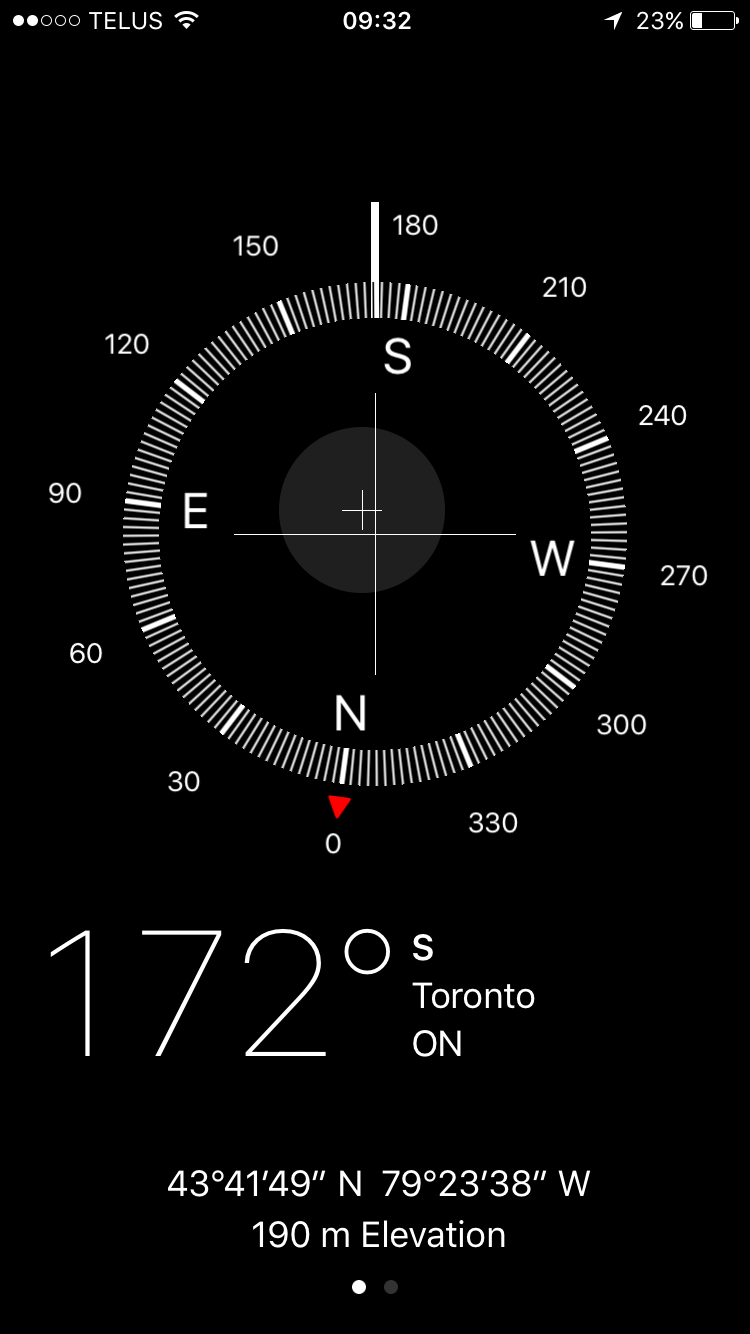
Once this process has been completed, the default compass screen will appear – your compass is calibrated and ready to be used! If the default compass screen appears as soon as the app is opened, your compass is already calibrated. If you see a different page appear on screen, the Compass app also doubles as a leveler; swipe left you will return to the compass screen.
MAPublisher LabelPro intelligently labels your map layers using custom rules and styles. One of the popular uses of this feature is to create highway shields. The result is a cleaner map and is widely used on road maps around the world. While MAPublisher has many default options for highway shields, it is possible to create custom shields to improve your map as well. This blog will outline the steps to create and customize highway shields for your map.
Step One
Import your data into MAPublisher, ensuring your road line data has an attribute field for highway route numbers. Highway shields can work with any data type, however, traditional highway shields are created with a highway number with no additional characters. Using the integer data type enforces this and is recommended for highway shields.
Step Two
On the MAPublisher toolbar, in the Labels subsection, click the MAP LabelPro button.
Step Three
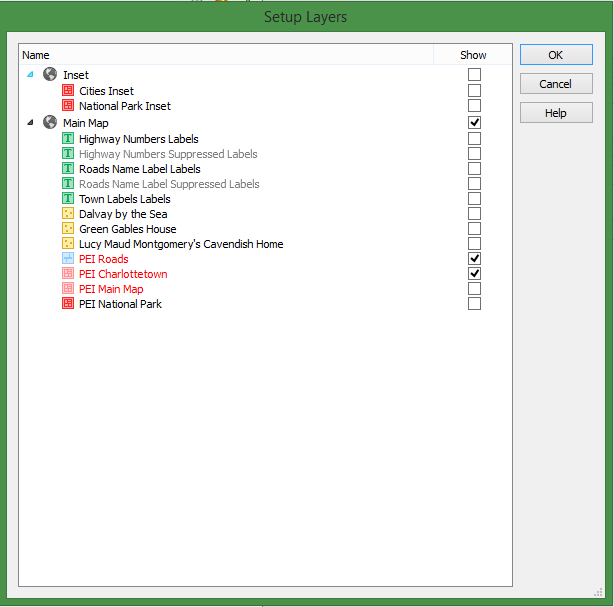
On the MAP LabelPro dialog box, click the Setup Layers button. This allows you to select which layers are going to be labeled or used as obstacles. This means you can label multiple features at the same time as the highway shields. Click the checkbox next to your roads layer and click OK.
Step Four
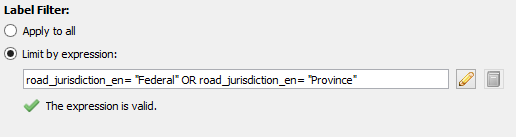
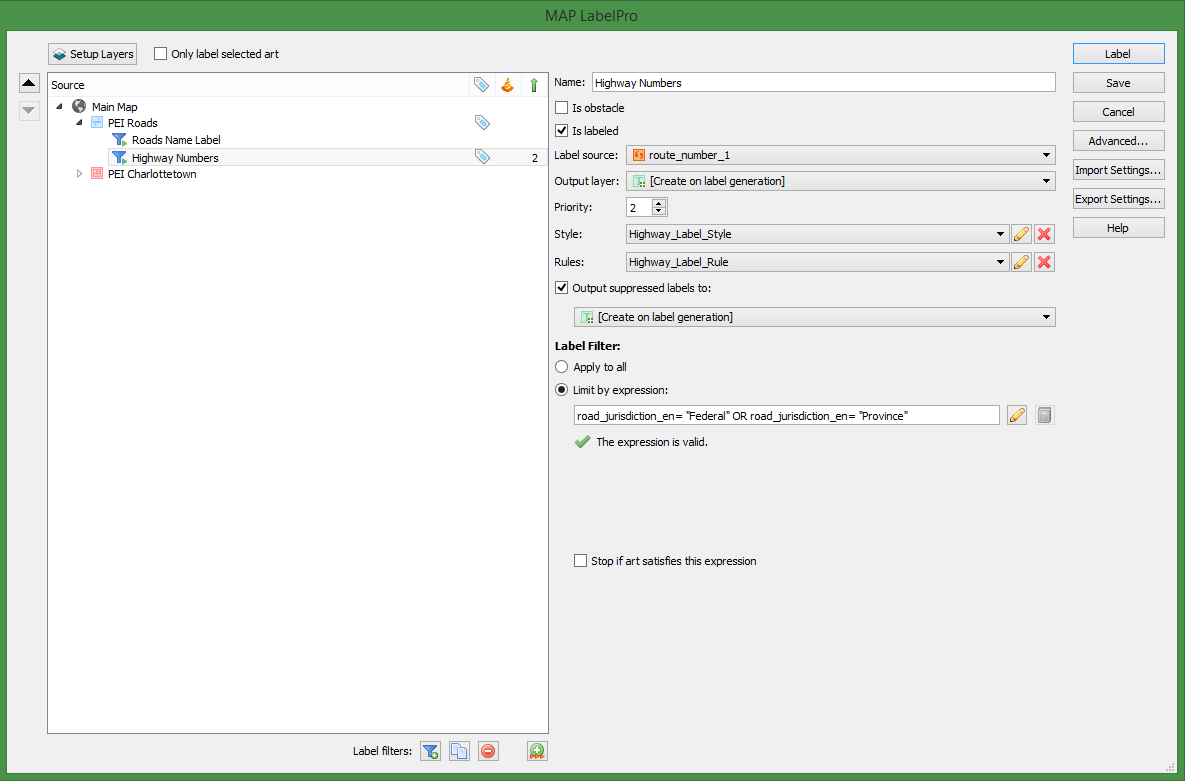
Optionally, you may want to only create highway shields on some of the roads within your road layer. For example, if your roads layer also contains roads that are not highways, you don’t want them labelled with a highway shield. The solution is to create a Label Filter. To do this, first create a new filter by clicking Add label filter button at the bottom of the dialog box. Next, in the Label Filter section, select Limit by expression and click the Edit icon. This opens the Expression Builder dialog box. In this example, the expression entered selects only roads that have a jurisdiction designated as “Federal” or “Province”. Only these roads will be labelled with a highway shield.
Step Five
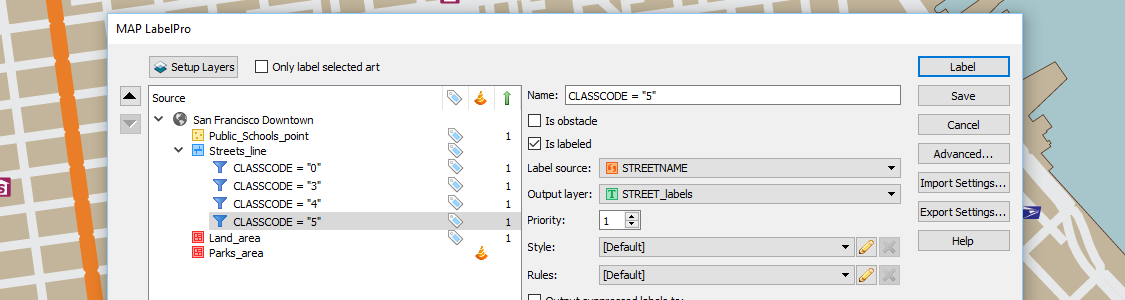
If you didn’t create a label filter, click the layer in the Source list you would like to label. On the right side, ensure that the “Is labeled” checkbox is checked. Immediately below, in the Label Source drop-down, select the field that contains the highway route numbers.
Step Six
Select or create a rule from the Rules drop-down. The pre-defined Highways and Interstate rules that are included with MAPublisher follow conventional mapping patterns, but if you want to customize the setup of your shields, click the Edit button. Once you are satisfied with your rules, click OK to return to the MAP LabelPro dialog box.
Step Seven
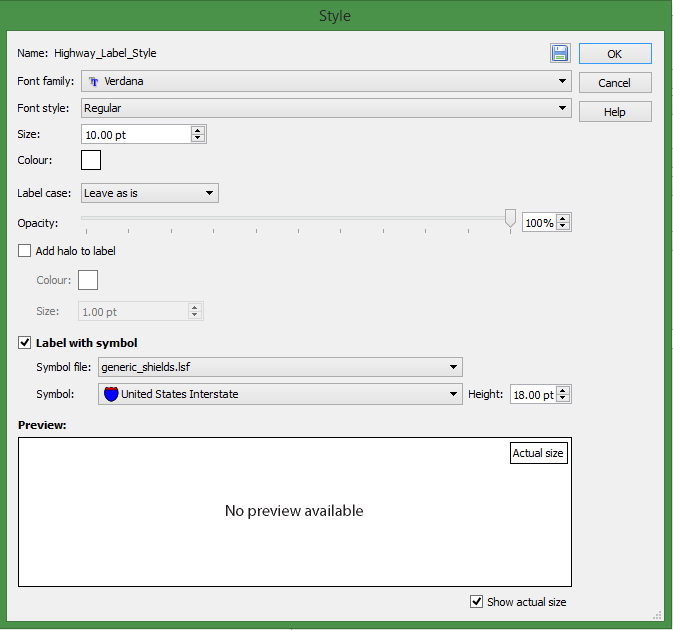
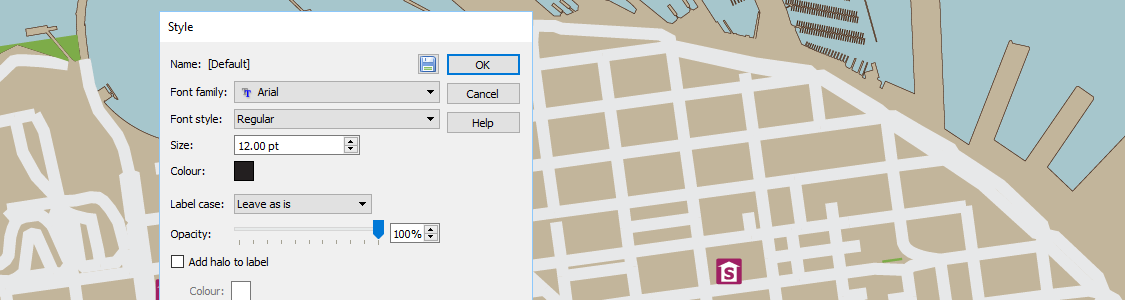
To customize the appearance of the shields, click the Edit button beside the Style drop-down. To add highway shields, click the Label with symbol check box to enable its settings. The Symbol file is the shield library, where you can pick between Canadian, US State and generic shields. The Symbol drop-down is where you can pick the shield from the shield library specified. All shields will have the same symbol, if you want multiple shield shapes on your map, you’ll have to create label filters as outlined previously in step four. The Font family, Font Style, Size, Colour and Label case affect the appearance of the text within the shield. Click OK when finished setting the style.
Step Eight
Back in the MAP LabelPro main dialog box, click the “Output suppressed labels to” check box. This moves all excess labels such as duplicate shields or shields that clash with other features on your map to a Suppressed layer. You can view features on the Suppressed layer after to see which labels were not included and you can decide to keep or delete them.
Step Nine
Click Label to begin the labeling process.
Step Ten
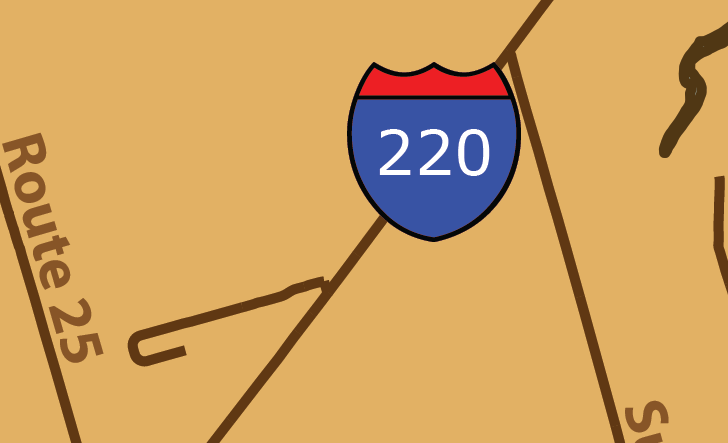
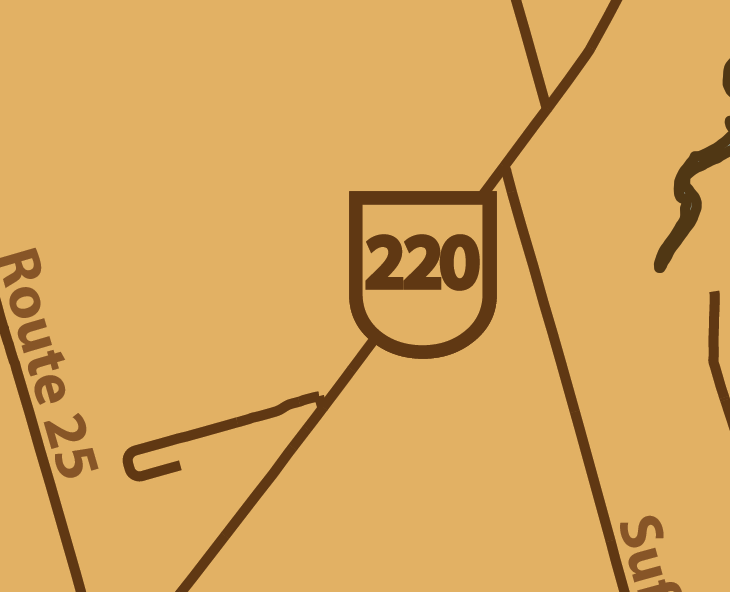
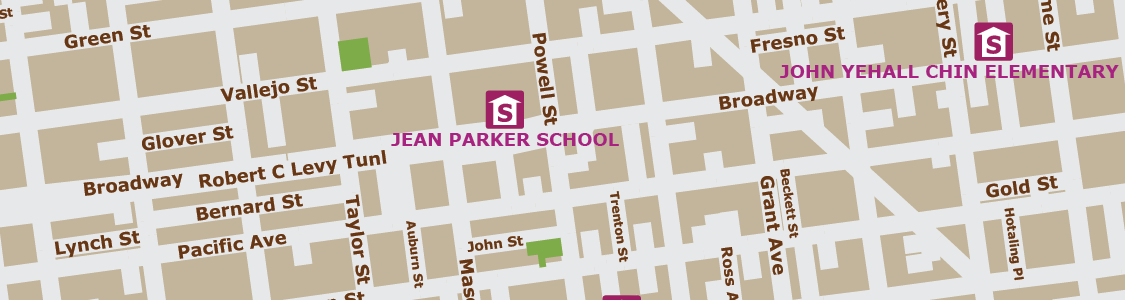
When all of your shields are generated, you can do some additional customization. In the Illustrator Layers panel, select all of your shields. From here, any changes to the colour, stroke colour and other settings you would use on objects, will be applied to your shields. With this functionality, you can create the exact shields you want for your map.
Using a Web Map Service (WMS) is a great way to easily get up-to-date imagery for your project. An issue you may run into, however, is that a server may not allow you to download images over a certain size (in pixels). The image resolution provided on most servers is usually high enough for most projects but there may be some instances where a higher resolution is needed (e.g. a poster-sized map or a web map that covers a large area).
One possible workaround for this issue is to get several small-area, high-resolution images from a WMS and then mosaic them together to make one large-area, high-resolution image. Here, we will use the City of Toronto Web Map Service to:
Get an image of downtown Toronto
Tile the image to split it into four smaller images
Use the extents of the four tiled images to get four high-resolution images
Mosaic the images to one large high-resolution image
Download an Image from the Web Map Service
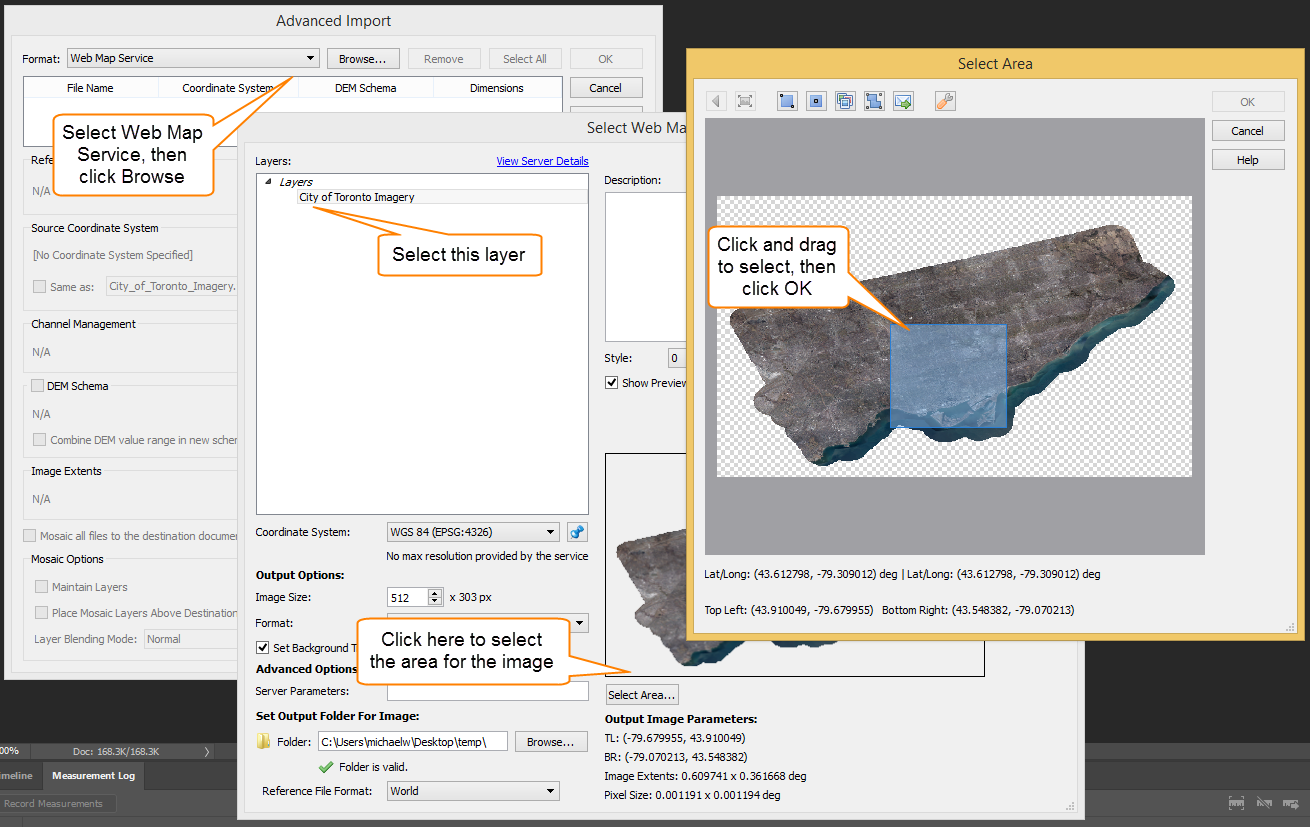
First we will get an image of downtown Toronto from the City of Toronto WMS. Click the Advanced Import button on the Geographic Imager panel. Select Web Map Service from the Format drop-down and click Browse. Click Load services from Avenza and select City of Toronto WMS from the list.
Download an Image from the Web Map Service (Click for larger version)
Select City of Toronto Imagery from the list of layers. Click Select Area then drag a box to zoom in on an area of downtown. Click OK to return to the previous window. There is no need to change the image size because we will use this image to get the extents of a higher resolution image. Leave the other options as default and click OK to load the image, and click OK again on the Advanced Import dialog box. The selected image will now open in Adobe Photoshop.
Tile the Image
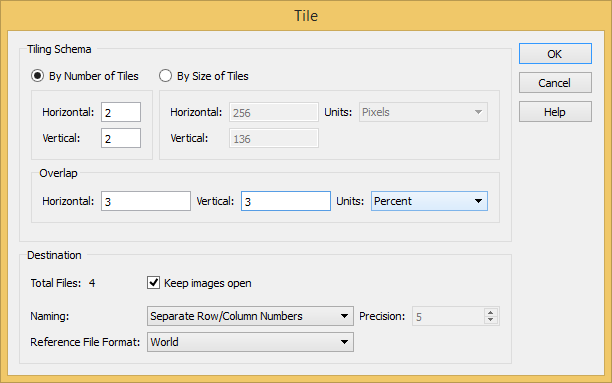
Next, let’s tile the image to split it into four separate images. Open the Tile dialog box from the Geographic Imager panel. Choose By Number of Tiles as the Tiling Schema and change Horizontal and Vertical to 2. Change the Horizontal and Vertical Overlap to 3 percent. It’s important to have overlap between the images so they will mosaic properly when the data is transformed.
Tile the Image (Click for larger version)
Click the Keep Images Open check box to enable it. Choose a name and location to save the tiles. You can save them to a temporary location because they will not be part of the final product. The four image tiles will open in separate tabs.
Estimate a Web Map Service’s Maximum Image Size
Open the City of Toronto Imagery WMS again and select an area. In this service, as with many other services, the maximum resolution is not provided. We can, however, use trial and error to find the largest image that the service will allow us to download. A WMS has a maximum allowed width and height set for an image request. The maximum width is usually the same as the maximum height.
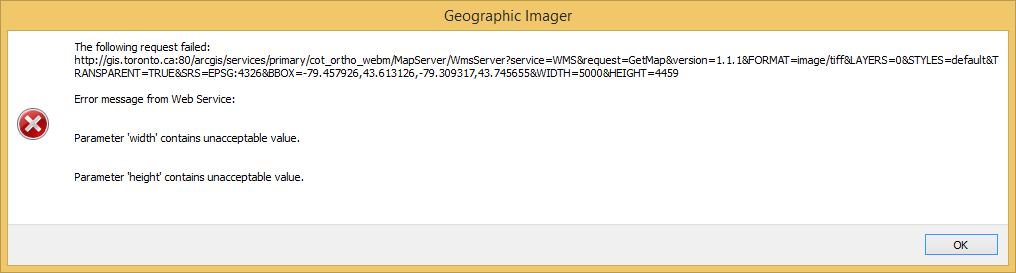
Set the resolution of the image by adjusting the width of the image in pixels under Output Options. First, try setting Image Size to a pixel width of 5000. Height will update automatically based on the image’s dimensions. Click OK and you will see an error that says “Parameter ‘width’ contains unacceptable value” (or height if the images higher than it is wide). OK the error to close it.
Estimate a Web Map Service’s Maximum Image Size (Click for larger version)
To estimate the maximum width and height allowed by a web service, you can adjust the image size to see when the server returns an error. The maximum width and height for the City of Toronto WMS is about 4000 pixels.
Downloading and Mosaicking Large Images
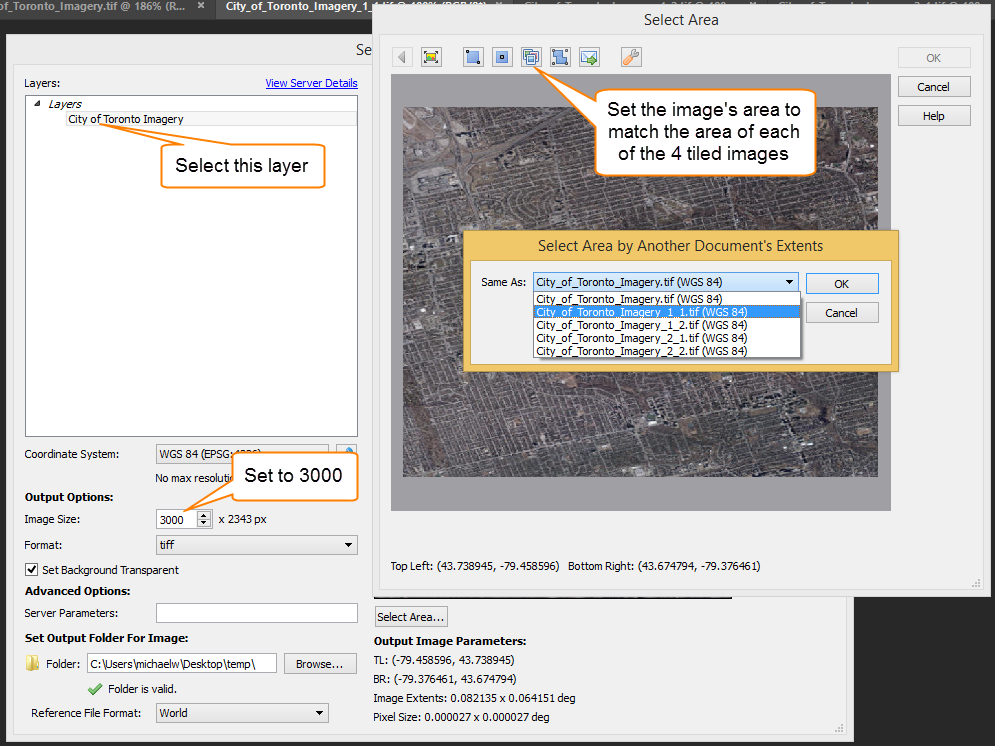
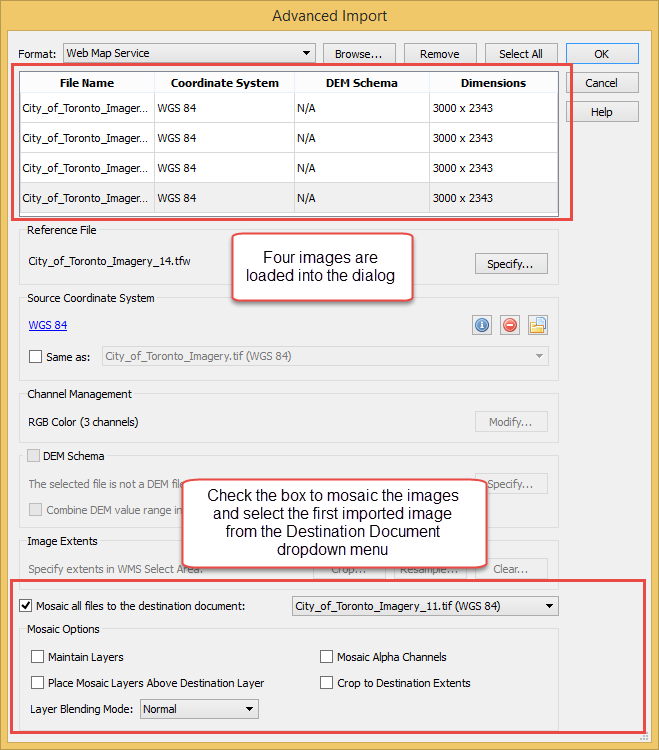
Next we will use the geographic extents of the four tiled images to download four higher resolution images with matching extents then mosaic the images together. Import an image again from the City of Toronto WMS using Advanced Import. Select an area, click Select Area by Another Document’s Extents and choose the first tiled image from the dropdown menu. The Select Area dialog will display an area matching that image’s area. Click OK to return to the previous screen.
Downloading large images (Click for larger version)
Enter 3000 as the Image Size. Click OK to add the image to the Advanced Import dialog box. Repeat the above steps for each of the remaining three tiled images.
Creating a mosaic of four images (two by two) makes a single image just under 6000 pixels wide because of the overlap between the tiles (the height will vary depending on the area you selected). This is larger than the maximum size allowed by the WMS. Check the box Mosaic All Files to the Destination Document and select one of the images currently loaded in the dialog window from the drop-down menu. Leave the other options unchecked and select Normal as the Layer Blending Mode. This will merge the four images into a single document.
Mosaicking large images (Click for larger version)
Avoid Downloading Images Greater than the Maximum Image Resolution
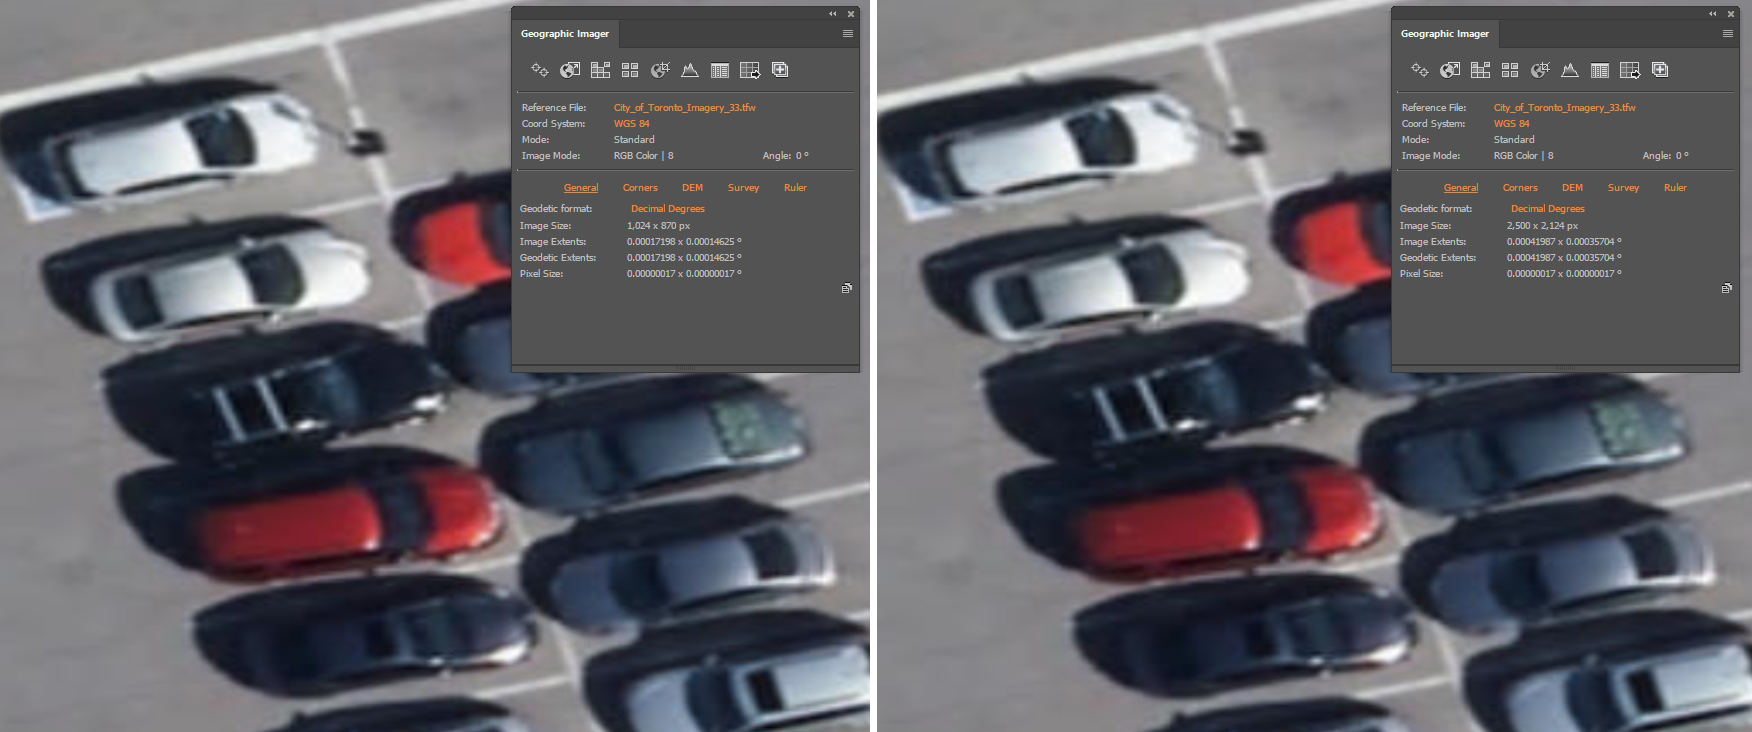
One further consideration when getting imagery from a service is to avoid requesting an image that is higher resolution than the full resolution of the image on the service. In this case, the number of pixels in the image and, therefore, the image size will increase without any increase in the actual resolution of the image.
To see an example of this, get an image from a WMS by zooming in on a small area and downloading images of varying resolution. The pictures below show two images of the same area side by side at different resolutions. The image on the left is 1024 by 870 pixels and the one on the right is 2500 by 2124 pixels but there is no noticeable difference between them. This is because the image exceeds the resolution of the image on the server so the WMS resamples the image to a higher resolution, creating duplicate pixels.
Avoid Downloading Images Greater than the Maximum Image Resolution (Click for larger version)
Configure which MAP Layers will be labeled and which layers will be denoted as obstacles. Obstacles are map objects that are included in the conflict resolution decision making process that must be avoided when trying to place a label. MAP LabelPro dialog box displays all MAP Layers, label settings, and control in an easy to use interface.
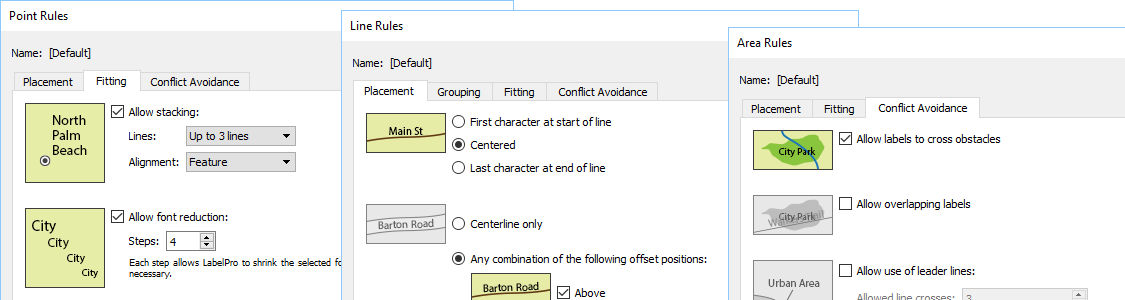
MAPublisher LabelPro provides users with an intuitive graphical interface for setting up labeling rules. Each Point, Line and Area rule dialog box has numerous label placement options for a high level of label detail and a variety of configurations. Pre-defined default rules are a good starting point out of the box, however customization can make your labeling even better.
Maintain label consistency with MAPublisher LabelPro styles. Customize label sizes, fonts and colour. Line styles may also include symbols such as road or highway shields. Save style files and share them to maintain consistency across multiple user projects.
Verify that labels were successfully placed in accordance to the MAPublisher LabelPro configuartion—and placed in either Destination or Supression layers. If no Suppression layer is available, non-compliant text is ignored and is not generated. Once placed, the labels are considered standard text and may be modified using Adobe Illustrator or MAPublisher operations.
MAPublisher® LabelPro™ labeling is fast, efficient and customizable. Save countless hours of tedious post-labeling refinement of your map labels. It is the best cartographic labeling engine that offers a complete rule-based system for collision-free text placement in Adobe Illustrator.
Batch generate Label Filters to create multiple filters with only a few clicks. Automatically add leader lines for small features. Stack long, one-line labels into multi-line labels. Automatically reduce font sizes for better fitment. Achieve high-quality labels on curved line features. Fine tune label placement around points. And much more…