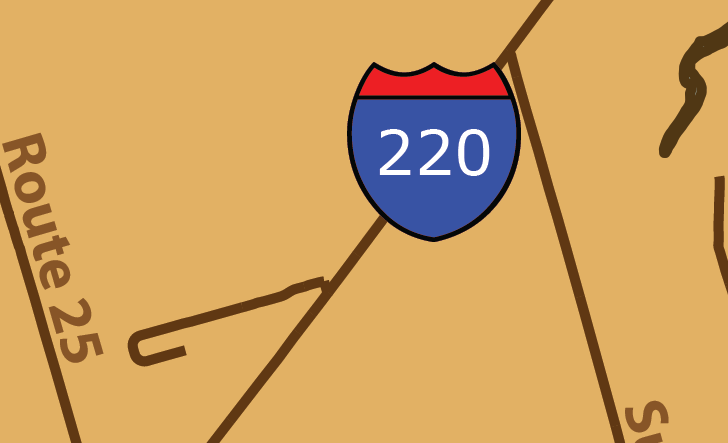
MAPublisher LabelPro intelligently labels your map layers using custom rules and styles. One of the popular uses of this feature is to create highway shields. The result is a cleaner map and is widely used on road maps around the world. While MAPublisher has many default options for highway shields, it is possible to create custom shields to improve your map as well. This blog will outline the steps to create and customize highway shields for your map.
Step One
Import your data into MAPublisher, ensuring your road line data has an attribute field for highway route numbers. Highway shields can work with any data type, however, traditional highway shields are created with a highway number with no additional characters. Using the integer data type enforces this and is recommended for highway shields.
Step Two
On the MAPublisher toolbar, in the Labels subsection, click the MAP LabelPro button.

Step Three
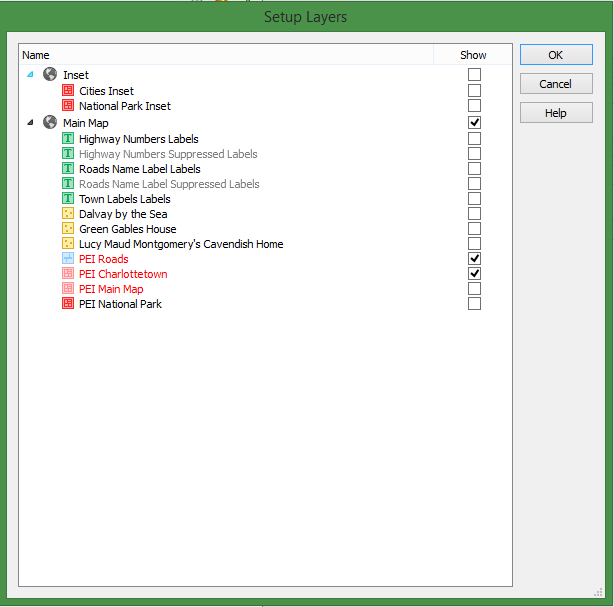
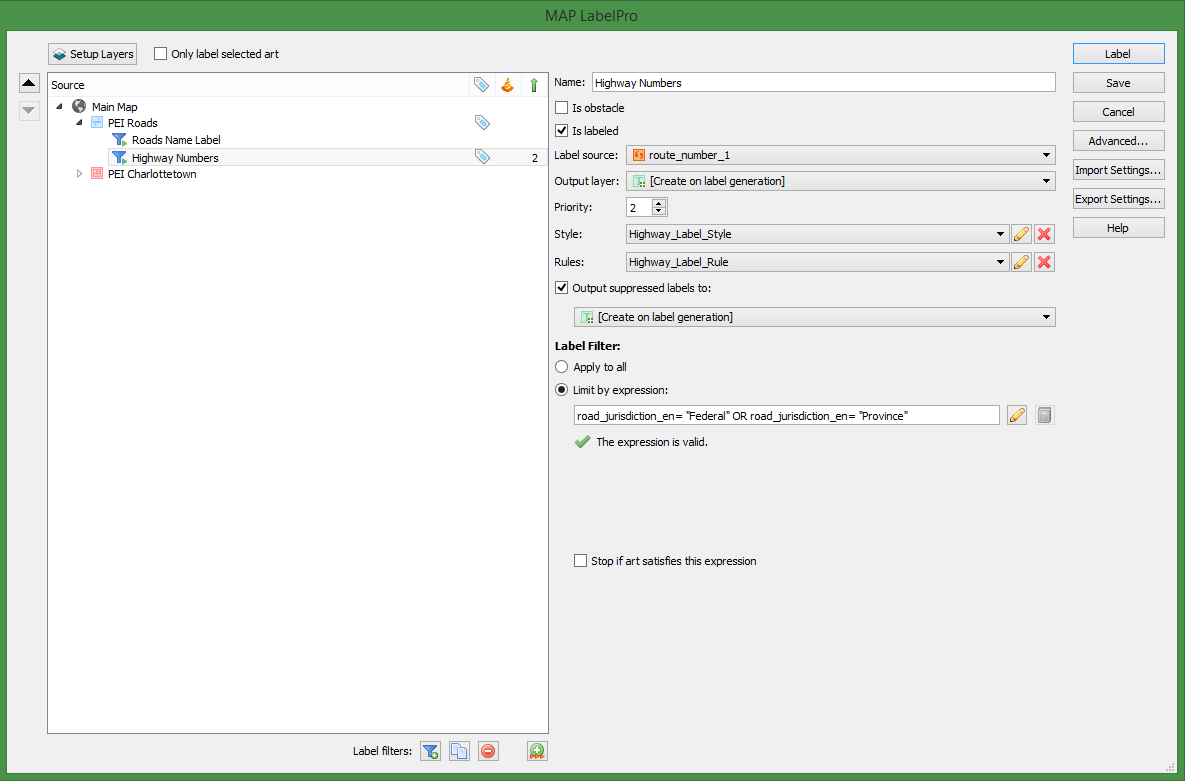
On the MAP LabelPro dialog box, click the Setup Layers button. This allows you to select which layers are going to be labeled or used as obstacles. This means you can label multiple features at the same time as the highway shields. Click the checkbox next to your roads layer and click OK.
Step Four
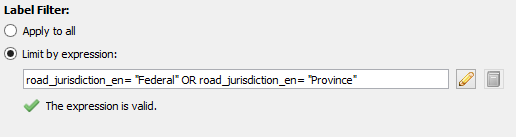
Optionally, you may want to only create highway shields on some of the roads within your road layer. For example, if your roads layer also contains roads that are not highways, you don’t want them labelled with a highway shield. The solution is to create a Label Filter. To do this, first create a new filter by clicking Add label filter button at the bottom of the dialog box. Next, in the Label Filter section, select Limit by expression and click the Edit icon. This opens the Expression Builder dialog box. In this example, the expression entered selects only roads that have a jurisdiction designated as “Federal” or “Province”. Only these roads will be labelled with a highway shield.
Step Five
If you didn’t create a label filter, click the layer in the Source list you would like to label. On the right side, ensure that the “Is labeled” checkbox is checked. Immediately below, in the Label Source drop-down, select the field that contains the highway route numbers.
Step Six
Select or create a rule from the Rules drop-down. The pre-defined Highways and Interstate rules that are included with MAPublisher follow conventional mapping patterns, but if you want to customize the setup of your shields, click the Edit button. Once you are satisfied with your rules, click OK to return to the MAP LabelPro dialog box.
Step Seven
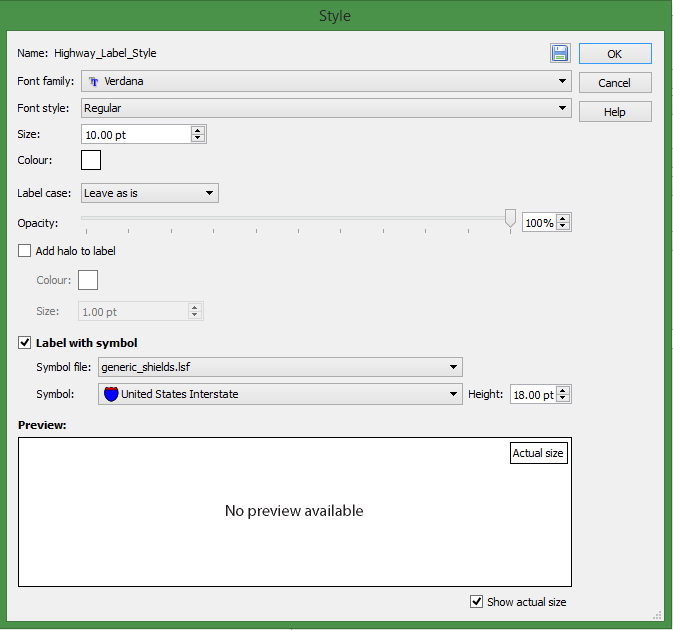
To customize the appearance of the shields, click the Edit button beside the Style drop-down. To add highway shields, click the Label with symbol check box to enable its settings. The Symbol file is the shield library, where you can pick between Canadian, US State and generic shields. The Symbol drop-down is where you can pick the shield from the shield library specified. All shields will have the same symbol, if you want multiple shield shapes on your map, you’ll have to create label filters as outlined previously in step four. The Font family, Font Style, Size, Colour and Label case affect the appearance of the text within the shield. Click OK when finished setting the style.
Step Eight
Back in the MAP LabelPro main dialog box, click the “Output suppressed labels to” check box. This moves all excess labels such as duplicate shields or shields that clash with other features on your map to a Suppressed layer. You can view features on the Suppressed layer after to see which labels were not included and you can decide to keep or delete them.
Step Nine
Click Label to begin the labeling process.
Step Ten
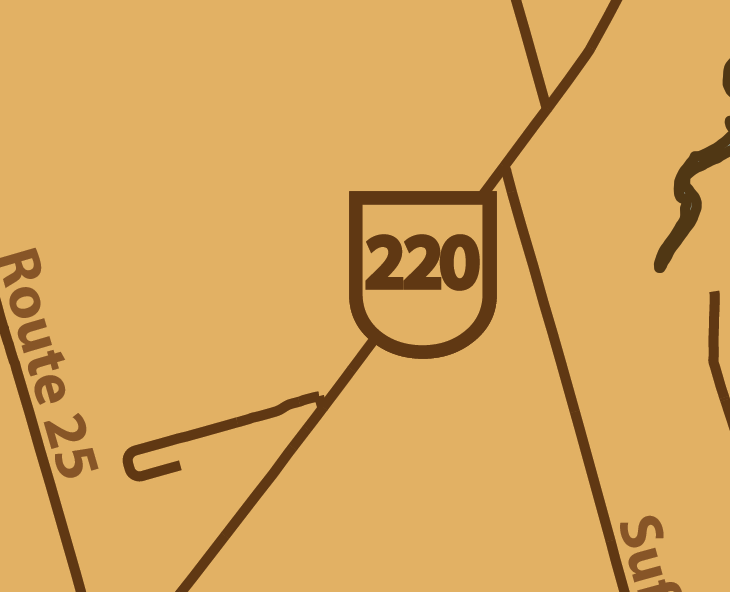
When all of your shields are generated, you can do some additional customization. In the Illustrator Layers panel, select all of your shields. From here, any changes to the colour, stroke colour and other settings you would use on objects, will be applied to your shields. With this functionality, you can create the exact shields you want for your map.