Géom@tique was founded at the end of the 1990s by introducing, for France and French-speaking countries, the distribution of MAPublisher for Adobe Illustrator. Through its position as a Value Added Reseller of Avenza products, Géom@tique is in contact, on a daily basis, with a wide variety of users who all have the desire to produce beautiful maps. With their vast knowledge of geomatics, they distribute our software, provide technical support, as well as certified training for Francophone users (one of their French MAPublisher trainings is coming up very soon). At this year’s Avenza User Conference, our friends Sophie-Anne and Alain presented with us an overview of how Géom@tique operates in France and, most importantly, highlighted the cartographic productions of some of the loyal and talented French-speaking users of MAPublisher and Geographic Imager they communicate with frequently.
The Avenza User Conference is an annual free virtual conference for map makers, GIS enthusiasts, and geospatial professionals worldwide who share a common interest in Avenza mapping technology. The conference includes a combination of virtual sessions led by experts who will share their experiences with Avenza mapping products.
The Avenza User Conference is an annual event that grows each year with incredible speakers and participants. Get inspired by mapping and industry professionals by joining us for #AvenzaUC2024. Register here for next year’s conference taking place on May 9th, 2024.
Sometimes we know enough about an image to georeference it in a faster manner than other images. In Geographic Imager, we call this type of georeferencing a Quick Georeference.
Quick Georeference is a method of georeferencing images that requires two conditions to be met:
The image is not rotated; in other words, true north is oriented at the top of the page
Two control points on the image are known, however these points cannot be aligned on either the X or Y axis
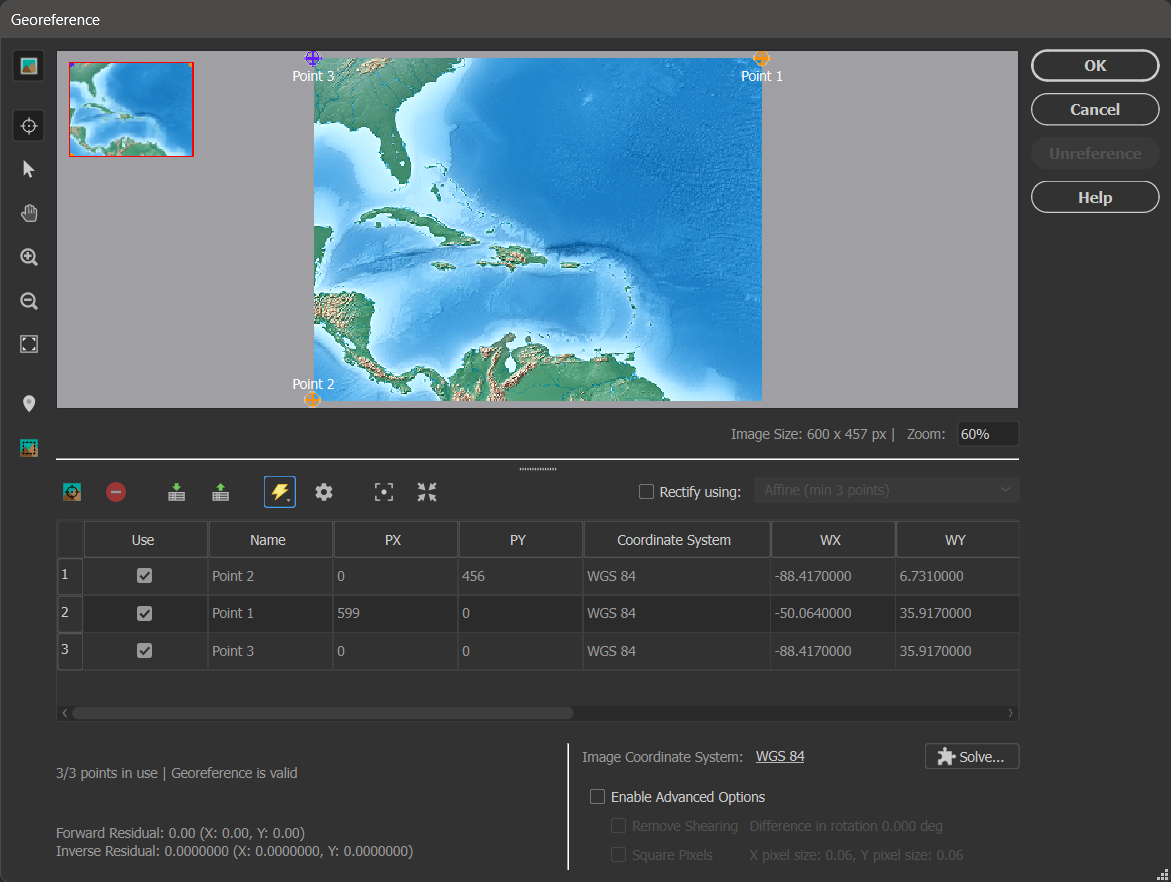
This article will show an example of quick georeferencing. The image used in this demonstration is called Americas_4.tif, and can be found in the Tutorial Data folder which is included with every installation of Geographic Imager.
After opening the image in Geographic Imager, you can confirm that it is aligned with true north. Then click the Georeference button on the Geographic Imager panel.
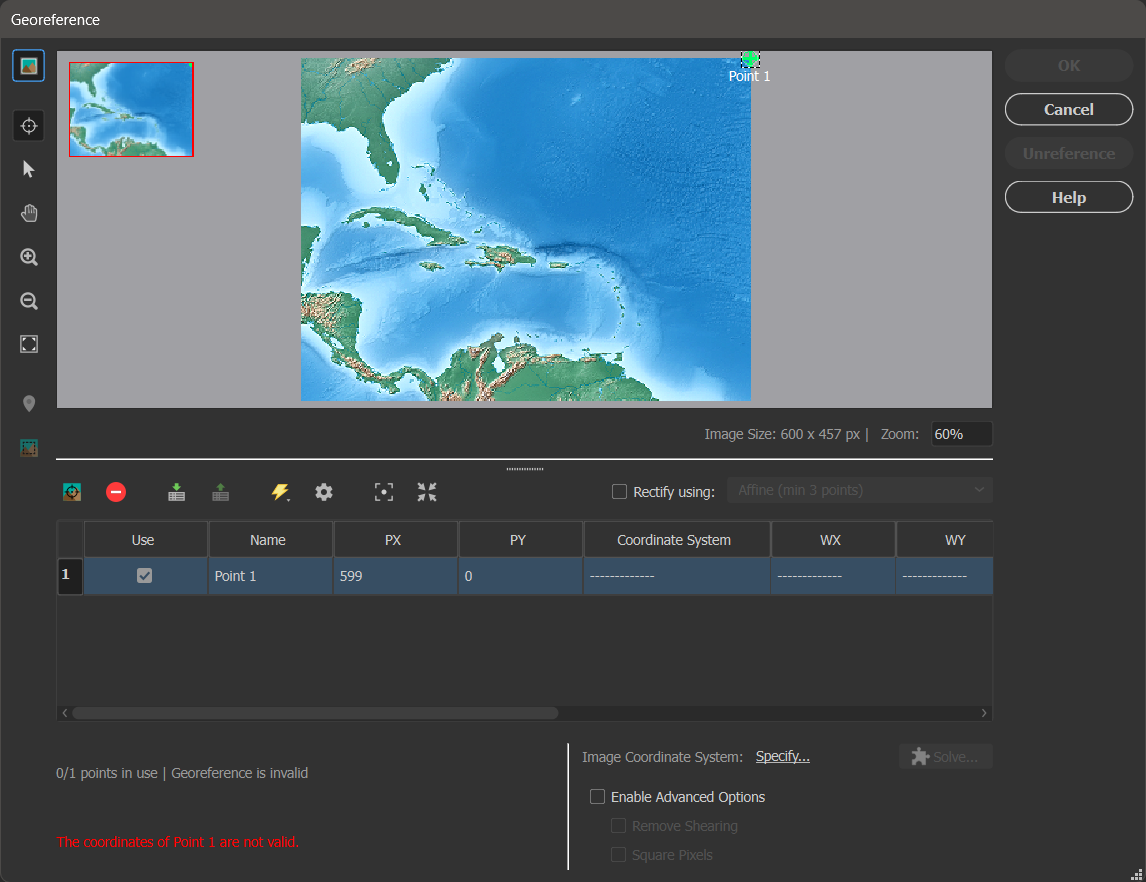
In the Georeference dialog box, you can click the Add Control Point button to do as such. Click anywhere on the image viewer to add a point. Point 1 will be added to the control point list. You can then adjust the pixel coordinates (PX and PY); these are the coordinates for the points on the image. Type 599 in the PX box and 0 in the PY box.
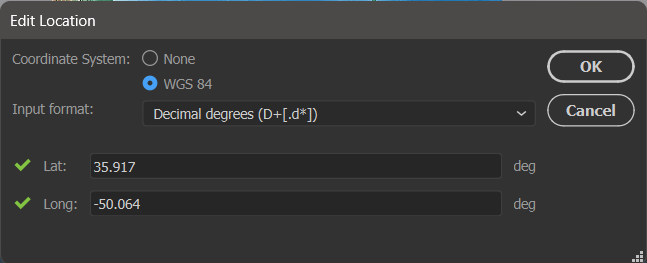
Next, you want to set the world coordinates that correspond to the pixel coordinates you just entered. You can double-click in the WX, WY or Coordinate System boxes to open the Edit Location dialog box. Here you want to select the WGS 84 coordinate system, and enter a Lat value of 35.917 and Long value of -50.064. After clicking OK, you will see that the world coordinates have been updated in the control point list.
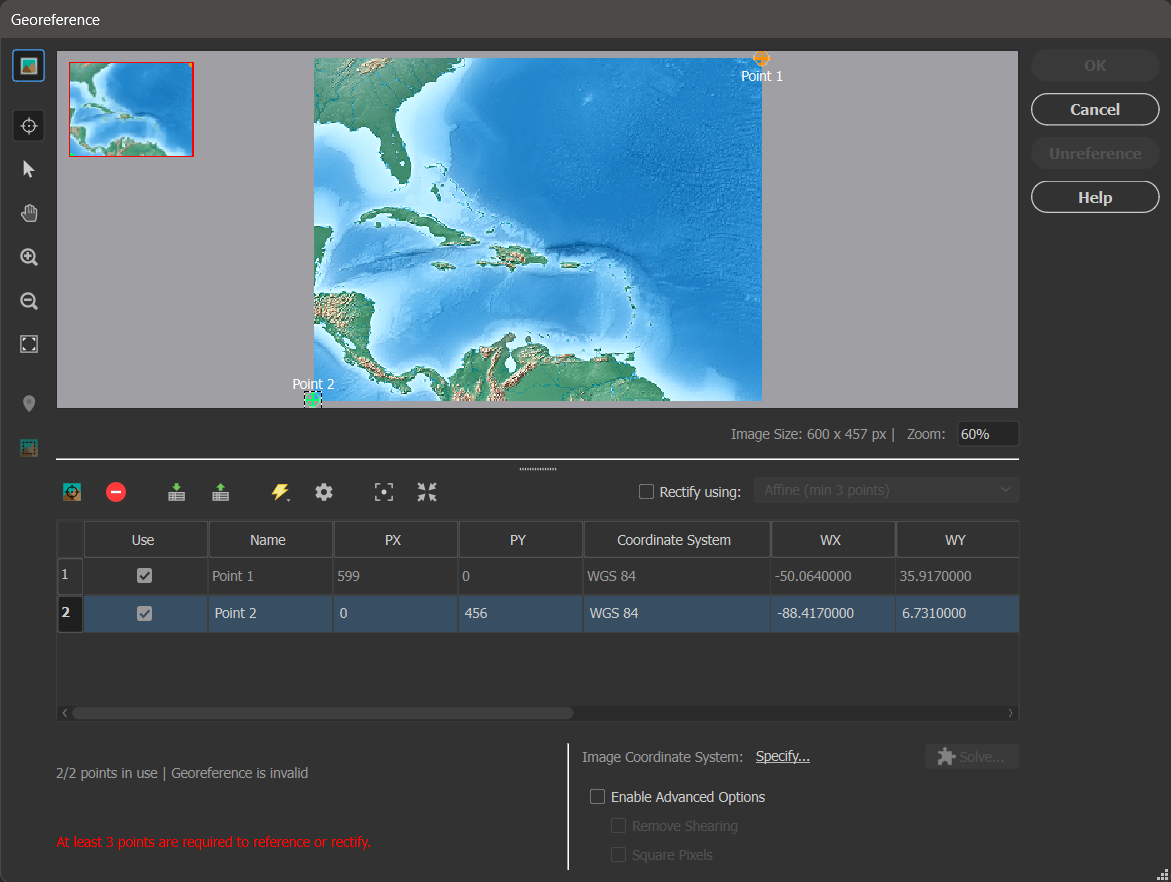
You now want to add your second control point at the location with pixel coordinates of PX = 0 and PY = 456. Following the above steps again, give this point the world coordinates of Lat = 6.731 and Long = -88.417.
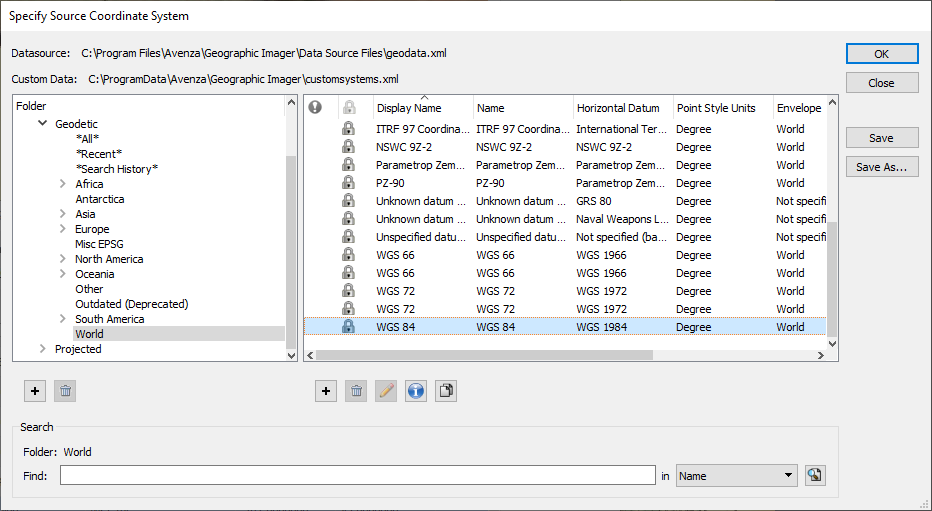
Now that you have added your two necessary control points to the image, you are ready to Quick Georeference your image. Next to the Image Coordinate System label, select the Specify… link. In the Choose Coordinate System dialog box, select the [No Coordinate System Specified] link. This opens the Specify Coordinate System dialog box, where you can select the Geodetic > World category, select the “WGS 84” coordinate system and click OK.
Back in the Georeference dialog box, select the Quick Georeference button (lightning bolt icon), and select By Two Reference Points (North/South aligned). You will notice that an additional control point is automatically added to the control point list and image view. Its world coordinates were calculated based on the existing two control point pairs. This occurs because a minimum of three control points are required to reference an image. It is also why the two control points you selected must not align.
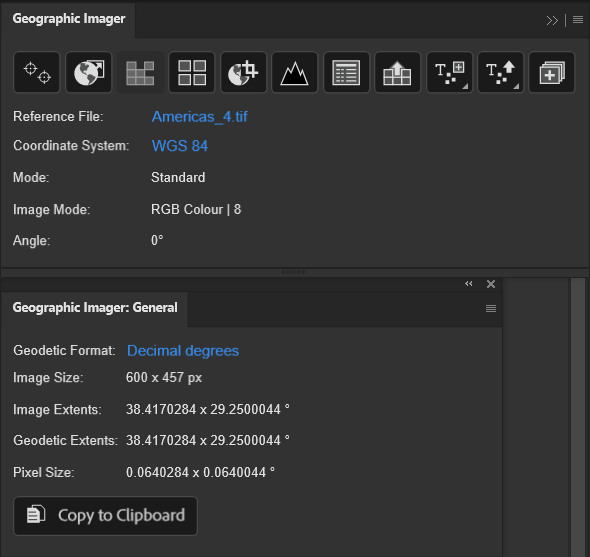
To complete your Quick Georeference, simply click OK. Voilà! You will see the reference information appear in the Geographic Imager panel, and further details can be found in the Geographic Imager: General panel.
You can also check out our video tutorial for Quick Georeferencing on YouTube:
To view the step-by-step instructions that constituted the material in this blog post, check out the Quick Georeference tutorial in our Support Centre!