


The upcoming release of Geographic Imager 3.2 introduces a new feature called Terrain Shader, used to apply color gradients and shaded relief to imported DEM images. Color gradients can be exported so that you can use them for other images or share them with other people.
You might want to take a look at our brief video about the Geographic Imager Terrain Shader on our Avenza YouTube channel.
In this blog, I’ll show you a quick workflow with Terrain Shader using one of the files from the Geographic Imager tutorial folder.
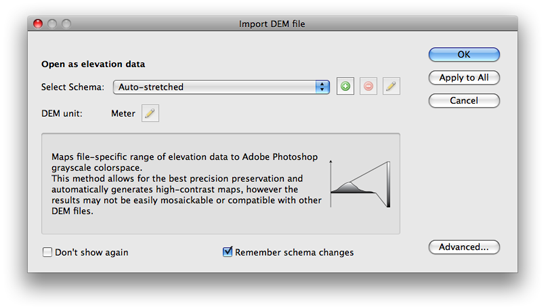
1) Open the DEM file called Yukon Water.dem from the Geographic Imager Tutorial Folder in Adobe Photoshop. Geographic Imager will automatically detect the file type so that you will see the “Import DEM File” dialog box(below).
When your workflow involves Terrain Shader, it is important to select an appropriate schema in the Import DEM file dialog box. For now, we’ll use the option “Auto-stretched”. We’ll return to this dialog box when we talk about an advanced use of Terrain Shader feature in another blog.
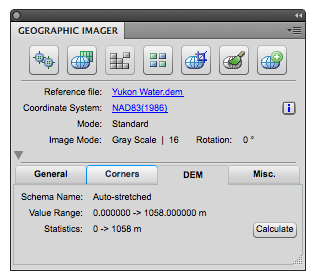
After the DEM file is successfully imported, you will see the geospatial information, the DEM schema and the value range information in the Geographic Imager panel. The panel has been redesigned and improved for version 3.2 (We think it works really well!)
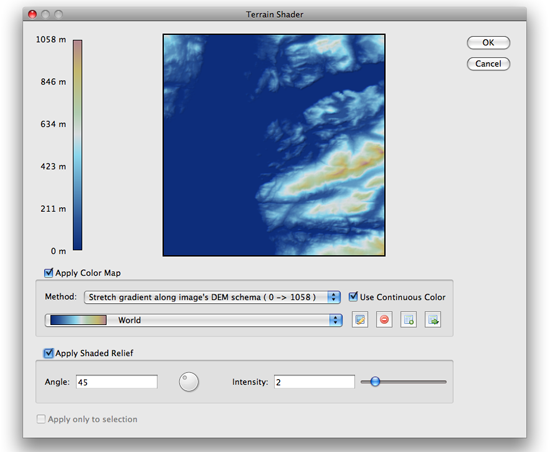
2) Click the Terrain Shader button.
![]()
In the Terrain Shader dialog box, on the left side, you can see the elevation range of the DEM file. There is a large preview image at the centre of the dialog box.
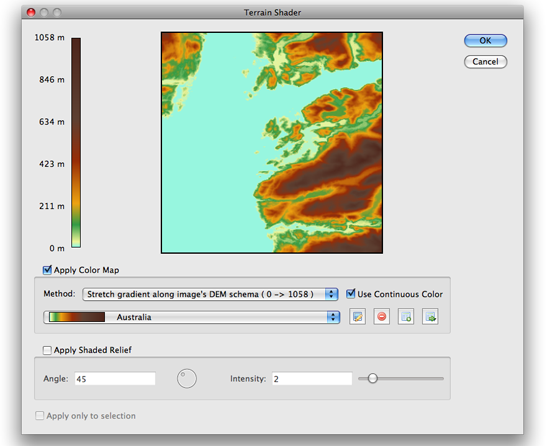
3) Click the check box beside “Apply Color Map” to apply a color gradient to the DEM image.
You can select one gradient from the preset gradients from the dropdown menu. Or you can edit the color gradient form the existing one. Click the pencil icon next to the preset dropdown menu. In the Edit Color Map dialog box, you can modify the gradient scheme. You can change colors, add ramps, adjust the ramp position, ….etc.
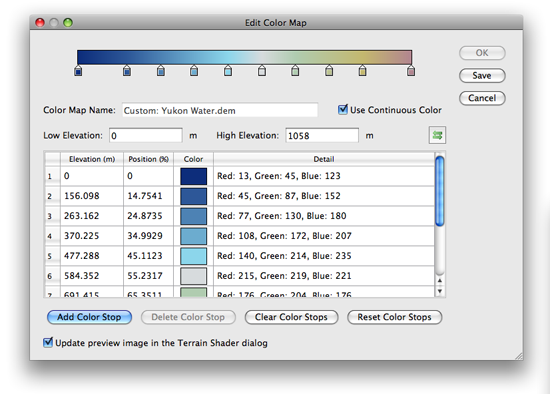
4) Click OK to apply the modication.
5) Another great function with the Terrain Shader is to apply the shaded relief effect at the same time. Click the check box beside “Applly Shaded Relief”.
You can adjust the angle of the source light and the intensity of the contrast. You can see how the settings affect the DEM image in the preview.
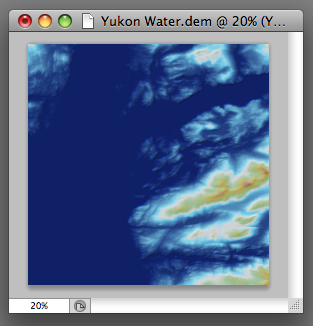
6) The DEM is stylized with a color gradient and a shaded relief effect.
Stay tuned for Introduction to Terrain Shader, Part 2