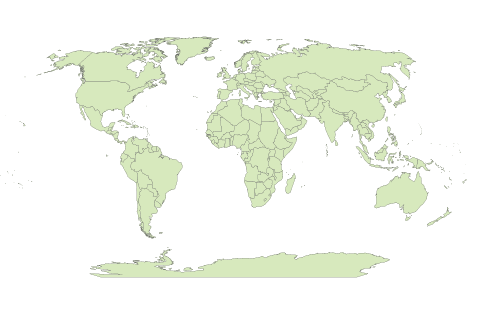
When transforming a world map in a geodetic system (such as WGS84) to a predefined projection (such as Robinson) using MAPublisher, the central meridian of the predefined projection should be set to 0 degree longitude as shown below.
Image 1: world map in WGS84
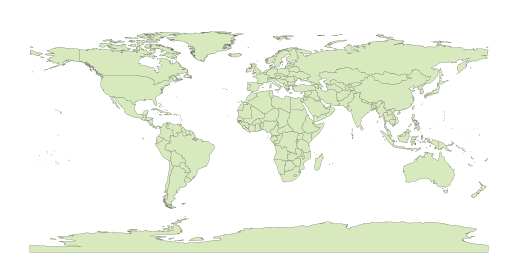
Image 2: world map in a predefined Robinson Projection
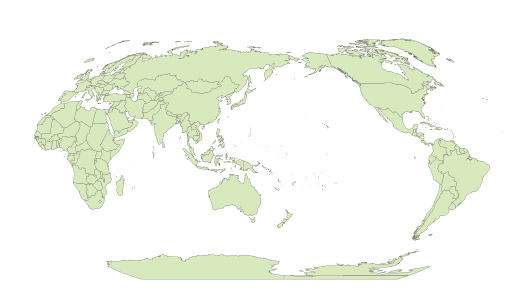
However, you might want to have a map with a different region centred on your map. For example, Image 3 below shows a world map with a part of Asia centred. In this case, the central meridian was set to 160 degrees East.
Image 3: world map in a custom Robinson Projection with a central meridian value set to 160 degree East
Today we’ll introduce how to create a custom coordinate system by modifying a predefined coordinate system. We’ll use an example using a GIS dataset world.mif available in the MAPublisher Tutorial folder. We are going to transform a world map to a custom central meridian value with the Robinson projection.
Step 0 : import the “world.mif” file from MAPublisher tutorial folder.
Step 1 : Open the MAP View Editor window from the MAP Views panel.
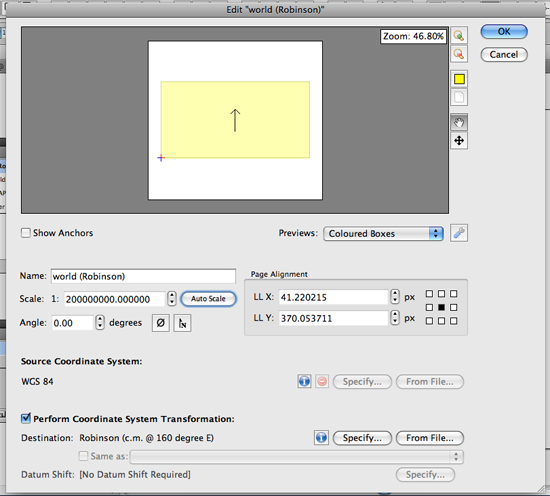
In the MAP View Editor window, you can see that the scale of the map, position of the map extent with respect to the current document extent, and most importantly the current coordinate system assigned to the MAP View.
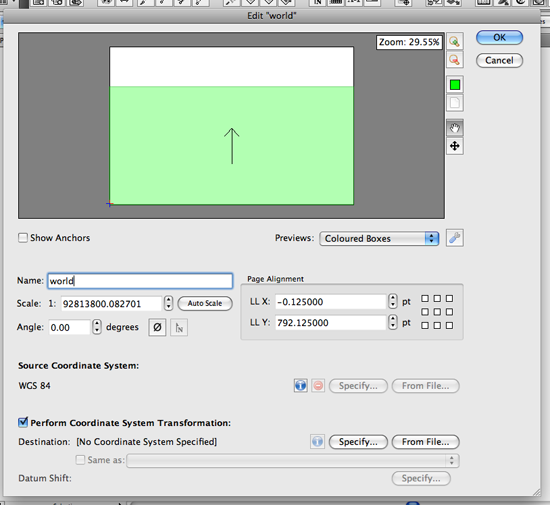
We are going to transform the MAP View from WGS84 to the Robinson projection with a custom central meridian value. Check the “Perform cordinate System Transformation option.
Click the Specify button under the “Perform Coordinate System Transformation” section. It will open the “Specify Destination Coordinate System” dialog box.
Step 2: Creating a custom coordinate system with the Robinson projection
We are going to create a custom coordinate system based on the Robinson projection by modifying the existing Robinson projection. Find the existing Robinson projection from the list.
On the left side, navigate to Coordinate system > Projected > World. Highlight the folder “World”. You will see the list of the predefined coordinate systems available on the right side of the window. Find the “Robinson” and highlight it.
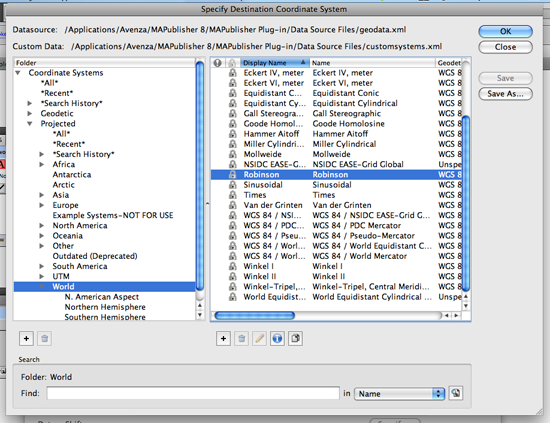
Once the predefined Robinson projection is highlighted, click the Copy button ![]() at the bottom. It will duplicate the existing coordinate system and will open the “Projected Coordinate System Editor” dialog box for the duplicated coordinate system.
at the bottom. It will duplicate the existing coordinate system and will open the “Projected Coordinate System Editor” dialog box for the duplicated coordinate system.
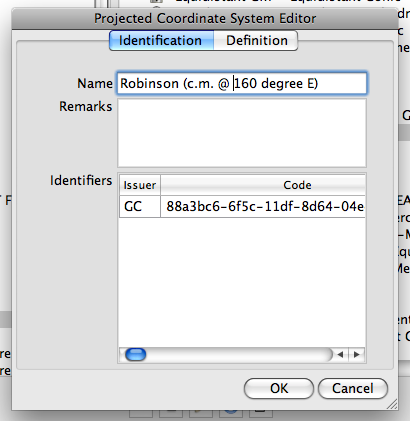
In the Projected Coordinate System Editor dialog box, there are two tabs: Identification and Definition. In the Identification tab, enter a new name for this customer coordinate system. This name will be used when you are searching the object.
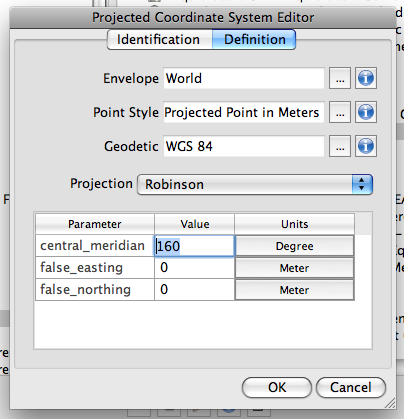
Click the Definition tab. Change the value of central_meridian from 0 (default) to 160. Click OK to apply this new setting. You have just made a custom coordinate system based on the existing Robinson projection.
Step 3: Complete the Transformation
Under the “Perform Coordinate System Transformation”, the new custom coordinate system just created is indicated. Now you are ready to transform your map.
Now the world map is successfully transformed into the custom coordinate system (Robinson with the central meridian set to 160 degree East).
You might want to take a look at this other blog about the new transformation engine implemented in MAPublisher 8.3.
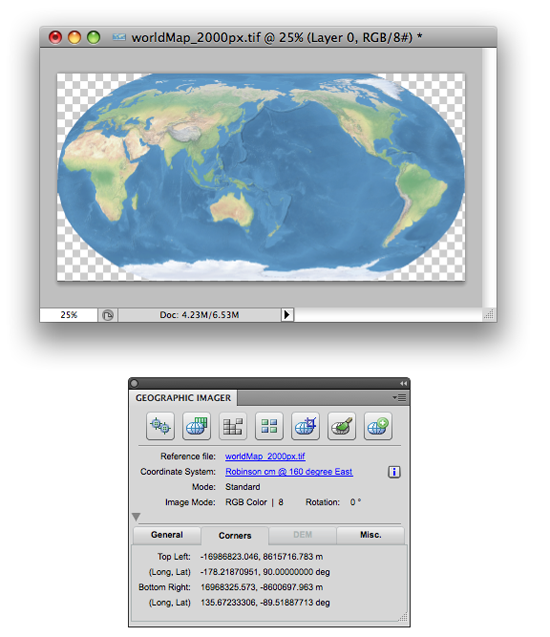
Transforming an image into a custom coordinate system with Geographic Imager
You can use the same approach to transform your image into a custom coordinate system.
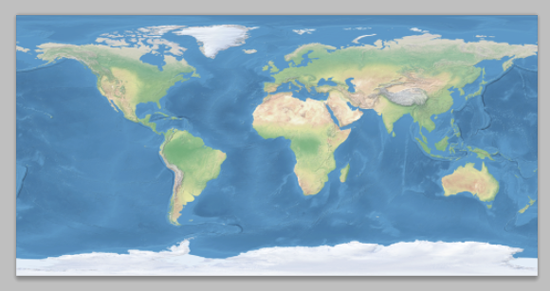
First, we open a world image that has a WGS84 coordinate system.
Click the Transform button in the Geographic Imager main panel. It will open the Transform dialog box.
Click the Specify button. Now repeat Step 2 illustrated above to create a custom coordinate system. Once you select the custom coordinate system in the “Specify Coordinate System” dialog box, it will be indicated in the Transformation dialog box (in the example below, a custom coordinate system “Robinson cm @ 160 degree East” is selected as a destination coordinate system).
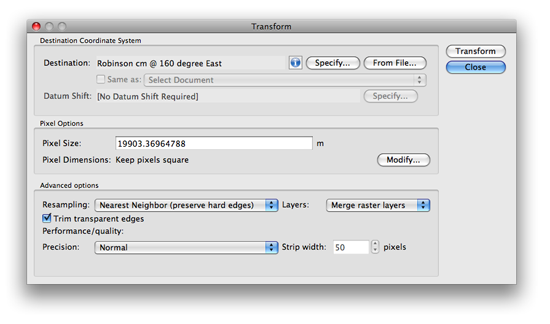
As soon as you click the Transform button, the transformation process will start. Once the transformation process is completed, the Geographic Imager main panel will indicate the new custom coordinate system name.