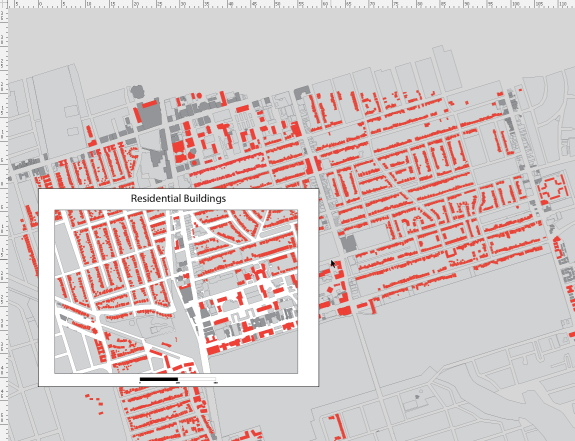
Ever have the problem that you want to make a map and you are waiting on the final extent or scale, but you want to get started adding data and working on the layout? Here are a couple of tips to make your life easier.
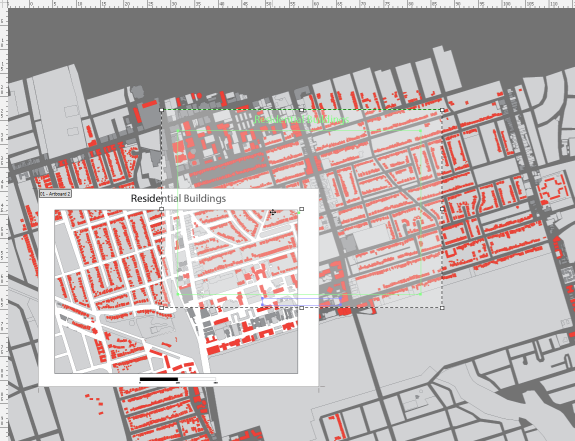
1. Move artboards around without moving your data
Geographic features in Adobe Illustrator are generally referenced to a known coordinate system. This coordinate system is mapped to Adobe Illustrator’s “Global Coordinate System” which has its origin at the top-left corner of the first artboard in a document. What this implies is that artboards can be moved around within this reference system in order to show different geographic data on the page. However, by default, moving an artboard moves any art that overlaps it as well. Obviously moving any referenced data around is going to ruin its spatial accuracy so this is something we want to avoid. Luckily there are two ways of doing this.
The first is to select the Artboard tool and click the Move/Copy artwork with artboard button to the right of the artboard name in the control panel above the document window.
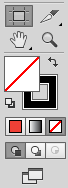

With this option turned off, you are free to move the artboard around without disturbing any of the geographic data.
There is one downside to this though: you may have map elements such as titles, legends, grids, masks etc. that you want to stay locked in place on the artboard while you move it around the geographic data. The easiest way to do this is to simply lock any layers that contain geographic features, unlock the map elements, and activate the Move/Copy art with artboard option.

When the artboard is repositioned, your data will stay in the correct geographic location and your map elements will move with the artboard, keeping the same relative position.
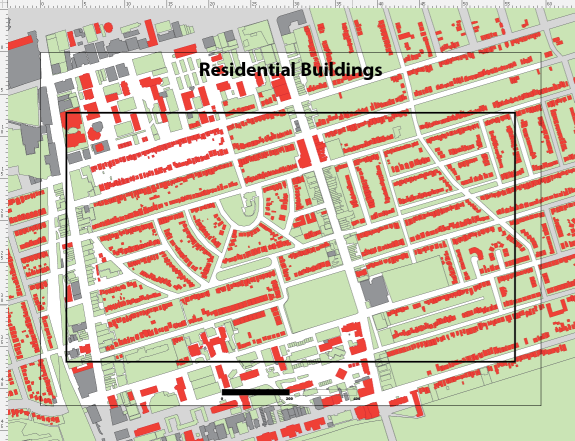
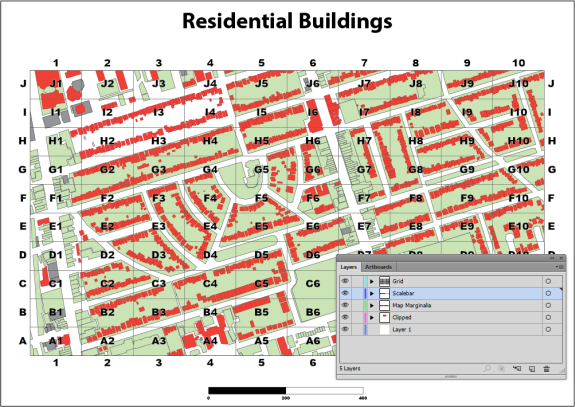
2. Set up a clipping mask in conjunction with a grid
The previous example used a white polygon with a hole in the middle as a mask to provide whitespace around the edge of the map. Another way to achieve this is to use a clipping mask to hide geographic features outside the extent of the mask. This works well by itself, or when combined with a grid or graticule layer.
We have taken the previous example, deleted the mask and adjusted the colour of the background polygons slightly. We have also added an AOI polygon that will serve as the clipping mask extent.
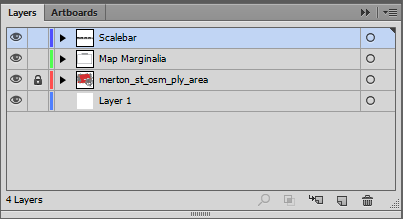
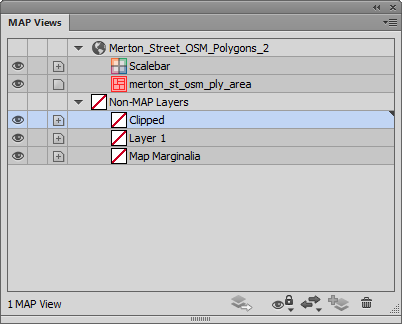
To create a clipping mask, the first thing we’ll make a new layer called Clipped. Make sure that it is a non-MAP layer (verify this in the MAP View panel).
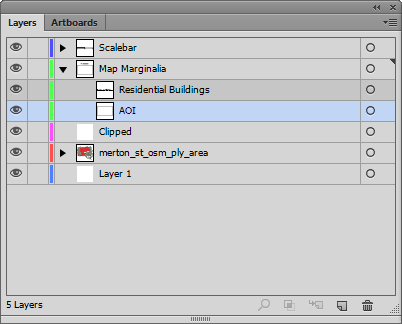
Next, drag both the AOI layer and layers that contain geographic data into the Clipped layer making sure that the AOI rectangle is above the layer holding the geographic features.
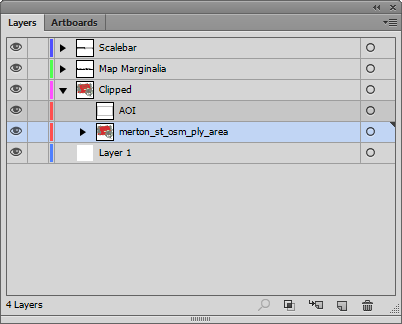
Now if we select the Clipped layer and click on the Make/Release Clipping Mask button (Second from the left at the bottom of the panel) we should see the AOI rectangle become invisible and the MAP layer is visible within the extent of this path.
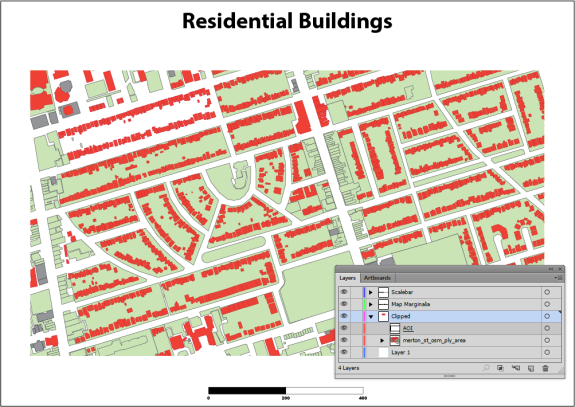
We can now add a grid over the top of the clipped area using the Grids & Graticules tool. You will find that the default extent of the grid is the same as the spatial data. You will need to resize the grid to match the clipping mask.
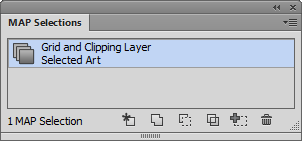
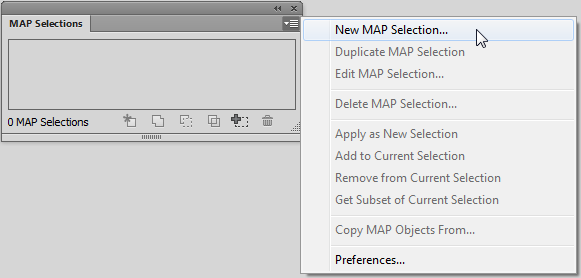
If you want to change the spatial extent of the map you have to adjust both the clipping polygon and the grid. It would be nice to group them and resize it together, but Adobe Illustrator doesn’t allow groups to span multiple layers. One way around this is to use a saved selection. To do this, select the clipping mask and the MAPublisher Grids, then choose Select | Save Selection. Give the selection a name like Grids and Clipping Mask.

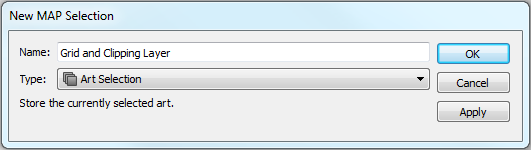
Now if you need to adjust the spatial extent of the map you can quickly choose the saved selection and resize the clipping mask and grid or move them both around the artboard simultaneously.