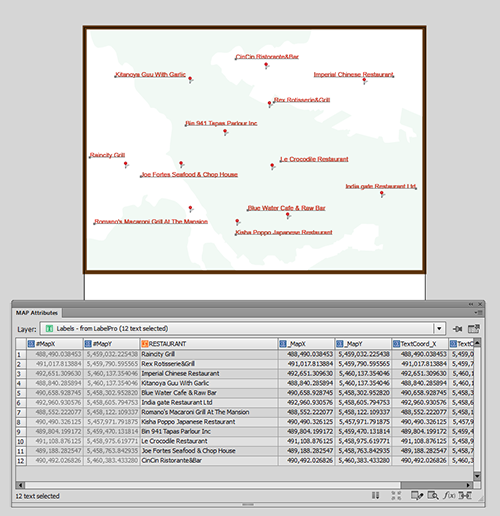
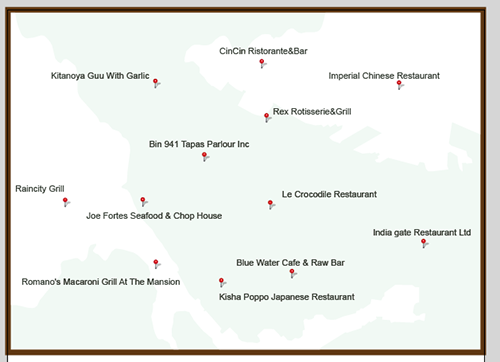
After a text placement engine places labels (e.g. annotations or labels) some manual adjustment is usually required. The major reason for this task is to avoid text colliding with other objects and to improve map aesthetics and composition. Here is an example map with the position of labels manually placed and adjusted. What do you usually do when updating your map and you have to update those labels?
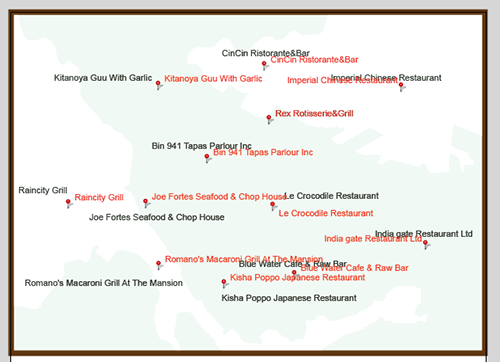
When running a text placement engine, it is common that the placed labels (in red) do not match with the position of the existing labels (in black). Have you ever thought that it would be useful if the updated labels can be positioned in the same place as existing labels? This is definitely possible using a combination of MAPublisher features.
Workflow involved to perform this task:
- Obtain the position coordinate of existing text objects
- Create new attributes to record #MapX and #MapY of each text object insertion point
- Export the attribute table as a text file
- Transfer the deteremined coordinte values of the text objects to the MAP layer (point layer in this example)
- Join Tables using a common attribute between two tables
- Place labels for the MAP layer
- MAP LabelPro or Label Features
- Adjust the position by those determined coordinate values for the text objects
- Applying the recorded value to #MapX and #MapY
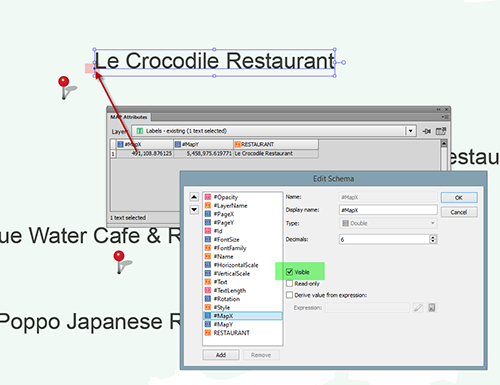
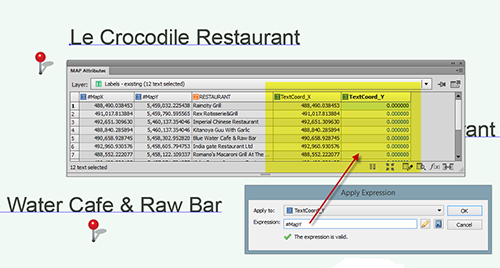
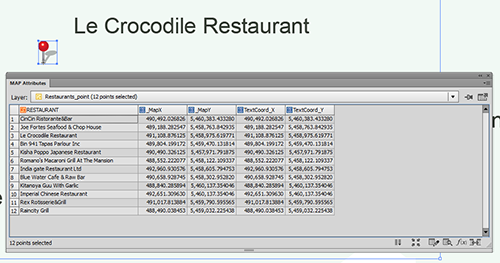
Step 1: Find the coordinates of the text insertion point from a text layer.
Every map object (point, line, area, image, and text) has a coordinate. MAPublisher calculates an insertion point when map objects are added to the artboard. For labels, a text insertion point can be seen as an anchor point or the square dot that is at the beginning of a text object. In this example, the text insertion point is placed at the lower-left corner of the word “Le Crocodile Restaurant” (highlighted in the red color in the screencapture below). The coordinate of this text insertion point is represented by the #MapX and #MapY attributes in the MAP Attribute panel. These two attributes are considered MAPublisher properties and are usually hidden. To display them, change their setting to “Visible” in the Edit Schema window as shown below.
Step 2: Record the coordinates of the text insertion point from a text layer.
Make the #MapX and #MapY coordinate values as useable attributes. Create new attributes called “TextCoord_X” and “TextCoord_Y”, then copy the values from #MapX and #MapY using Apply Expression.
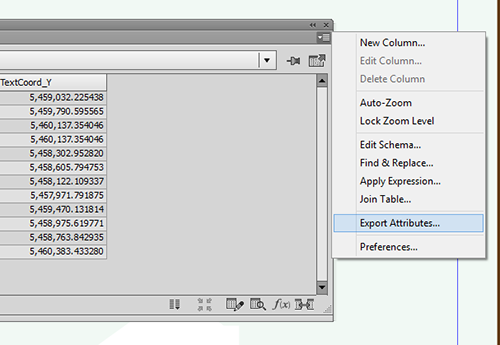
Step 3: Prepare to copy coordinates of existing labels to the point layer.
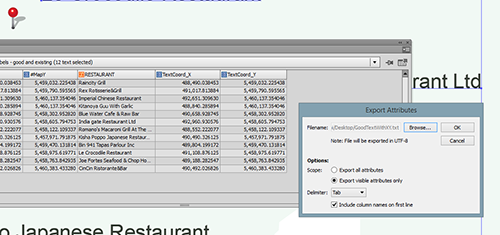
The coordinate values of the text insertion coordinate of a text layer are now copied. The next step is to copy these coordinates from the text layer to the point layer. A simple method to do this is to use Join Tables based on a common attribute. In this example, the string field “RESTAURANT” is the common field in both text and point layers to make a connection. If you already have some other attributes (i.e. object ID or feature ID in both the text layer and the point layer, you should use that). Export the attributes as a text layer from the MAPublisher Attributes panel options menu.
Step 4: Join the Point layer to the exported attributes table.
Now, create a table join between the point layer table and the exported attribute table using the Join Table feature.
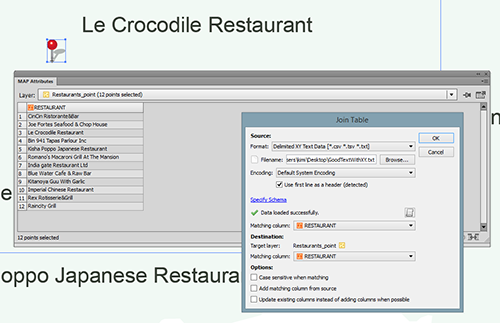
Below is the result from joining the tables together. There are also _MapX and _MapY columns because all visible attributes were exported. While the the step of copying attribute to TextCoord_X and TextCoord_Y was not totally be necessary, having columns named _MapX and _MapY could avoid some confusion because the point layer also has #MapX and #MapY columns. In this case, having attributes clearly indicating the values from the text insertion point is what is most important.
Step 5: Place labels with MAPublisher (inherit the attribute values from the point layer to text layer)
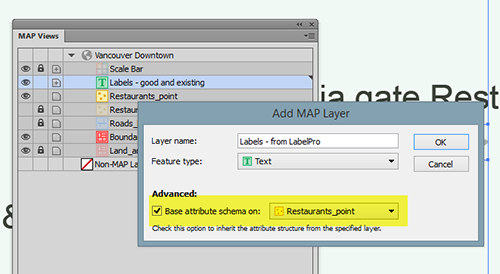
Now, place labels with MAPublisher using either Feature Label or MAP LabelPro. The important step here is to inherit the attributes from the point layer to the text layer (the target layer for generating new, updated labels).
When creating a new Text MAP layer, make sure that the “Base attribute schema on:” option is checked. This will allow the text layer to inherit the attributes from the point layer.
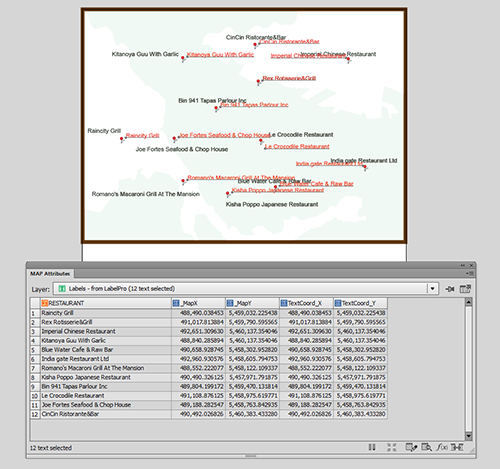
Below is the result of placing labels with MAP LabelPro (red labels). The result (in terms of the attribute structure) should be the same if labels are placed using Feature Labels. The position of new labels are not the same as the existing one. The label position can now be adjusted using the TextCoord_X and TextCoord_Y values.
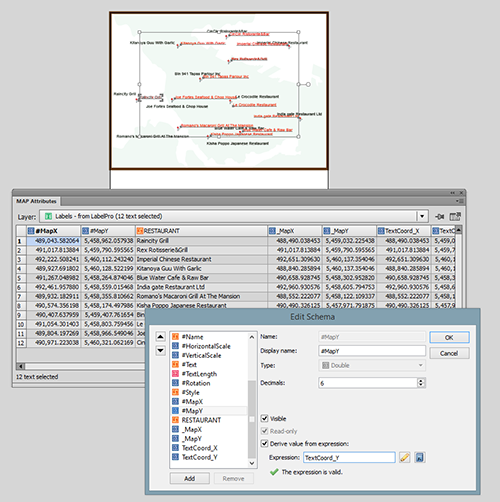
Step 6: Move the text objects by adjusting the #MapX and #MapY.
As illustrated above, the text position is obtained from the text insertion point. The next step is to apply the text insertion point coordinates to the #MapX and #MapY attributes of the point layer using an expression with the Apply Expression feature or use the “Derive value from expression” option in the Edit Schema dialog box.
Apply the TextCoord_X and TextCoord_Y values to #MapX and #MapY, respectively.
The labels are now positioned in the exact same location as the existing text layer.