


Having introduced some background information about text insertion point coordinate values in a previous post, it would be good to explore if this method works when trying to place text objects (annotations/labels) with a specific offset value. For example, if you have a point layer and there is an attribute for the offset value so that every object has a different offset value.
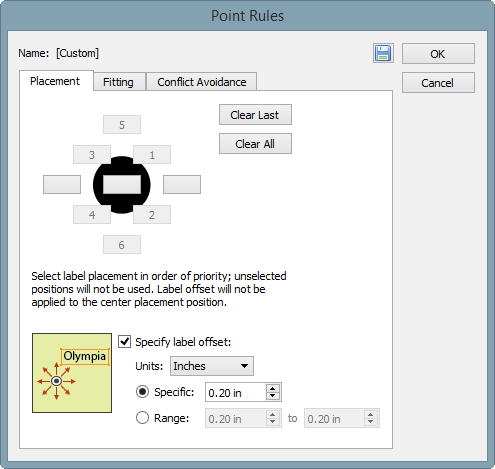
Placing text objects with a specific offset is possible in MAP LabelPro. You can specify the Label Offset value in the MAP LabelPro dialog box. However, this setting will be applied to all text labels. In the example below (see screenshot), all the text will be placed 0.2 inches away from the object. However, that does not help when every point has different offset value like this example. Also, MAP LabelPro uses page units, not the world/map units. In this example, the offset distance was specified in the world/map unit (metres).
There are two methods you can accomplish to make the text placed with offset value. The first method is the same as the step shown above. You can adjust the text placement position by calculating the “ideal” coordinate for the text insertion point. From a MAP layer (point, line, or area), generate text with a MAPublisher feature (MAP LabelPro or Feature Label). Then adjust the text position (maybe you will have to calculate a new position by adding/subtracting the offset values from the current point), then apply it to #MapX and #MapY. The second method is to adjust the position of the points first before labeling.
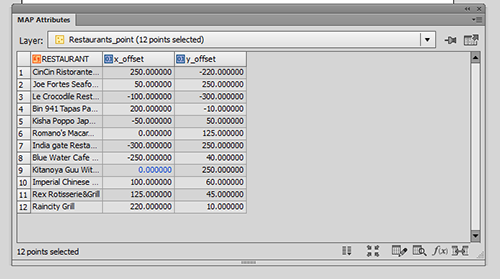
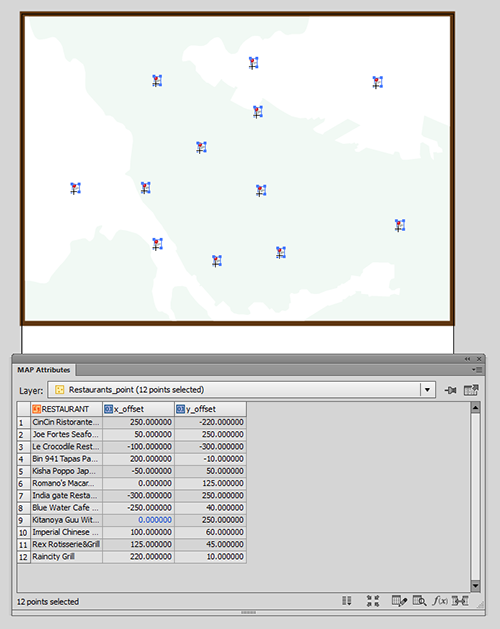
In the example below, a point layer with offset values in the attribute: x_Offset and y_Offset.
Step 1: Calculate coordinates with offset.
- Create a copy of the layer just because the point value will be adjusted.
- Make the #MapX and #MapY visible (so that it’s easy to see when calculating).
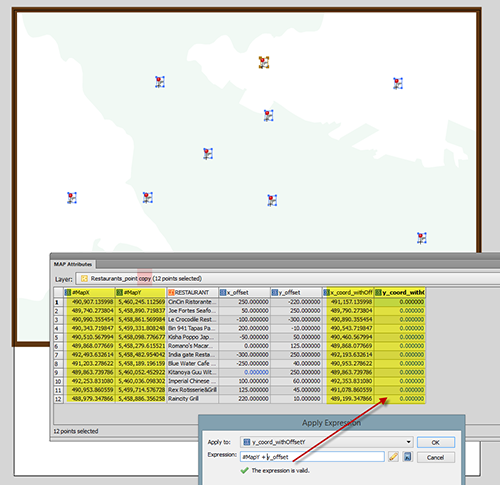
- Create new columns (here we created “x+coord_withOffsetX” and “y+coord_withOffsetY”).
- Calculate the new coordinate of the points for X and Y (here we used Apply Expression) as shown below.
Step 2: Move the points to the calculated coordinates with the offset values.
Use the same method as the one introduced in the previous post. This method works for the Point layer as well. Open the Edit Schema window and apply “x_coord_withOffset” and “y_coord_withOffset” to #MapX and #MapY, respectively.

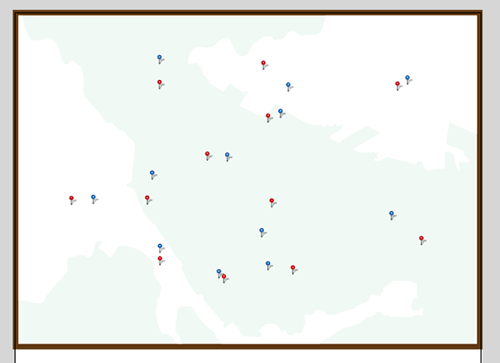
Now, the points are moved to new position. The red point is the original and the blue points are the ones moved to the offset. Now you can label each points. After placing labels for the point layer (blue), you can make the point layer invisible.
Now you can run the label engine (MAP LabelPro / Label Feature) for the new point layer with offset.