


The Orthographic projection is a commonly used projection by cartographers because it closely resembles the world as we know it exists – a three-dimensional sphere (sorry “Flat Earthers”). However, when MAPublisher displays the world in the Orthographic projection, it will still draw any points, lines or polygons that fall beyond the perspective’s horizon. This can create a “hollow Earth” or see-through effect that would cause confusion to the map reader.
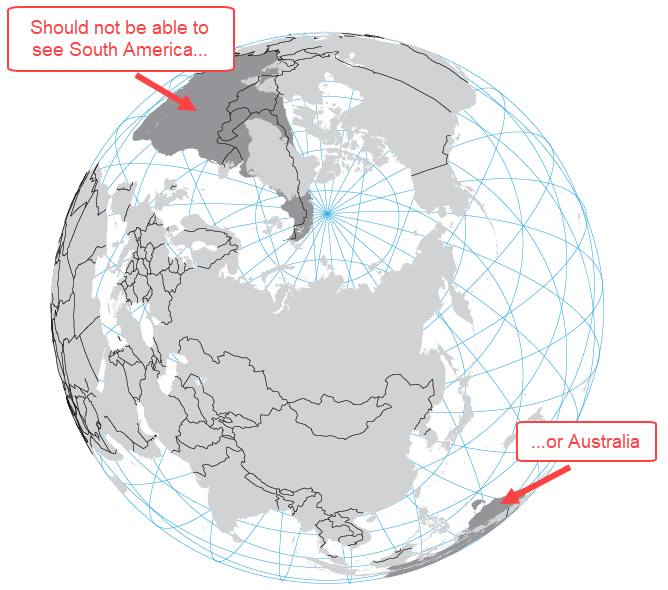
Further confusion may arise depending on the order of the artwork within the layers, as some features that should be on the far side of the Earth may appear on top of features on the near side of the Earth. In order to prevent these inaccuracies, we need to remove the data beyond the horizon before transforming the data to the Orthographic projection. The following workflow is one example of how to overcome this limitation. It can be easily adapted for any orthographic projection with a custom latitude of origin and/or central meridian.
Step 1: Plot Your Centre Point
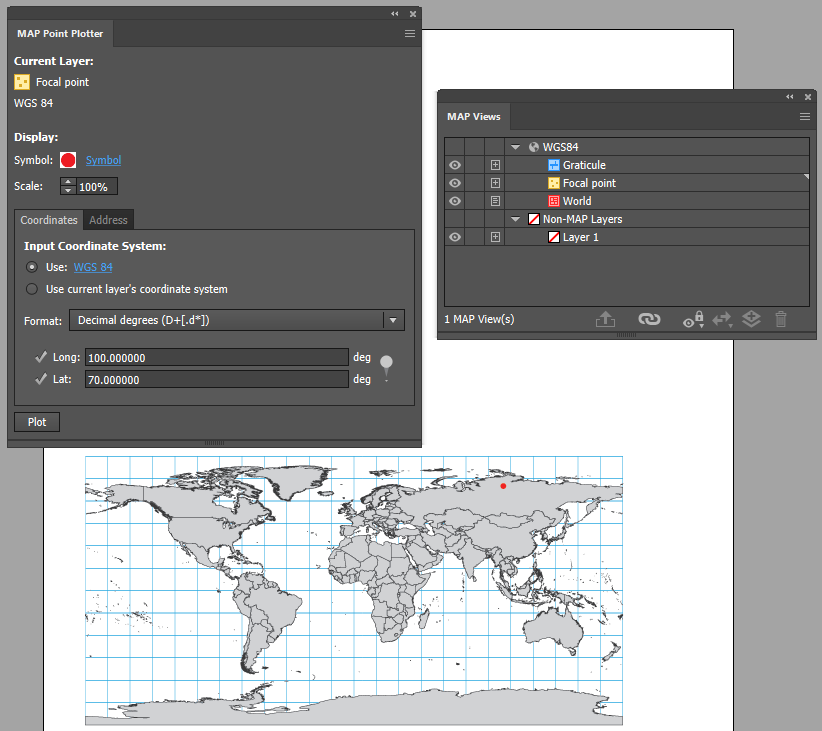
Import your world dataset and ensure the MAP View is in WGS84 (or you can use the world.mif file from the MAPublisher Tutorial Data folder).
Next, decide where you want the final orthographic map to be focused on. In this example, our focal point is 70°N, 100°E. Create a point layer, and plot your centre point using the MAP Point Plotter tool.
Step 2: Project to Azimuthal Equidistant Projection
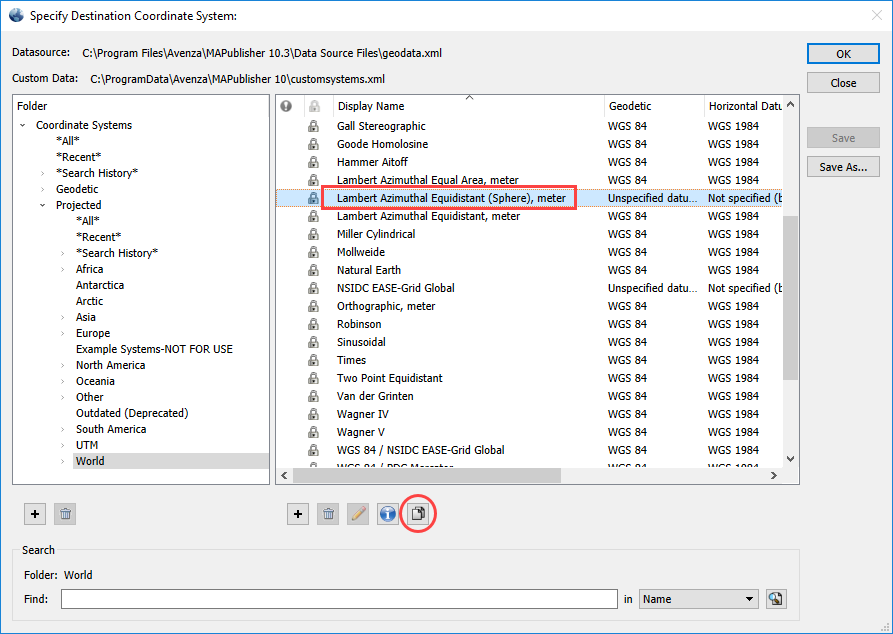
Reproject the map to Azimuthal Equidistant (with a sphere-based datum). To do so, go to the MAP Views panel > Edit Map View. Enable Perform Coordinate System Transformation and click the No Coordinate System Specified hyperlink.
Under the Projected > World category, find Lambert Azimuthal Equidistant (Sphere), meter and click the Copy Object button to begin editing a copy of the existing Lambert Azimuthal Equidistant (Sphere), meter coordinate system.
Side Note – Why start with the Azimuthal Equidistant projection?
The straight-line distance between the central point on the map to any other point is the same as the straight-line distance between the two points along the earth’s surface.
Furthermore, you must use the ‘Sphere’ version of the Lambert Azimuthal Equidistant projection, because the radius is equal in all directions. The other version of the projection uses an ellipsoid datum which would require more complex formulas to solve the buffer distance in Step 3.
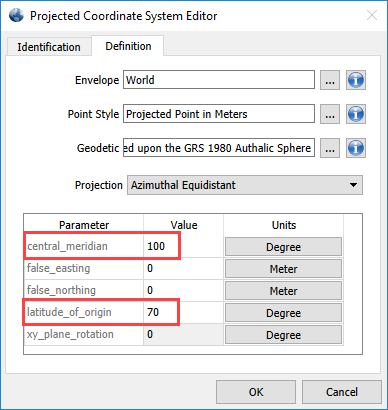
Next On the Definition tab, set the Central Meridian to 100, and the Latitude of Origin to 70. You may rename the custom projection on the Identification tab if you wish to reuse it later. Click OK and apply the projection.
Step 3: Create the Horizon Line
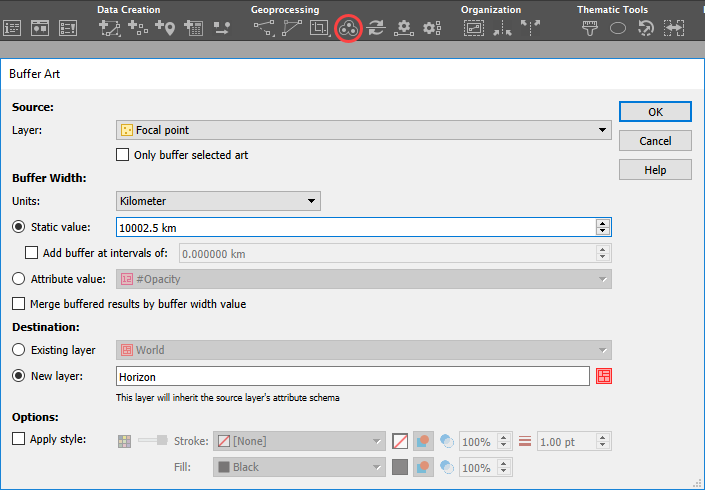
Create the horizon line from your custom centre point. Next, add a buffer of 10,002.5 km (see note below) around your focal point.
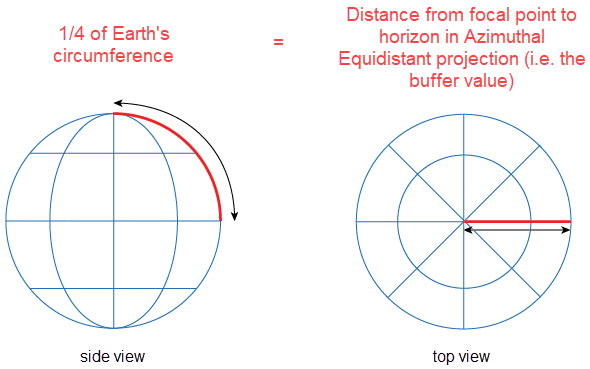
Curious about where the buffer value comes from?
Given that we know:
Earth’s radius using Authalic Sphere is 6,371,007m
The formula for the circumference of a sphere = 2πr
The distance from the focal point to the horizon in the Azimuthal Equidistant projection = 1/4 of Earth’s circumference = C × 1/4
We can first determine the circumference by:
= 2πr
= 2 × π × 6,371,007
= 40,010,000 m
Now that we know Earth’s circumference, we can determine the distance to the horizon by:
= C × 1/4
= 40,010,000 × 1/4
= 10,002,500 m or 10,002.5 km
Step 4: Convert Your Custom Horizon Line
Convert the resulting circle with four Bezier curve points to polylines using MAPublisher’s path utilities tool Convert Beziers to polylines. This is your horizon line.

Step 5: Back to WGS84 and Editing the Horizon line
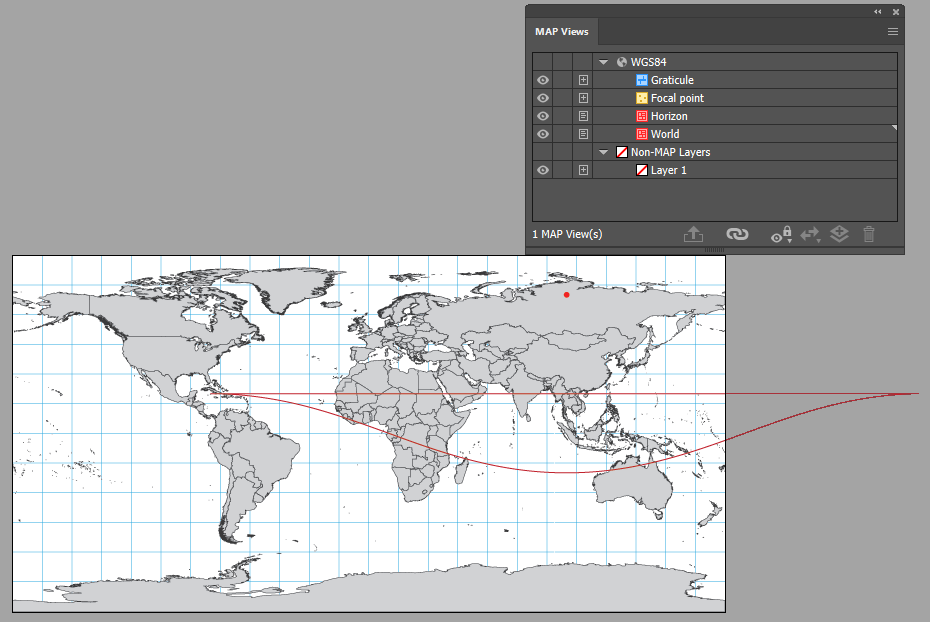
Import another copy of your world file. If necessary, transform it to WGS84 and drag your horizon line into this MAP View. You can also hide or remove the Lambert Azimuthal Equidistant MAP View.
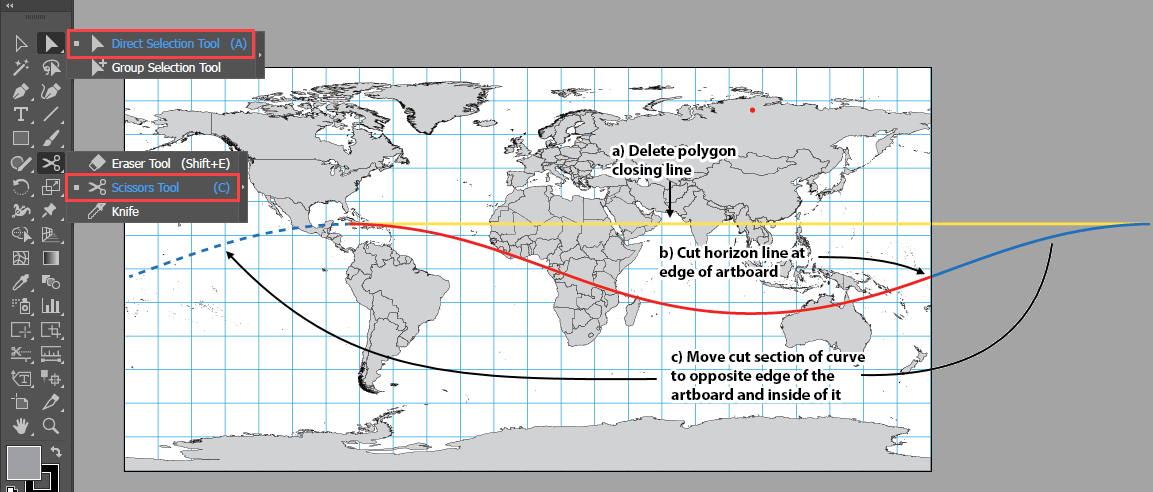
Use Illustrator’s Direct Selection Tool to select and delete the horizontal portion of the horizon polygon.
Next, use Illustrator’s Scissors Tool to cut the polyline at the artboard edge
Move the section of the curve remaining outside the artboard inside and to the opposite edge.
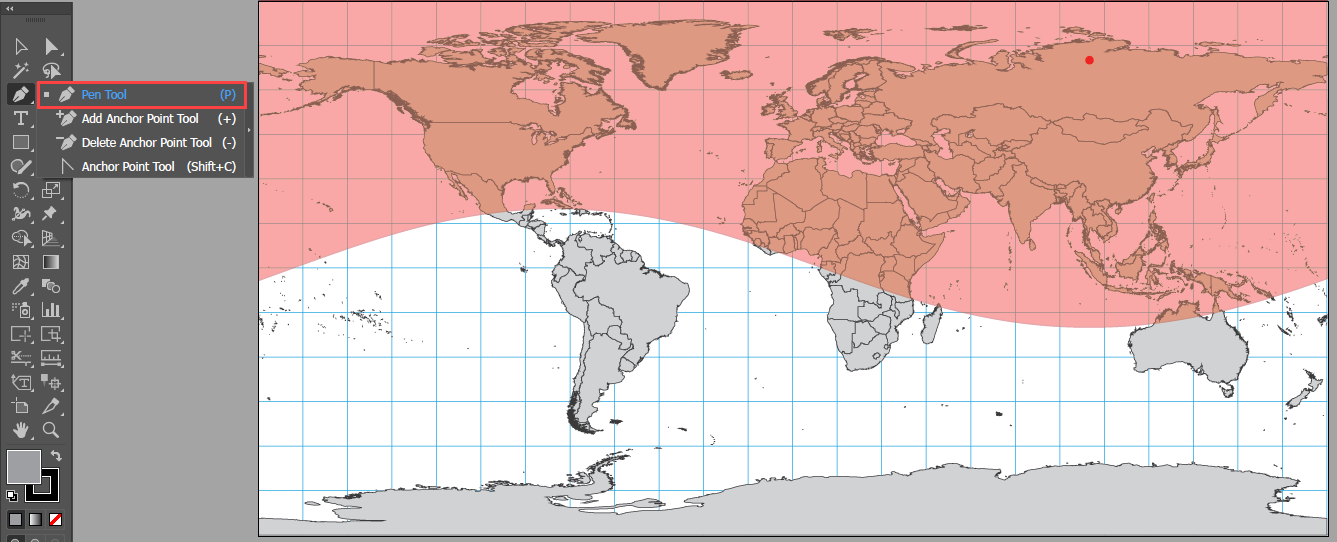
Resize the artboard to match the extents of the WGS84 MAP View. Use Illustrator’s Pen Tool rejoin the two lines into one. Continue using the Pen Tool to close the polygon by following along the edge of the artboard (result should look similar to the image below). Export the polygon area in case you need to add additional data at a later date.
Step 6: Crop Beyond the Horizon
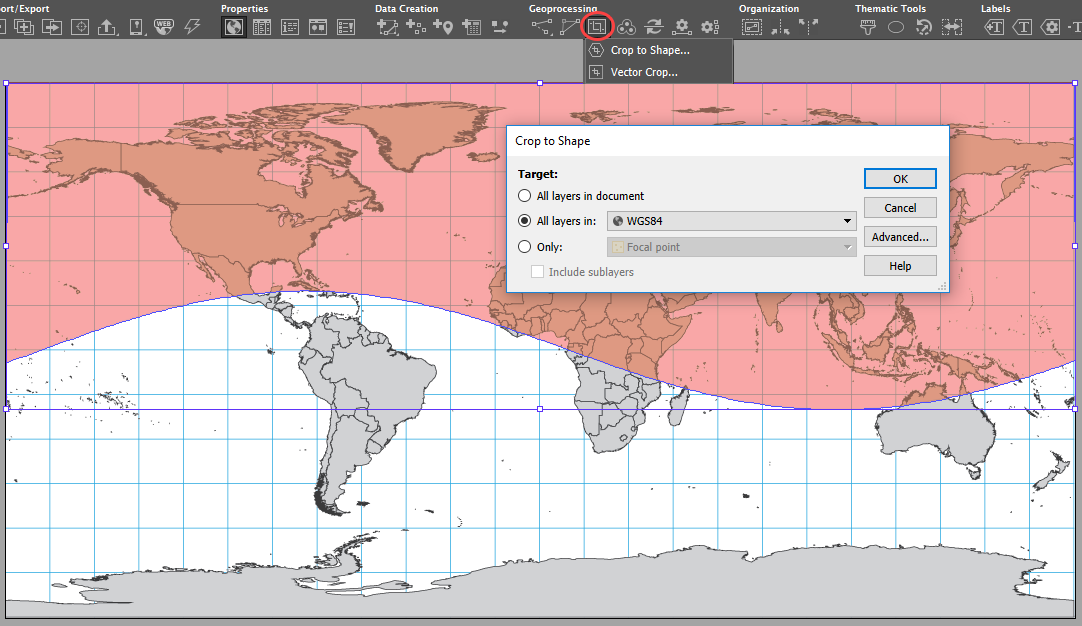
Use the Crop to Shape tool to remove the features outside of the polygon.

Step 7: Reproject the Remaining Data
After cropping, go to the MAP View and Perform Coordinate System Transformation. Choose the Orthographic, meter projection, click Copy Object to begin editing the coordinate system and put in the custom central meridian and latitude of origin you chose back at the beginning of the workflow. Once the custom Orthographic coordinate system is created, complete the MAP View transformation.

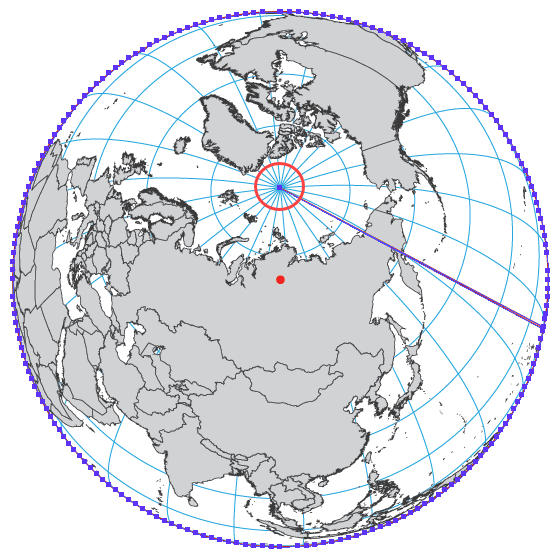
Step 8: Remove Lingering Polar Points
If there are any lingering polar points, you can delete them from the horizon line manually using the Direct Selection Tool.
You’ve successfully projected your data into a custom orthographic projection without any overlapping features from the other side of the Earth.
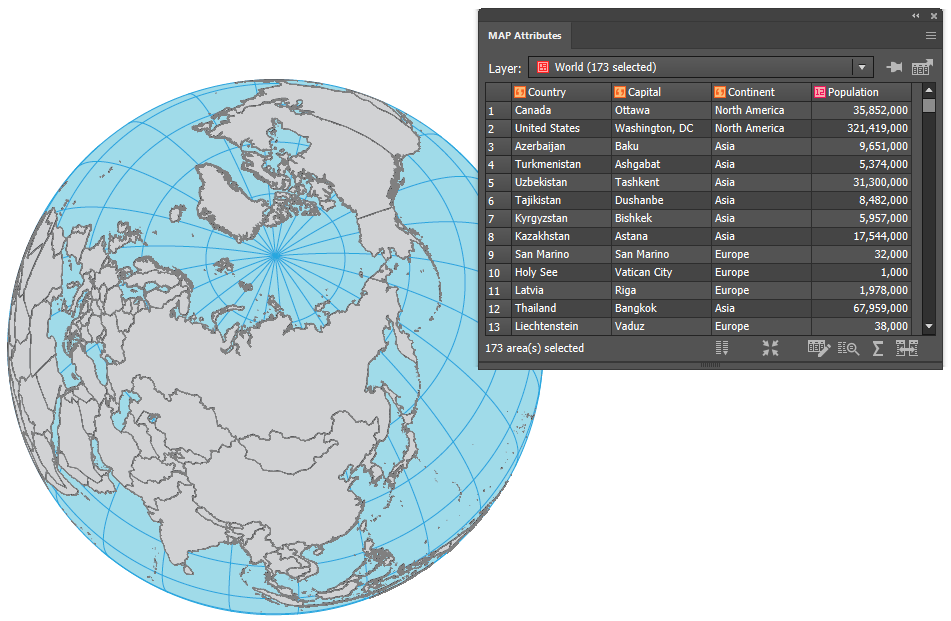
The best part is, all of the map features retain their attributes, so you are free to continue applying MAP Themes, generating labels, and any of the other design tools at your disposal to make your map project a work of art.
About the Author
Jeff Cable is the Quality Assurance Lead for Avenza’s desktop applications. While he primarily focuses on MAPublisher, Jeff’s formal education is in remote sensing. He hopes to utilize this knowledge in the near future to help develop Geographic Imager into a more powerful geospatial image processing suite.